Introduction
Chair patterns for woodworking are more than just pretty outlines on paper. They are the blueprint for comfort, proportion, and durability. Whether you’re crafting a classic Windsor, a modern upholstered seat, or a compact kitchen chair, having reliable chair patterns for woodworking helps you translate a design idea into a steady piece of furniture. When you start with solid patterns, you can focus on refining details such as grain direction, joinery, and finishing—areas where small choices yield big results.
In this guide, you’ll learn how to identify quality chair patterns for woodworking, where to source patterns, and how to translate templates into real-world cuts. You’ll also discover practical tips for building confidence with different joinery styles, selecting the right wood, and approaching chairs as part of a broader furniture plan. If you’re looking for curated pattern libraries that can accelerate your learning, consider Ted’s Woodworking, a resource many woodworkers rely on to explore chair projects and pattern variations. Ted’s Woodworking is designed to offer a wide range of patterns you can adapt to your shop workflow.
Understanding chair patterns for woodworking
What defines a good chair pattern?
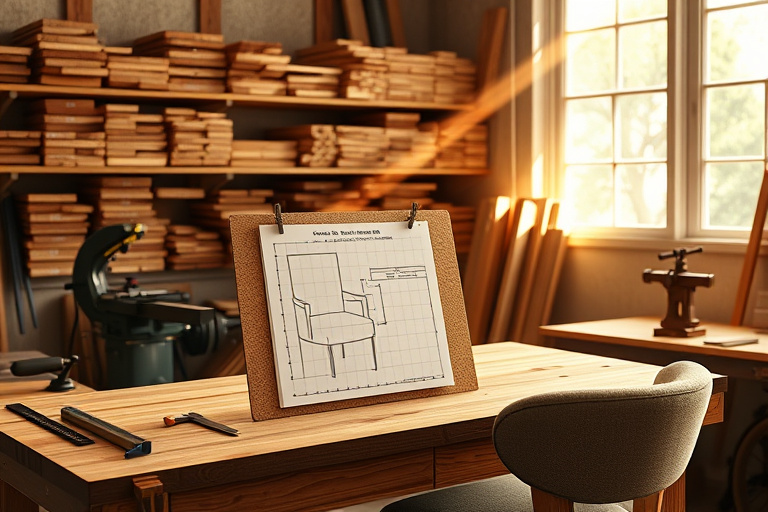
A good chair pattern for woodworking functions as a precise guide for each cutting, shaping, and assembly step. It should specify seat width, backrest height, leg spacing, and armrest configuration. Patterns that include multiple size options or scalable templates can save time when you’re working with stock lumber of varying thickness. Look for patterns that provide accurate proportion guidelines for ergonomics, so the chair feels comfortable not just in looks but in actual use.
When evaluating patterns, assess the clarity of the measurements, the quality of the linework, and whether the pattern accounts for wood movement. The best chair patterns anticipate material behavior—especially when you’re finishing with oils, varnishes, or upholsteries that add or reduce weight distribution. A dependable pattern will also indicate joinery choices such as mortise-and-tenon, dovetails, or dowels, and will map out grain orientation to maximize strength and aesthetics.
Ergonomics, geometry, and material considerations
Ergonomics matters as much as aesthetics. Chairs need proper seat height, comfortable back support, and stable leg geometry. The seat height commonly falls in the 17–19 inch range, but this depends on the intended user and table height. Patterns that address curve radii for the seat and backrest can help you visualize how your stock will bend and how the chair will feel when somebody sits down. Geometry—such as the tilt of the back, the radius of armrests, and the angle between legs—affects both comfort and stability. Here, wood type matters: hard, dense woods like maple, beech, or oak resist wear longer, while softer woods can be easier to shape for beginners but may require stronger joints to prevent creep over time.
Consider the finishing plan early as well. Patterns that include cut lists for both solid wood and veneered options expand your creative and budgetary choices. You may also want to plan for upholstery or seat padding, which introduces additional pattern considerations for fabric stretch, foam thickness, and attachment methods. All of these details should align with the core chair pattern you’re following to ensure a coherent end result.
Sourcing chair patterns
Pattern libraries, templates, and books
Finding reliable chair patterns for woodworking starts with pattern libraries and well-reviewed books. Reputable patterns will provide dimensional data, joinery guidance, and, ideally, scalable templates. If you’re building a library, you’ll want a mix of styles—from traditional bentwood and Windsor forms to contemporary low-profile designs. Printed plans are helpful for beginners because they offer tactile templates you can pin to your workbench or tape to the saw guide. Digital patterns can also be convenient, giving you the flexibility to resize or print in multiple sheets as needed.
To broaden your options, pair patterns with practical shop manuals that cover safety, tool setup, and workflow optimization. For instance, the pro-level workspace guide linked here can be a valuable companion as you gather the tools to execute chair patterns more efficiently: Essential shop tools: the complete guide to a pro-level woodworking workspace.
Ted’s Woodworking as a resource
Among the available pattern collections, Ted’s Woodworking stands out for its breadth and structure. The program offers a wide range of chair patterns, from simple dining chairs to more elaborate lounge designs, with templates you can adapt to your materials and skill level. If you’re curious about expanding your chair projects, it can be a practical way to explore different joinery styles and seating geometries. For interested readers, more information and access options are available here: Ted’s Woodworking.
In addition to Ted’s Woodworking, you may also find value in exploring beginner-friendly patterns. For example, a curated set of small projects can introduce you to chair-related patterns while building confidence. A helpful collection of beginner-friendly ideas is available here: Small woodworking projects: easy rewarding DIY ideas and plans for beginners.
Tools and workspace for chair pattern projects
Essential tools for pattern work
Chair pattern work benefits from a well-rounded set of tools. Core items include a quality block plane for smoothing joints, a marking knife for precise transfer of patterns, a ruler and calipers for scaling templates, and a good saw (either a backsaw or a Japanese pull saw) for clean, accurate cuts. A drill/driver with a selection of bits helps with pilot holes and assembly hardware. Don’t overlook clamps, which are essential when you test-fit curved backrests and angled legs. For more advanced pattern work, a bandsaw or a jigsaw can help you shape curved components with greater ease and consistency.
Quality sanding gear and a reliable dust collection system will pay dividends in the final finish. As you begin to treat chair patterns with different finishes—stains, oils, waxes, or varnishes—post-finishing tools and methods become just as important as the cutting steps themselves. A well-organized set of jigs and fixture blocks can also speed up pattern transfers and ensure repeatable results across multiple chairs.
Setting up a pro-level woodworking workspace
Organization and workflow are the bedrock of consistent chair pattern production. A clean, well-lit workspace makes pattern transfer easier and safer. If you’re aiming for a pro-level setup, you’ll want a dedicated bench area with adequate vise space, a sturdy work surface, and a system for storing patterns, templates, and stock—ideally in clearly labeled bins or files. I recommend reviewing a complete pro‑level workspace guide to optimize your environment and improve your pattern work efficiency: Essential shop tools: the complete guide to a pro-level woodworking workspace.
Step-by-step approach to chair patterns
Measuring, scaling, and transferring patterns
Begin with precise measurements of the chair you’re modeling or replicating. If you’re designing a new chair, establish a baseline height for the seat and backrest that works for your anticipated user. Transfer the pattern to your stock using a marking knife and straightedge, ensuring the grain direction aligns with structural and aesthetic goals. When scaling templates, test print with a basic paper version first to verify fit and proportion before applying it to hardwood. This careful transfer minimizes errors in later stages and keeps the chair pattern for woodworking faithful to your intended design.
Cutting, shaping, and joinery basics
Cutting patterns to shape requires discipline and sharp tools. Start with rough cuts and progress to final shaping, especially around curved backrests or armrests. For joinery, mortise-and-tenon remains a dependable choice for many chairs, offering strength and a classic look. Alternative joints like dowels or mechanical fasteners can be used if you’re aiming for a quicker build or a lighter chair. Regardless of joinery, ensure all parts tilt and align as predicted by the pattern to prevent post-assembly wobble.
Dimensioning is the key to a consistent fit. Fitting a test rail, dry-fit of all major components, and then a final glue-up helps you identify any misalignment early. Don’t skip this step—even small deviations during the pattern transfer stage can compound in the finished chair’s seat and back geometry.
Finishing, upholstery, and aesthetics
Finishing brings chair patterns for woodworking to life. The choice of finish depends on wood species, the chair’s use, and the desired look. For oak or maple chairs, a classical oil-and-wax finish enhances grain depth, while polyurethanes offer durability for high-use kitchen seating. If you’re upholstering a seat, patterns should account for foam thickness and fabric stretch so the upholstery sits evenly and doesn’t pull or sag over time. Upholstery layers also impact seat height, so re-checking ergonomics after the fabric is installed ensures comfort and longevity.
Project ideas: beginner to advanced chair patterns
Beginner-friendly chair patterns
Starting with simple designs helps you build confidence with chair patterns for woodworking. A basic dining chair or a straightforward Adirondack-inspired armchair can be a good entry point. These patterns usually rely on straightforward joinery and simple curves, allowing you to practice pattern transfer, cutting accuracy, and clean finishes before tackling more complex forms. As you complete these initial projects, you’ll gain a better sense of how scale, grain orientation, and leg angles influence a chair’s comfort and stability.
Upgrading to more complex designs
Once you’re comfortable, you can branch into patterns that incorporate more advanced shaping, like compound-curved backs, sculpted seats, or multi-panel backrests. These projects test your ability to interpret and adapt patterns, manage more intricate joinery, and coordinate upholstery or carved details. A pattern library or a curated plan collection can be invaluable here, providing reference data that helps you scale for the specific wood you’re using and the exact dimensions you want to achieve.
Integrating chair patterns into a broader woodworking plan
Matching with other furniture styles
Chair patterns don’t exist in isolation; they should harmonize with surrounding furniture. Consider how a chair’s silhouette, leg styling, and finish will relate to your table, sideboard, or bench projects. A cohesive furniture plan creates a unified space and simplifies finishing decisions, as you can standardize leg dimensions, edge profiles, and stain colors across pieces. When you design or choose chair patterns, envision how they’ll play with your overall room aesthetic and with your carpentry methodology.
Budgeting and project timelines
Pattern-driven projects benefit from upfront budgeting. Chair patterns for woodworking often involve stock materials, fasteners, finishes, and potential upholstery. Boundaries in cost help you select wood types and hardware that fit your budget while preserving quality. A practical approach is to map out a timeline that accounts for pattern transfers, dry-fitting sessions, and finishing batches. This pacing reduces errors and keeps motivation high as you move through beginner to advanced patterns.
Ted’s Woodworking and other pattern sources: a quick comparison
When evaluating resources for chair patterns for woodworking, consider the balance between breadth of patterns and practical, hands-on guidance. Ted’s Woodworking offers a broad library of chair patterns, with printable templates and build-ready instructions that many hobbyists find valuable for learning and experimentation. If you’re exploring multiple projects, a curated collection can save time on pattern creation and let you focus on execution. For readers who want a broader set of ideas and beginner-friendly patterns, the two internal resources linked above provide approachable starting points and context for expanding your shop repertoire: Essential shop tools: pro-level woodworking workspace guide and Small woodworking projects: beginner-friendly patterns.
In any case, compare patterns not just by aesthetics, but by how well they explain the build process. Clear cut lists, material lists, and step-by-step assembly notes help you reproduce chair patterns for woodworking reliably, even if you’re new to the craft. If you choose to explore Ted’s Woodworking more deeply, you’ll find a suite of patterns that can complement your existing projects and potentially accelerate your pattern acquisition over the long term.
Conclusion and next steps
Mastering chair patterns for woodworking opens a wealth of possibilities—from simple, sturdy dining chairs to elegant, carved backrests. Start with patterns that emphasize ergonomics and proportion, then gradually introduce more complex joinery and finishing techniques. Use reliable resources, like curated pattern collections or libraries, to broaden your approach while maintaining alignment with your skills and budget. Remember that pattern accuracy is a driver of success: take the time to transfer, test-fit, and refine until your chair feels like a natural extension of your workshop. If you’re exploring a broader set of patterns for chairs and related projects, consider a trusted resource such as Ted’s Woodworking for diverse templates and build plans, and pair that with solid guidance on workspace setup and beginner-friendly patterns from respected sources. Finally, keep your eye on the two internal guides referenced earlier for practical shop setup and approachable starter projects as you build confidence with chair patterns for woodworking.
Image credit statement
Note: This article uses pattern-based guidance and practical recommendations to optimize chair patterns for woodworking. Images and diagrams referenced in this guide are for educational purposes and should be used in conjunction with official pattern templates and safety guidelines.