To keep your project aligned with best practices, you might want to reference practical woodworking resources as you progress. For example, you can consult a focused guide on a related project, the rocking-chair build, to understand how precision cut lists and joinery choices contribute to long-term stability. See this rocking chair guide for a broader look at plan accuracy and material selection. And if you want to approach loft-bed design with a full toolkit, the best woodshop tools piece is a reliable reference for choosing the right equipment and safety gear.
\n\n
Materials, hardware, and tools
\n
Choosing the right materials is fundamental to both aesthetics and durability. For the frame, a combination of solid lumber for the primary supports and plywood for the platform can offer a strong, smooth surface while keeping costs reasonable. Common choices include pine, beech, oak, or maple for the posts and rails, paired with ¾-inch (19 mm) plywood for the mattress platform. If you’re aiming for a lighter footprint, spruce or fir can also work, but with the caveat of slower wear resistance compared to hardwoods. When selecting lumber, favor straight grain and minimal defects; consistent moisture content helps prevent warping after assembly.
Hardware matters as much as the wood. Use heavy-duty deck screws or lag bolts for anchor points, paired with corner brackets or metal L-brackets to reinforce joints. Don’t neglect guard-rail fasteners, ladder bulkhead connectors, and anti-slip ladder feet. A clean, reliable finish sealing is important to protect the wood in a child’s room or a high-traffic space. If you’re new to tools, consider a starter kit that includes a square, measuring tape, carpenter’s pencil, an impact driver, and a reliable drill/driver. You’ll also want a handsaw or a miter saw for accurate crosscuts, a random-orbit sander for a smooth finish, and appropriate clamps to hold joints during assembly.
As you prepare to cut and assemble, you’ll find that having a clear cut list helps a lot. The frame typically consists of two long side rails, multiple cross supports, a headboard and footboard, plus the posts that connect everything to the ceiling or wall. In this context, the exact hardware you choose will influence the joinery method—mortise-and-tenon joints, screws with pre-drilled pilot holes, or dowel joints are all valid options. If you’d like a curated set of plans and diagrams, consider looking into a reputable woodworking program that offers structured, project-based blueprints; you can access concrete layouts for building loft bed quickly through their plans library. For ready-to-build guidance, you might explore a trusted source through this affiliate link: Ted’s Woodworking. This resource provides a broad library of woodworking plans that you can adapt to a loft-bed project, helping you refine joinery, cut lists, and finishing steps without reinventing the wheel.
\n\n
Step-by-step build guide
\n
With your plan in hand, it’s time to implement a methodical build process. Start by laying out the required pieces on the floor or a workbench, flipping the cuts into the correct orientation so you don’t confuse long sides with crosspieces. Mark the locations for all joinery points, guard-rail placements, and ladder mounts before you drive any screws. A precise cut list is your best friend when you’re building loft bed because it minimizes material waste and keeps assemblies square.
\n\n
Frame assembly begins with the base frame. Assemble the long side rails with cross supports to create a stable platform. Confirm squareness by checking diagonal measurements; both diagonals should be equal. Once the frame is square, attach end panels and the posts. It’s often simplest to build the frame on the floor, then raise the frame into position and secure it to the wall or a dedicated freestanding support. If you’re anchoring into wall studs, locate studs using a stud finder and pre-drill pilot holes to prevent splitting. Guard rails should be installed along all open sides of the mattress area, with continuous fastenings that won’t loosen over time. The ladder must be securely anchored at both the top and bottom to prevent shifting during ascent or descent. Remember to maintain at least 36 inches (about 0.9 m) of clear space in front of the ladder for safe access.
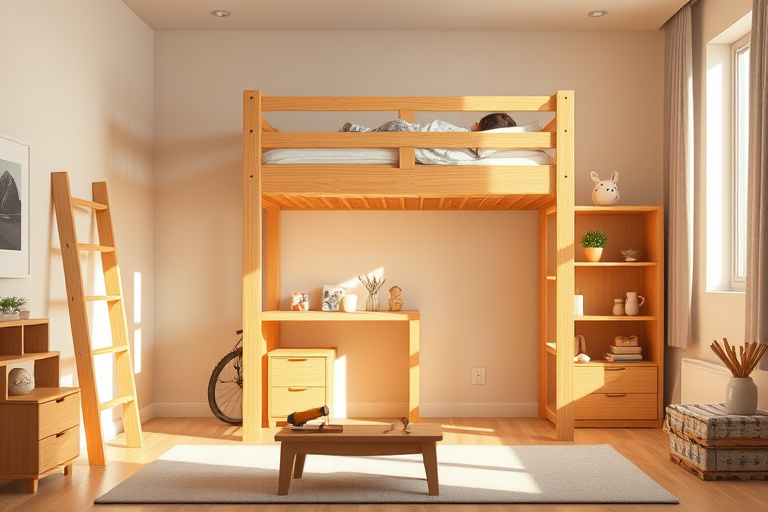
Under the loft, you can create a practical desk area, drawers, or a small wardrobe—whatever aligns with your room layout and daily routines. If you’re planning a desk under the loft, consider a recessed or wall-mounted desk surface to maximize legroom. For storage, build shallow drawers or open shelves into the space between the posts or along the underside of the platform. This is a great time to personalize with color, stain, or a clear protective finish that’s safe for indoor air quality and durable against fingerprints and wear. If you want to keep a broader view of the project, you can look at a related woodworking project to broaden your understanding of joinery and finish methods. For example, this rocking chair guide discusses joinery accuracy, alignment, and finishing techniques that cross over well into a loft-bed build: Rocking chair guide and this article on tools offers quick insight into selecting a robust shop setup: Best Woodshop Tools.
\n\n
Maximizing space under the loft
\n
One of the best parts of building loft bed designs is the versatility beneath the sleeping area. If the room is small, transforming the lower portion into a compact study corner can dramatically improve daily life. A simple desk surface with an under-desk drawer stack creates a dedicated workspace for homework, drawing, or computer tasks without occupying extra square footage. You can add a wall-mounted pegboard or magnetic strips for tools and school supplies, keeping the desk area organized and distraction-free. If you need more storage, incorporate a modular shelving system that can be reconfigured as needs shift—this approach keeps the space flexible and practical as a child grows into adolescence or as your setup changes for guests or siblings sharing a room.
\n\n
Design consistency matters here as well. Choose materials and a finish that complement the bed frame and room color palette. If you go with natural wood tones, a clear polyurethane or polyurethane-urethane hybrid finish can help protect the surface from scuffs while maintaining the wood’s character. For a painted look, use a high-quality interior enamel that resists fingerprints and cleaning solvents. In addition to aesthetics, always consider safe, non-toxic finishes, especially in bedrooms where children sleep or play. The goal is a space that feels cohesive, not a mismatched collection of pieces that complicates cleaning or maintenance.
\n\n
Finishing touches and safety checks
\n
Finishing touches are more than cosmetic. A well-applied finish protects the wood from moisture, minor dents, and daily wear. Start with thorough sanding to remove burrs and splinters, progressing from 120 to 220 grit to achieve a smooth surface. Apply a wood conditioner if you’re working with softwoods to ensure even stain absorption, then follow with your chosen stain or paint. Finally, seal the surface with at least two coats of finish, allowing adequate dry time between coats. Safety checks after construction are just as important as the finish. Re-tighten all screws, confirm the guard rails remain stable, test the ladder’s grip and rake, and evaluate for any wobble or movement. A well-maintained loft bed stands up to years of daily use and still looks great in your bedroom.
\n\n
When you’re planning building loft bed with an eye toward long-term use, it’s useful to stay connected with woodworking resources that reinforce best practices for plan accuracy and finish quality. For deeper project planning and blueprint strategies, exploring a curated plans library can be invaluable. If you’re considering a broader library of designs, Ted’s Woodworking offers a broad spectrum of plans and diagrams through an affiliate channel: Ted’s Woodworking. This resource can help you tailor the loft-bed design to your exact dimensions, choose appropriate hardware, and adapt the plan to include storage or a workstation beneath the bed without compromising structural integrity.
\n\n
Finally, remember that real-world projects benefit from community knowledge. If you’re curious about additional techniques, this rocking-chair guide and the tools-focused article linked above can provide practical tips on precise cuts, joint alignment, and finishing strategies that you’ll apply to building loft bed as well. By combining solid planning, careful measurement, and a few smart tool choices, you’ll create a space-saving loft bed that’s both stylish and durable for years to come.
\n\n
If you’d like to explore ready-to-build plan options and design variations, consider checking out Ted’s Woodworking (affiliate link) for detailed loft-bed layouts that you can adapt to your room’s dimensions. This approach helps you avoid common pitfalls in framing, ladder placement, and guard-rail design while staying within a reasonable budget and timeline.
“,


