Finding and following free adirondack rocking chair plans is a classic DIY project that combines comfort, durability, and timeless style. If you’re eager to start building a cozy seating area on a porch or in a sunlit garden, this guide will walk you through choosing reliable free adirondack rocking chair plans, executing a clean build, and expanding your toolkit with trusted resources. While you’ll primarily rely on free plans to get started, I’ll also share how to broaden your plan library with a reputable resource that won’t break the bank, plus a few practical learning materials that can accelerate your progress.
Why choose free Adirondack rocking chair plans
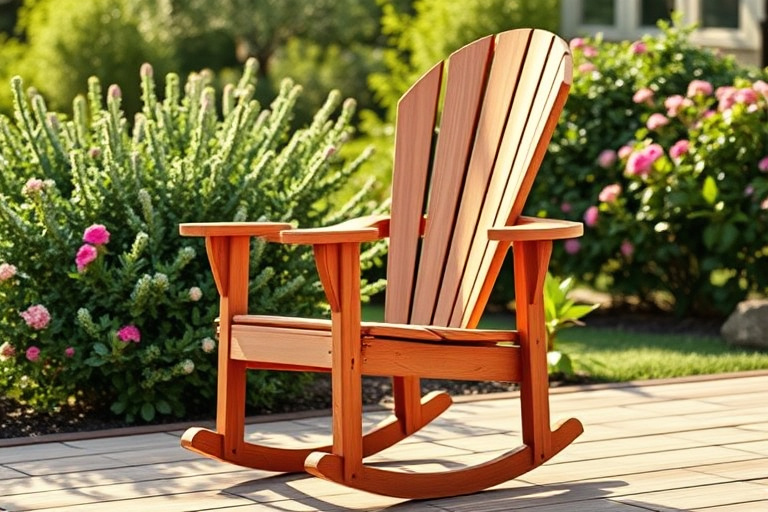
Free Adirondack rocking chair plans are great for beginners and seasoned woodworkers alike. They typically provide a materials list, a cut list, and step-by-step assembly tips. The Adirondack chair’s distinctive features – wide slats, a tall back, a generous seat, and rockers on the base – make it an iconic fit for porches and patios. A good free plan will translate those features into precise measurements that account for standard lumber sizes, hardware, and finish considerations.
When a plan is free, you still want to evaluate a few critical details: accurate dimensions, a clear cutting list, easy-to-follow diagrams, and a sensible assembly sequence. The right plan will reduce guesswork, minimize waste, and help you forecast the time needed to complete the project. If you’re beginning, look for plans that emphasize safety, simple joinery (like pocket screws or butt joints reinforced with glue), and a straightforward finish schedule to protect the wood from the elements.
How to find reliable free adirondack rocking chair plans
Reliable free plans often come from woodworking blogs, maker communities, or DIY forums where designers share tested layouts. Before you print or cut, skim the plan for a few telltale signs of quality: a complete bill of materials, dimensioned drawings, a well-labeled cut list, and photos or diagrams showing each assembly step. If a plan asks you to guess crucial angles or mislabels a critical handle on the rocker, it’s worth seeking another option.
As you browse, keep your eye on practical constraints such as your shop space, available tools, and your preferred finishing schedule. A plan that assumes exotic tools or specialty jigs may be impressive but impractical for a home workshop. If you want to keep exploring broader topics in woodworking, there are helpful resources that can expand your toolkit and your knowledge without overwhelming your budget.
Red flags to watch for
When evaluating free adirondack rocking chair plans, be mindful of these warning signs:
- Ambiguous measurements or unclear diagrams that require guesswork
- Missing or outdated hardware lists, or plans that rely on nails for critical joints
- Plans that omit a proper cutting diagram or a scale drawing of the rocker’s curvature
- Plans that fail to address finishing, weatherproofing, or maintenance considerations for outdoor use
If you encounter any of these, it’s reasonable to search for another plan and use it as a baseline. You can also supplement a solid free plan with a trusted library to access more variations and enhanced instructions later on.
Step-by-step project blueprint
Here’s a practical blueprint to help you translate a free adirondack rocking chair plan into a successful build. The steps are designed to align with common free plans, but always cross-check with the specific plan you’re using.
Gather materials and essential tools
Start by compiling a straightforward shopping list based on your chosen plan. Common materials include exterior-grade pine, cedar, or hardwood boards for a durable outdoor chair. You’ll also want screws (or stainless hardware for outdoor use), wood glue, sandpaper (80-120 grit for initial shaping, 180-220 for a smooth finish), a finish suitable for outdoor furniture, and protective gear. A plan might call for a few precut parts, but in most cases you’ll be cutting all pieces yourself. Space-saving tips: organize your stock by board width, and set up a dedicated clearance zone for assembling and sanding to minimize rework.
Essential tools typically include a table saw or circular saw, a drill/driver, a miter saw (or a steady handsaw with a miter box), clamps, and a sanding block or electric sander. If you’re optimizing a small shop, consider a compact cutting station, which you can read more about in a shop-setup guide such as this helpful resource: Small wood-working tools: the essential guide to building more with less space.
Create a precise cutting list and dimensions
A well-drafted cutting list is the heartbeat of a clean build. Convert each dimension from the plan into a numbered cut list tied to your material stock. Double-check the curvature on the back slats and the seat width to ensure ergonomic comfort. If your plan uses a specific joinery approach, sketch out the joint profiles on cardboard or scrap wood to visualize how pieces will come together. This simple pre-fit step can save you from surprises during assembly.
When you’re ready, mark every part with its number and reference letter from the plan. This clarity becomes invaluable during assembly and when you later need to disassemble for maintenance or sanding. If you want to deepen your knowledge beyond plans, you might explore woodworking literature that helps you master cut lists, joinery, and flow for various projects. For example, many builders find value in comprehensive woodworking guides linked in this section: Wood working books: the essential guide to mastery in woodworking.
Assembly sequence and drywall-free joints
Adirondack chairs typically rely on simple, sturdy joints. Common choices include pocket screws, dowels, or dado joints reinforced with glue. Plan your assembly order to minimize handling of finished surfaces. A typical sequence might be the base rocker assembly first, then the arm and backrest frame, followed by attaching the seat slats and back slats. Dry-fit all components before applying glue to confirm alignment, then clamp securely while the glue cures. If your plan lacks explicit assembly illustrations, consider cross-referencing with a related plan or a broader set of instructions in a trusted resource like Ted’s Woodworking, which we’ll discuss below as a way to explore more variations.
Quality finishes extend the life of outdoor furniture. Whether you opt for a penetrating oil, a spar urethane, or a durable outdoor paint, prepare and seal the wood properly. Remember to sand between coats for a smooth, durable surface. Outdoor furniture benefits from at least two coats of finish, with attention to all edges and end grains to prevent water ingress.
Finishing touches and maintenance tips
Finish is as important as the build. For outdoor chairs, UV protection and moisture resistance are crucial. Consider a two-step finish: stain or dye for color, followed by a protective topcoat such as polyurethane or marine varnish. If the chair will remain in a humid climate or exposed to sun, plan for yearly maintenance—wipe away grime, sand lightly, and reapply a weatherproof topcoat. Keeping a simple maintenance routine will ensure your free adirondack rocking chair plans yield years of comfort and relaxation.
Expanding your plan library without breaking the bank
After you complete your first chair, you’ll likely want more designs. A well-curated plans library can save time and inspire new variations without the cost of premium courses. One reputable option that many hobbyists explore is Ted’s Woodworking. This resource provides thousands of plans across a wide range of projects, including additional Adirondack designs, enabling you to experiment with different scales, back angles, and rocker profiles. You can learn more about expanding your plan library here: Ted’s Woodworking.
Using Ted’s Woodworking for more designs (affiliate)
While you can confidently start with free adirondack rocking chair plans, you may eventually want to explore a broader catalog of projects. Ted’s Woodworking is a long-standing archive that offers a wide variety of chair designs, living room furniture, outdoor benches, and garden accents. The library can spark new ideas and provide alternative joinery methods, which is particularly helpful if you plan to build a set of consistently themed outdoor furniture. If you decide to explore, you can access the resource here: Ted’s Woodworking (affiliate).
Resourceful woodworking learning on a budget
Learning more about the craft doesn’t have to be expensive. In addition to free plans, you can deepen your practical knowledge with targeted reading and guided tools. Two excellent internal references that complement hands-on building are:
Small tools and space optimization – internal link to guide
For readers who want to maximize a small workshop, this guide explores essential compact tools and efficient layouts: Small wood-working tools: the essential guide to building more with less space. It’s a practical resource for selecting the right equipment when you’re limited by floor space, storage, and budget. The goal is to keep your workflow smooth so you can focus on crafting beautiful furniture rather than wrestling with tools.
Woodworking books – essential mastery guide – internal link to guide
For a deeper understanding of fundamentals, design principles, and project planning, this resource covers essential reading for mastering woodworking: Wood working books: the essential guide to mastery in woodworking. Reading broadly helps you approach each new project with more confidence, from measuring and layout to finish techniques and maintenance routines.
Practical SEO and affiliate integration for DIY content
When sharing hands-on projects like free adirondack rocking chair plans, a thoughtful mix of useful content, internal resources, and affiliate recommendations can help readers stay engaged while supporting your site. By weaving natural internal links to related guides and a discreet affiliate link to a trusted plan library, you provide genuine value and monetize with integrity. The key is to keep the user experience seamless: offer high-quality, actionable steps, cite credible resources, and present affiliate opportunities as helpful enhancements rather than sales pitches.
Conclusion and next steps
Starting with free adirondack rocking chair plans is a smart way to dip your toes into outdoor woodworking. Focus on selecting reliable plans with clear measurements, practice careful cutting and assembly, and finish with a robust outdoor sealant to ensure longevity. As you gain experience, consider expanding your library with additional designs through Ted’s Woodworking, while continuing to grow your toolkit and knowledge with the internal resources mentioned above. The journey from a single free plan to a portfolio of outdoor furniture is a rewarding path that blends creativity, practical skills, and a bit of strategic shopping for plans that suit your space and budget.
FAQs
Q: Can I use free adirondack rocking chair plans for outdoor use in all climates?
A: Yes, but you should select weather-resistant woods and apply a durable outdoor finish. Consider climate-specific maintenance intervals to keep the chair looking good and performing well over time.
Q: Are there quick joinery methods suitable for beginners?
A: Yes. Pocket screws or dowels with glue are common, effective options for beginners. Always predrill to minimize wood splitting and test-fit before final assembly.
Q: How can I access more chair designs without buying expensive courses?
A: A reputable resource like Ted’s Woodworking can broaden your options with an extensive library of plans. It’s a great complement to free plans and can help you build a cohesive outdoor furniture set.