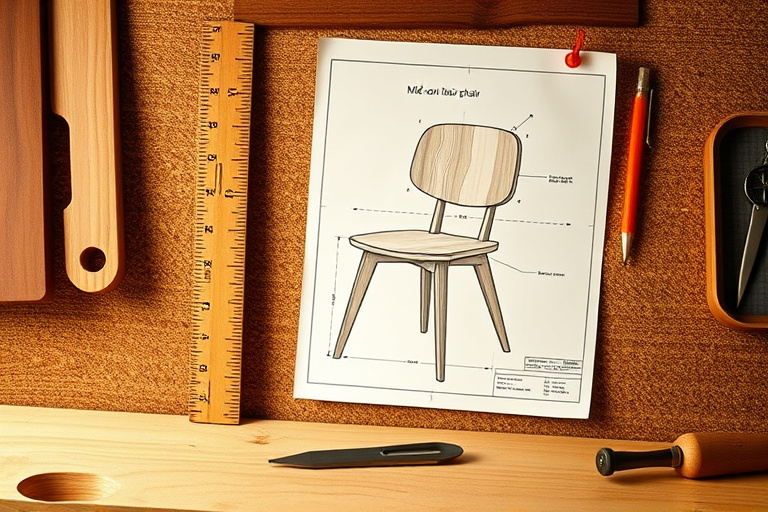
Introduction to the wood chair blueprint
If you’re venturing into furniture making, a wood chair blueprint is your best friend. It’s more than a rough sketch; a well-crafted blueprint translates a design idea into precise measurements, cut lists, and joinery instructions. With a wood chair blueprint, you can plan every detail before ever touching a saw, ensuring ergonomics, stability, and finish quality. In this guide, we’ll explore how to use a wood chair blueprint effectively, what to look for in a plan, and a practical path to build a sturdy chair from start to finish.
Why a blueprint matters for a wooden chair project
- The correct seat height for the intended user, typically around 16–18 inches, depending on space and table height.
- Ergonomic proportions so the backrest supports the spine without sacrificing aesthetics.
- Joinery choices that balance strength and ease of construction, such as mortise-and-tenon or dowel joints.
- Material planning, including board width, thickness, and potential grain matching for a cohesive look.
Using a blueprint also helps with project planning, from estimating wood stock and hardware to sequencing cuts. For beginners, it reduces guesswork and minimizes wasted material. If you’re seeking a structured path, consider pairing a wood chair blueprint with curated design resources that explain the steps in more depth. For example, you can explore beginner-friendly guides like Unlocking DIY Wood Plans: The Ultimate Beginner’s Guide to Confident Simple Projects and Master Easy Wood Designs: A Practical Guide to Beginner-Friendly Projects and Skills, which provide foundational ideas and practical tips (see internal resources below).
Core components of a chair blueprint
- Seat assembly: dimensions for width, depth, and thickness; often includes a stepped rendering for bevels or edge shaping.
- Backrest: height, curvature, and the method of attachment to the seat or legs. Some blueprints specify slats or a solid panel with a defined back angle.
- Legs and stretchers/rails: length, angle (to achieve stability and a balanced stance), and cross-bracing if present.
- Joinery: recommended joints, such as mortise-and-tenon, dowels, or pocket holes, plus any required hardware.
- Finish and hardware: suggested fasteners, wood species notes, sanding grits, and finish types (oil, varnish, or lacquer).
When you see a wood chair blueprint, you’ll likely notice a scale note, a cut list, and a hardware schedule. These elements keep your workflow organized and ensure you cut precisely what you need the first time around. If you’re new to wood plans, you may also want to reference beginner guides to DIY wood plans and easy wood designs as you navigate the learning curve. See the internal resources for more context.
Reading a wood chair blueprint: measurements, scales, and ergonomics
Reading a blueprint is a skill that grows with practice. Here are practical tips to decode a typical wood chair blueprint:
- Scale and units: most plans use inches (in) or millimeters (mm); confirm the scale if the drawing appears condensed. Some plans provide a full-size template to transfer patterns to your stock.
- Key dimensions: note seat width, seat depth, leg length, back height, and the overall chair height. These numbers influence comfort and fit for your space.
- Angles and curves: backrest angle and leg tilt affect seating posture and stability. A slight toe-in on the front legs can improve balance on uneven floors.
- Joint details: mortise-and-tenon joints, shoulder cuts, and tenon lengths determine the strength of the chair. If you’re first starting out, choose plans that clearly annotate the joints and tool requirements.
ergonomics is a core consideration in a wood chair blueprint. A well-balanced chair should support natural posture: feet flat on the floor, thighs parallel to the ground, and the backrest aligning with the natural curve of the spine. If you’re unsure, read through a few beginner-friendly guides to see how designers translate comfort into measurements. For a broader overview, you might also consult beginner-focused resources such as the two internal guides linked below.
From blueprint to build: a beginner-friendly plan
Starting from a wood chair blueprint doesn’t require mastering every advanced technique at once. A practical approach combines a clear cut list, a staged build plan, and safety basics. Here’s a straightforward path to move from plan to prototype.
Tools, safety, and workspace setup
Gather essential tools before you cut: measuring tools (a steel ruler and a carpenter’s square), a saw (back saw or miter saw), a drill/driver, bits for various joinery, clamps, sandpaper, and finishing supplies. A workbench with a stable surface is invaluable. Safety comes first, so wear eye protection and hearing protection, secure your stock with clamps, and plan your cuts to minimize tear-out. A clean, well-lit workspace helps you read the blueprint more accurately and reduces mistakes.
The role of resources like Ted’s Woodworking in the process
Many woodworkers turn to comprehensive plan libraries to speed up the design-to-build cycle. A popular option is Ted’s Woodworking, known for a broad collection of project blueprints and step-by-step instructions. While you should evaluate any library for quality and fit to your skill level, using a trusted source can help you validate your wood chair blueprint and expand your skills as you progress. Ted’s Woodworking offers a variety of plans that complement learning, especially when you want to see multiple approaches to the same chair style or improve your joinery technique. If you’re primarily searching for a curated set of plans to practice with, this can be a practical add-on as you grow more confident with blueprints.
Choosing the right blueprint library and how to use it effectively
When you’re evaluating a blueprint library, look for clarity in measurements, well-labeled joinery, and plans that include a bill of materials. A good wood chair blueprint should provide:
- Clear exploded views showing how pieces join together
- A complete cut list with stock dimensions
- Recommended wood species and finishing suggestions
- Tips for scale, proportion, and ergonomics
To deepen your understanding of woodworking plans and beginner-friendly methods, you can explore a few curated guides first. For example, the following resources can offer complementary viewpoints: Unlocking DIY Wood Plans: The Ultimate Beginner’s Guide to Confident Simple Projects and Master Easy Wood Designs: A Practical Guide to Beginner-Friendly Projects and Skills. These internal references provide foundational insights that pair nicely with a practical wood chair blueprint.
Step-by-step project: building a simple wooden chair from a blueprint
Here’s a practical, beginner-friendly workflow that aligns with a standard wood chair blueprint. The steps are designed to be approachable while remaining faithful to your plan.
Step 1: selecting wood and planning stock
Choose a forgiving hardwood like maple or beech for durable results, or a softwood like pine for a budget-friendly practice chair. Begin by laying out the stock according to the cut list. If your plan calls for mortise-and-tenon joints, ensure you have the appropriate chisel, mallet, and stop dado or hollow chisel if needed. Mark all pieces with reference numbers from the cut list and label which pieces join where. Precise stock preparation reduces fitting issues later in the build.
Step 2: cutting, jointing, and fastening
Follow the blueprint’s sequence for cutting pieces, paying attention to grain orientation and drill bit sizes for joints and screws. When you perform mortises, test-fit dry before gluing. Clamps should secure the joints while the glue dries, ensuring a tight, square fit. If your plan uses dowels, pre-drill holes to prevent any tear-out. Remember to check that each piece aligns with the blueprint’s dimensions—this is where small deviations can compound into a poorly balanced chair.
Step 3: shaping, sanding, and finishing
Sand progressively from coarse to fine grits, keeping the surface level and free of scratches that could telegraph through the finish. After assembly, shape edges slightly for comfort and remove any sharp corners. Apply your chosen finish—oil for a natural look, varnish for durability, or paint for a bold aesthetic. A good finish protects the wood, makes cleaning easier, and enhances the visual appeal of the chair as described in the blueprint.
Common mistakes and how to avoid them
Even experienced woodworkers hit snags when working from a wood chair blueprint. Here are frequent missteps and practical remedies:
- Inaccurate measurements: double-check each dimension against the blueprint twice before cutting.
- Misaligned joints: dry-fit joints first to ensure a square, then glue. If needed, trim tenons or mortises slightly to achieve a snug fit.
- Rushing finishing steps: allow adequate drying time between coats and test the chair on a flat surface to confirm there’s no wobble.
- Ignoring ergonomics: adjust seat height and backrest angle based on the end user’s stature for better comfort and usability.
By approaching a wood chair blueprint with care, you’ll reduce waste and increase the likelihood of a satisfying result. If you need a broader perspective on planning and executing beginner projects, the two internal guides mentioned earlier offer helpful context and strategies to build confidence as you progress.
Additional learning and practical tips (internal resources)
For readers who want to expand beyond a single chair, you can explore broader projects and techniques through these internal resources:
Explore beginner-friendly guidance here: Unlocking DIY Wood Plans: The Ultimate Beginner’s Guide to Confident Simple Projects.
Or dive into practical, beginner-friendly design ideas with Master Easy Wood Designs: A Practical Guide to Beginner-Friendly Projects and Skills.
As you get comfortable reading and interpreting a wood chair blueprint, consider supplementing your learning with a curated library that offers a wide range of plans. A popular option is Ted’s Woodworking, which can be accessed via this affiliate link: Ted’s Woodworking. While you explore plans, pick projects that gradually increase in complexity so you can apply the blueprint concepts without being overwhelmed.
Conclusion and next steps
A wood chair blueprint is more than a page of numbers—it’s a structured path from idea to finished piece. By understanding the blueprint’s components, reading measurements correctly, and following a careful build sequence, you can create a chair that’s not only beautiful but comfortable and durable. Along the way, use reliable resources to widen your knowledge and keep your learning momentum. The combination of solid woodworking principles, thoughtful ergonomics, and a well-chosen blueprint set the foundation for future projects—whether you’re building a classic Windsor-inspired chair or a modern, minimalist silhouette.
When you’re ready to broaden your plan library or seek additional inspiration, the internal guides above and a reputable plan library can help you expand gradually. And if you want a broad catalog of ready-to-build blueprints to reference as you grow, consider checking Ted’s Woodworking for curated designs that align with your skill level and project goals.