If you’re passionate about creating outdoor comfort, there’s hardly a more satisfying project than building your own 2×6 adirondack chair plans. The 2×6 adirondack chair plans provide a robust, comfortable, and stylish chair that stands up to sun, rain, and the occasional weather swing. Whether you’re a weekend warrior with a few hours to spare or a DIY enthusiast who loves turning scrap lumber into a functional piece of furniture, these plans can help you craft a chair that lasts for years while looking as good as it feels to sit in it.
When people search for 2×6 adirondack chair plans, they’re seeking a reliable blueprint that uses widely available lumber and clear measurements. A 2×6 board, when cut and assembled properly, yields the classic contoured seat, the generous armrests, and the supportive back that make Adirondack chairs so beloved. The real value in these plans isn’t just the lines on paper; it’s a proven approach that balances comfort, geometry, and ease of construction. In this guide, you’ll learn how to translate a simple set of plans into a durable, weather-ready chair you’ll be proud to own or gift.
For readers who want a broader library of well-organized woodworking plans, a resource like Ted’s Woodworking can be a convenient way to explore more projects, including comprehensive plan bundles and step-by-step instructions. If you’re curious, you can explore a trusted woodworking plan library here: Ted’s Woodworking. This article keeps the focus on the 2×6 adirondack chair plans while offering practical guidance and a few smart shortcuts so you can finish faster and with better results.
What Are 2×6 Adirondack Chair Plans and Why They Work
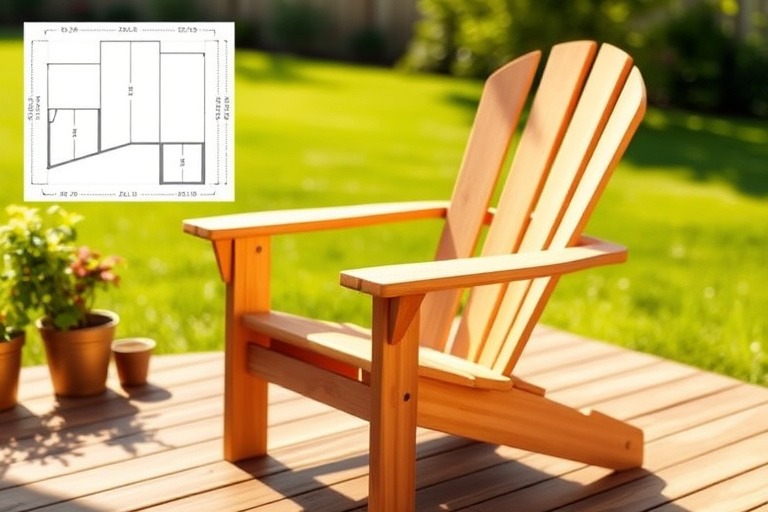
The term 2×6 adirondack chair plans refers to a set of blueprints or cut sheets that specify how to form a classic Adirondack chair using 2×6 boards for major components. The 2×6 dimension is popular because it provides a sturdy, forgiving wood size that’s easy to handle with common tools. The Adirondack chair’s design relies on a few fundamental angles—the seat angle, backrest tilt, and armrest height—that combine to create a relaxed lounging posture. A well-drafted 2×6 adirondack chair plans ensures these angles are accurate, which translates into comfortable seating and a chair that sits square and balanced on a porch, deck, or lawn.
Choosing these plans also means you’re adopting a construction method that’s scalable. If you want to build multiple chairs for a deck party or a backyard gathering, the plans can be adjusted to batch-cut parts from identical stock. The plan’s clear cut list minimizes waste and reduces trips to the sawmill or home improvement store. It’s the kind of project that hobbyists and beginners can approach with confidence and success.
Materials, Tools, and Prep
Before you start cutting, gather your materials and tools so you’re not scrambling in the middle of the project. A typical 2×6 adirondack chair plans assumes you’ll use exterior-grade lumber such as pressure-treated pine, cedar, or teak for longevity. Cedar or teak offers natural rot resistance and a warmer finish but comes with a higher price tag. Pressure-treated pine is a budget-friendly option that, when finished with an exterior sealant, can perform well outdoors. If you plan to leave the chair unfinished to age to a natural patina, cedar is an excellent choice because of its natural oils and appearance.
Core tools you’ll need include a circular saw or miter saw, a power drill/driver, a random orbital sander, clamps, a square, a tape measure, and safety gear such as eye protection and hearing protection. Having a miter saw makes clean, repeatable angles easier, and precise cutting is critical for the back slats and seat boards to align properly. Don’t skip the sanding step—rough edges can cause discomfort and introduce moisture pockets that compromise the chair’s finish over time.
Cutting Lists and Lumber Choices
Your 2×6 adirondack chair plans provide a cut list that typically includes a few main frame pieces, a series of seat slats, back slats, and a pair of sturdy armrests. The 2×6 boards are ideal for the armrests and the frame members because they create solid, wide supports that won’t flex under weight. The exact counts depend on the design you’re following, but the general approach is to cut a pair of front legs, two rear legs, two side rails, several back slats, and a sequence of seat slats. When cutting, plan for a 1/8 to 1/4 inch kerf and account for wood movement due to humidity and temperature changes.
If you’d like more plan styles beyond the Adirondack, you can explore a broader range of chair plans and woodworking templates at your own pace. For a detailed guide to wood chair plans and downloadable PDFs, you might find the following resource helpful: Your guide to wood chair plans PDF master DIY woodworking and build stunning chairs.
Essential Tools and Safety Tips
Safety first: wear eye protection and a dust mask when cutting and sanding. Secure the boards with clamps and work on a stable bench or table. For smoother finishes, use progressively finer grits during sanding, ending with a 120 to 220 grit depending on your finish. If you’re new to woodworking, consider building a practice piece or a smaller version of the chair to get comfortable with the sequence before tackling the full-size project.
Step-by-Step Build Guide
The step-by-step guide below follows typical 2×6 adirondack chair plans. The emphasis is on accuracy, repeatability, and finishing so your chair looks and feels like a professional product. You’ll notice how the plan naturally encourages efficient use of wood and straightforward assembly.
Cutting the Parts Accurately
Start by labeling each cut with the plan’s reference letters (A, B, C, etc.). Cut the seat slats to uniform width and length, then cut the back slats so they fit the back curvature. The armrests should be wide enough to rest a forearm but not so thick they crowd the user. While you cut, double-check your measurements against the plan to avoid pairing mismatched pieces during assembly.
If you want a more curated set of plans, a wide array of woodworking projects are available via resources like Ted’s Woodworking. It offers a large library of plans that can complement your Adirondack build by furnishing you with additional seating, outdoor furniture, and related projects for future weekends.
Assembling the Frame
Begin by assembling the chair’s frame with square joints or pocket-screw methods, ensuring the frame sits flat on your work surface. Attach the front legs to the side rails, then connect the rear legs with cross supports. Check that the frame is square by measuring diagonals; they should be equal. Once the frame is stable, move on to the seat assembly, which creates the strong base for the chair. The seat will attach to the frame with screws or dowels, depending on your preferred method and the plan’s recommendations.
Attaching the Backrest and Seat
With the frame assembled, affix the back slats to create the backrest’s curve. The top slats run slightly flush with the top of the backrest and provide comfort while supporting the silhouette that characterizes Adirondack design. Align the seat slats so they are evenly spaced and comfortable to sit on. The backrest angle is crucial; the plan likely calls for a tilt around 100 to 110 degrees from the seat plane. Minor adjustments here can dramatically impact comfort, so test-fit a few times before final assembly.
Sanding, Finishing, and Weatherproofing
Finish with a thorough sanding sequence—from coarse to fine—then wipe clean to remove dust. Apply a protective exterior finish suitable for your climate. Cedar and teak respond beautifully to penetrating oils or varnishes, while pine benefits from a solid sealant or paint. A two-coat system—one stain or oil, followed by a clear sealant—helps preserve color and prevent water ingress. If you plan to store the chairs in winter, consider storing indoors or using a breathable cover to reduce moisture damage.
Design Variations and Finishes
The classic 2×6 adirondack chair plans can be adjusted to suit different aesthetics and comfort levels. If you prefer extra leg room or a deeper seat, tweak the seat length and backrest angle slightly. For a more modern look, you can experiment with thinner back slats or a slightly lower profile to reduce mass while keeping the same overall silhouette. Finishing options range from natural wood tones to bold paints or tinted stains that coordinate with your outdoor space.
Comfort-focused Modifications
Small adjustments can yield big comfort gains. A slightly wider seat can transform how the chair feels after a long afternoon. Some builders add a gentle curve to the front edge of the seat to encourage better posture. If you plan to lounge for longer periods, consider adding optional cushions or using a slightly more contoured backrest to cradle the spine.
Stain, Paint, and Sealant Options
Oil-based or water-based finishes each have benefits. Oils penetrate the wood and enhance natural grain without forming a film, while high-quality exterior paints provide a more protective, opaque finish. Seals and varnishes create a durable barrier against moisture and UV exposure. When selecting finishes, check for outdoor compatibility and re-coat intervals to keep your chair looking fresh for years to come.
Using Ted’s Woodworking and Other Resources
While the adirondack chair project stands strong on its own, broadening your plan library can accelerate learning and project variety. For those who want a reliable assortment of woodworking plans, many builders use a curated resource like Ted’s Woodworking to access assorted outdoor furniture plans, jigs, and templates. It’s a practical add-on for anyone who wants to expand from a single chair to a full deck or patio set without hunting for new sources every time.
Maximizing Your Plan Library
If you’re new to woodworking, starting with a core project like the 2×6 adirondack chair plans gives you a solid layout to learn essential skills—measuring, cutting, sanding, joining, and finishing. As you gain confidence, you can explore a broader range of outdoor furniture builds, benches, planters, and even small storage solutions. For broader chair plan resources and PDFs, refer to Your guide to wood chair plans PDF master DIY woodworking and build stunning chairs.
Helpful Related Resources
Beyond Ted’s Woodworking, there are other project ideas that pair well with outdoor furniture builds. If you’re looking for space-saving furniture or a different woodworking challenge, consider reading about space-saving DIY projects such as loft beds, which can inspire clever design approaches for small decks or porches. See this guide on space-saving projects: Twin-size loft bed plans: The ultimate guide to space-saving safe DIY.
Putting It All Together: Quick Start and Maintenance Tips
To begin quickly, print or save your chosen 2×6 adirondack chair plans and make a careful cut-list. Start with the necessary frame components first, then advance to the seat and backrest. Take your time with the joints and clamps; a well-clamped piece is easier to assemble accurately and produces a cleaner final project. After assembly, inspect all fasteners to ensure nothing wiggles and that all slats are evenly spaced. A good maintenance routine—cleaning off dirt, refreshing the sealant or paint every few years, and addressing any cracks or loosened joints promptly—will extend the life of your chair significantly.
As you gain experience, you can document your own modifications and share them with fellow DIYers. The community around woodworking plans often thrives on feedback and variations, helping everyone tailor projects to their space and regional climate. And if you ever want to broaden your toolkit for future builds, keep Ted’s Woodworking in mind as a resource for additional plans and inspiration.
Conclusion: A Comfortable Investment in DIY Outdoors
The 2×6 adirondack chair plans provide a dependable, practical pathway to a comfortable seating experience that complements any outdoor space. The blend of accessible lumber, straightforward cuts, and proven assembly methods makes it a rewarding project for beginners and seasoned builders alike. By following clear steps, paying attention to angles and joints, and finishing with a weather-ready sealant, you’ll create a chair that feels like a staple of your backyard for years to come.
To broaden your woodworking horizons and find more outdoor furniture plans, consider exploring a broad plan library like Ted’s Woodworking, which can be a valuable companion on future builds. And if you’re looking for related plan ideas or space-saving furniture projects, the two internal resources linked above can provide additional direction and inspiration as you grow your woodworking skills.