
If you’ve ever kicked back in a sun-warmed backyard chair and thought, I could build something like this, you’re in the right place. The phrase adirondack chair plans free download pdf is a common starting point for many DIY enthusiasts who want a sturdy, comfortable outdoor seating option without breaking the bank. A well-designed plan is more than just a shopping list; it’s a blueprint for accuracy, safety, and finishing beauty. In this guide, you’ll learn how to approach adirondack chair plans free download pdf with a practical mindset, what to look for in a trusted plan, and how to execute a project that stands up to the elements—season after season.
Before you dive in, remember that a free download PDF can be a valuable entry point, but the real payoff comes from understanding the core joinery, material choices, and finishing steps. If you’re new to woodworking, you might want to pair your plan with a reliable beginner resource. For example, a comprehensive walk-through such as Beginner joinery projects: The Ultimate Step-by-Step Guide to Safe, Beautiful Woodworking can help you master the basics before you tackle a larger project. It’s the kind of resource that complements adirondack chair plans free download pdf by building confidence in layout, measurement, and safe tool use.
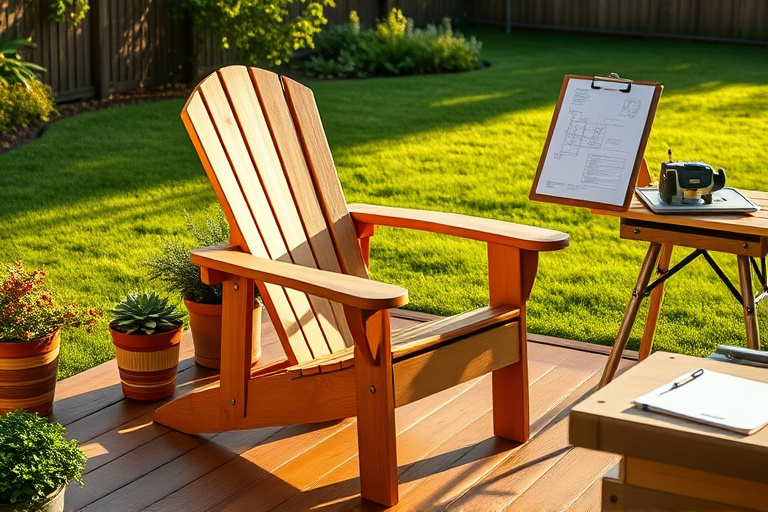
What you get in a solid Adirondack chair plan
When you search for adirondack chair plans free download pdf, you’re typically looking for a precise set of measurements, a cut list, and a assembly sequence. The best plans include several key elements that keep your build on track and ensure a comfortable, durable chair:
- Clear cut lists for seat slats, back slats, front and rear legs, armrests, and braces.
- Accurate dimensions that account for seat height, back angle, and overall footprint so the chair looks and feels right in your space.
- Recommended fasteners and joinery methods that balance strength with a clean appearance, such as pocket hole or dowel joinery in non-visible areas.
- Notes on material choices, including wood species that tolerate outdoor conditions (cedar, teak, and treated pine are common options).
- Finishing guidance that helps you select exterior finishes and maintenance intervals.
When you’re evaluating adirondack chair plans free download pdf, look for these features. Free plans are a great way to learn, but a plan that includes a detailed cutting diagram and an explicit assembly sequence will save you time and reduce the chance of wobble or misalignment.
Materials, tools, and cut lists you’ll need
Most Adirondack chairs are built from durable, easily workable woods like cedar, pine, or treated lumber. Your choice affects weight, cost, and weather resistance. A typical plan will help you estimate quantities for:
- Two side rails and a series of slats for the seat and back
- Armrests, leg blocks, and cross braces
- Outdoor-grade screws, wood glue, and optional hardware like lag bolts for extra stability
- Finish materials such as exterior-grade varnish, stain, or a penetrating oil and sealant
Tools you’ll likely need include: a saw (circular or miter, plus a hand saw for fine work), a drill/driver, a doweling jig or pocket-hole jig, clamps, a sandpaper graining block or sander, square, measuring tape, and a brush for finish. If you’re just starting out, you can align every cut to the plan and double-check with a square before you assembly. For beginners seeking guidance on safe, effective joinery and project flow, consult resources like the Ultimate Step-by-Step Guide to Safe, Beautiful Woodworking to build your confidence in cutting and joining, which will make your adirondack chair plans free download pdf venture smoother.
Step-by-step build overview
Below is a practical, high-level workflow you can adapt to most adirondack chair plans free download pdf sets. Always follow your specific plan for exact sizes and sequence, but these steps give you a strong framework to stay organized:
- Prepare your materials: Condition the wood to the same moisture level to prevent warping post-assembly. Sand rough edges and ensure all components fit within the plan’s tolerances.
- Mark and cut: Use the cutting diagram from your plan to lay out and cut all pieces. Keep track of each part by labeling them as you go to avoid mix-ups later.
- Dry-fit assembly: Without glue, assemble key joints to check alignment. A loose dry-fit is easier to fix than a glued, misaligned chair.
- Joinery and glue-up: Apply wood glue only where specified in the plan, and clamp the components until dry. Pre-drill pilot holes to prevent splitting near armrests and legs.
- Finish and test: Sand surfaces progressively from 120 to 220 grit, then apply your chosen outdoor finish. After curing, test for comfort by sitting and adjusting if needed.
Throughout this process, remember that adirondack chair plans free download pdf are most valuable when they translate into a comfortable seat shape and a sturdy frame. If you encounter a wobble or a tight fit, re-check measurements and consider a light re-sand or slight trim to align everything perfectly. For a broader set of ideas on project flow and basic joinery, the resource on beginner joinery cited above can be particularly helpful as you refine your technique.
Durability and outdoor finishing: protecting your chair
Adirondack chairs are typically exposed to sun, rain, and seasonal temperature shifts. A durable finish protects the wood and keeps color and texture intact over years of use. Here are finishing considerations to help you maximize longevity:
- Material choice matters: Cedar is naturally resistant to rot and decay, while pressure-treated pine offers affordability and weather resistance when properly finished.
- Choose the right finish: Exterior-grade polyurethane or marine varnish provides a protective layer, while penetrating oils (such as tung or linseed oil) enhance wood grain without creating a thick film that can crack in sun.
- Maintenance schedule: Reseal or re-oil every 1–2 years depending on climate, and perform light sanding before applying a new coat to keep the surface smooth and free of cracks.
When you’re selecting a finish, consider your climate. If you experience heavy rain or intense sun, a more robust sealant with UV protection will extend the life of your adirondack chair plans free download pdf project. A well-finished chair also resists moisture absorption, which helps prevent warping and stiffness in the slats.
Paid resources vs. free plans: finding the right fit
Free adirondack chair plans free download pdf are an excellent way to begin, but many woodworkers eventually seek expanded libraries to tackle more complex projects or to compare different styles. This is where paid resources can be valuable. [Ted’s Woodworking] offers a broad collection of plans, templates, and project guides that help you scale from beginner-level chairs to more elaborate outdoor furniture and accessories. If you’re curious, you can explore the comprehensive library and purchase options via Ted’s Woodworking, which is designed to provide ongoing inspiration for your workshop. While you don’t need to buy to build a single chair, a long-term plan library can be a useful investment if you anticipate multiple projects in the coming months.
As you evaluate options, think about your goals: Is the priority finding a fast, simple build to refresh your patio, or are you building a long-term collection that includes a set of chairs, a table, and perhaps a bench? The decision influences whether you lean on free adirondack chair plans free download pdf resources alone or pair them with paid programs that broaden your plan vocabulary and access to detailed cut lists and problem-solving tips.
Practical tips for beginners and budget-minded builders
Starting out with woodworking can feel overwhelming, but a few practical strategies keep things moving smoothly. The following tips emphasize safety, efficiency, and cost control, while still delivering a high-quality Adirondack chair that you’ll be proud of:
Beginner-friendly joinery and safety
One of the biggest confidence builders for new woodworkers is mastering safe joinery. If you’re new to the craft, consider resources like the Ultimate Step-by-Step Guide to Safe, Beautiful Woodworking to build your understanding of reliable joints, proper clamping, and safe tool use. Even when following adirondack chair plans free download pdf, taking time to practice basic joints with scrap wood can prevent costly mistakes on your final project. A careful approach to layout and measurement reduces waste and makes the process more enjoyable.
Budget-friendly wood projects that complement outdoor spaces
While you’re working on your Adirondack chair, you may also want to tackle other garden-friendly projects. Resources such as budget-friendly woodworking ideas that deliver great results can provide a wealth of ideas for small, high-impact builds that pair well with outdoor seating. These projects help you practice cuts, joinery, and finishing techniques in a cost-efficient way, so you can build a cohesive outdoor space without a big upfront investment. And if you’re exploring plans beyond the single chair, a small, well-planned set of projects can deliver a cohesive style and improved value for your backyard setup.
Sourcing and confidence: choosing the right plan for you
Adirondack chair plans free download pdf can be found in many places, and the quality varies. When you’re evaluating options, look for clarity in instructions, a clearly labeled cut list, and scale-accurate drawings. A plan that shows both a top view and a side profile helps you verify your material calculations, so you don’t over- or under-purchase stock. If you’re curious about expanding your toolkit beyond one project, consider how a paid library might support your goals while still allowing you to complete the Adirondack chair with a robust template to follow.
FAQs about adirondack chair plans free download pdf
Q: Can I build an Adirondack chair from a free download PDF even if I’m a beginner?
A: Yes, many beginners succeed with a well-structured free plan. Start with a simple wood choice, practice basic cuts, and use a dry-fit approach to ensure alignment before gluing. Pairing the plan with a beginner-friendly joinery guide can boost your success rate.
Q: Do I need special tools to complete this project?
A: A standard set of hand and power tools is usually enough. A handsaw, a drill/driver, clamps, and a sander plus measuring and marking tools cover the basics. For more complex joints, a pocket-hole jig or doweling jig can be helpful.
Q: Is a paid resource necessary to build a high-quality Adirondack chair?
A: Not strictly. Free plans can be excellent for a single chair, but paid resources often provide a broader range of plans, clearer diagrams, and more advanced techniques for future projects. If you’re planning multiple builds, exploring Ted’s Woodworking may be worth considering as a supplementary library.
Final thoughts and next steps
Building an Adirondack chair from adirondack chair plans free download pdf can be one of the most satisfying DIY projects for outdoor spaces. It offers a practical way to customize comfort, share time with family, and learn essential woodworking skills—without a heavy upfront investment. Start by choosing a plan you trust, gather the right materials, and proceed with a measured, patient approach. If you find yourself wanting more options or ready to broaden your project horizon, the related resources and curated plan libraries can be a smart fit for ongoing curiosity in the shop. Whether you stick to a single chair or expand into a full outdoor furniture set, you’ll benefit from a careful blend of free plans and trusted resources that keep you motivated and equipped to create beautiful, durable pieces for years to come.
For easy access to more plans and a broader selection of woodworking projects, you can explore Ted’s Woodworking through the affiliate link above and see if a larger library aligns with your goals. And if you’re specifically looking to deepen your skills in joinery or to explore additional budget-friendly ideas, the two internal resource guides cited earlier can provide practical, actionable guidance as you grow your workshop confidence.


