If you’re stepping into the world of woodworking, the idea of a fully equipped shop can feel daunting. Fortunately, you don’t need every tool on the market to start making solid, useful projects. The journey begins with understanding the most essential woodworking tools, building a reliable starter toolkit, and then gradually expanding as your projects become more ambitious. This guide focuses on the most essential woodworking tools you’ll use again and again, along with practical tips for choosing, using, and maintaining them. You’ll also discover how curated plans and trusted resources, like Ted’s Woodworking (affiliate), can accelerate your learning curve without breaking the bank.
What are the most essential woodworking tools?
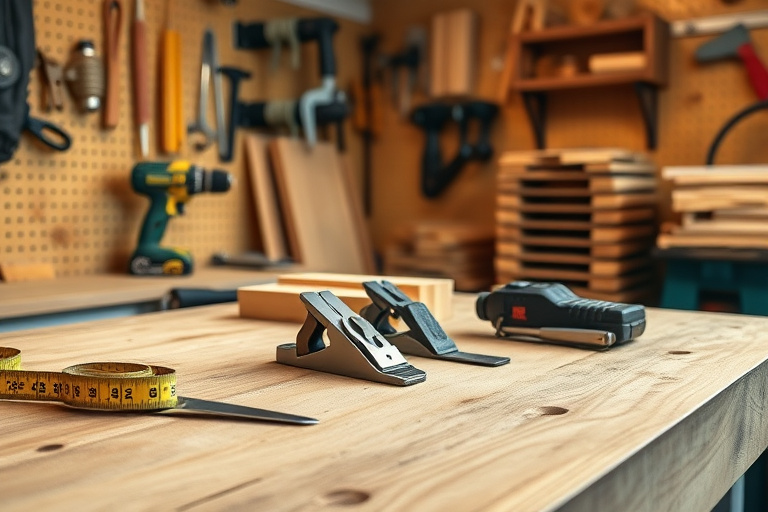
When we talk about the most essential woodworking tools, we’re talking about items that reliably help you measure accurately, cut cleanly, shape with control, join securely, and finish smoothly. These tools aren’t fancy; they’re dependable workhorses that stay in your toolbox as you move from simple practice pieces to meaningful projects. The core categories include measuring and marking, cutting and shaping, joining and fastening, and finally finishing and maintaining. By focusing on these core groups, you’ll cover the essential basics without getting overwhelmed by specialty tools.
Measuring, marking, and layout tools
Accuracy is the backbone of good woodworking. The most essential woodworking tools in this category include a reliable steel tape measure, a combination square or speed square, a sharp marking knife or fine pencil, and a marking gauge. A simple ruler and a carpenter’s pencil pair well with a basic square to ensure your parts line up correctly before you cut. These tools help you translate ideas into precise cut lines, which reduces waste and frustration as you progress to more complex builds.
Cutting, shaping, and smoothing tools
For straight, clean cuts, a fine-tooth handsaw or a backsaw, coupled with a compatible blade, is indispensable. Power tools like a drill/driver and a compact random-orbit sander expand your capabilities, but the real value lies in mastering controlled cuts with hand tools. A sharp block plane for edging and smoothing surfaces, along with a set of high-quality chisels, will dramatically improve the fit and finish of joints and mortises. The goal isn’t just to cut but to cut accurately and safely, preserving wood fibers for a stronger, longer-lasting piece.
Joining, fastening, and clamping essentials
Many projects hinge on solid joints. The most essential woodworking tools in this category include a selection of clamps (bar clamps are versatile), wood glue, a mallet or hammer, a combination square for verifying joints, and a drill with a small set of bits for pilot holes. Learning basic joinery—such as butt joints, mortise-and-tenon joints, or dowel joints—will unlock a wide range of project possibilities. Clamps keep pieces steady while the glue dries and provide consistent pressure for strong bonds.
Power tools vs. hand tools: building a balanced toolkit
New woodworkers often wonder how to balance hand tools and power tools. The most essential woodworking tools don’t require a full shop’s worth of equipment, but a few well-chosen power tools can dramatically speed up tasks and improve consistency. A drill/driver, a compact random-orbit sander, and a lightweight multitool can handle most starter projects. The key is to learn proper technique with hand tools first; power tools should supplement, not replace, foundational skills. This approach keeps your budget realistic and your learning curve smooth.
Building a practical starter toolkit on any budget
Your toolkit should reflect your goals, space, and budget. Start with a core set of items that will handle a broad range of tasks, then add specialized tools as you take on bigger or more detailed projects. Here are practical steps to assemble a reliable starter toolkit without overspending.
Prioritizing must-have tools for beginners
- Measuring and marking: tape measure, combination square, pencil, marking gauge
- Cutting and shaping: handsaw or backsaw, sharp chisels (1/4″, 1/2″), block plane
- Drilling and assembly: drill/driver, a basic drill bit set, clamps (4- to 12-inch), wood glue
- Sanding and finishing: small random-orbit sander, sanding discs, finish brushes or rags
As you gain confidence, you can expand with a power jigsaw, a router, or a have-at-it table saw. Remember, the best tools for beginners are the tools you’ll actually use. That means choosing reliable models that fit your space, rather than chasing the latest gadgetry. For a curated path to start faster, consider structured plans and booklets that teach technique alongside project paths.
Investing smartly: quality vs. value
Quality matters more than hype. A solid mid-range drill/driver, a dependable set of chisels with comfortable handles, and a small but sturdy clamp collection will outperform flashy tools that aren’t used regularly. When evaluating tools, look for compatibility, blade clarity, comfortable grip, and solid warranties. It’s better to buy fewer tools that perform well than buy a dozen tools that you rarely use. If you’re unsure where to begin, a curated resource can guide tool purchases while you learn techniques. For example, a robust library of plans can help you choose tools that fit the projects you’ll actually build, rather than buying on impulse.
Real projects to apply your tools
Learning by doing is the fastest route to proficiency. Start with simple, functional projects that require only the most essential woodworking tools. As your skill grows, you’ll naturally incorporate more complex jobs and finer finishes. The projects you choose should reinforce technique and build confidence, not overwhelm you with complexity.
To get you started, check out the essential guide to easy beginner woodworking projects for practical, confidence-building plans that use smart, scalable layouts. These beginner-friendly projects help you practice measurement accuracy, reliable joints, and a smooth finish, all while reinforcing the fundamental use of the most essential woodworking tools.
Another great way to put your toolkit to work is by exploring outdoor projects that test your joinery and durability skills. The Adirondack chair plans provide a practical, comfortable outdoor build that demonstrates how to translate plan into a sturdy, weather-resistant structure. You can view these plans here: Adirondack chair plans. This project emphasizes precise cutting, clean sanding, secure joints, and careful finishing—perfect practice for building confidence with the most essential woodworking tools.
Integrating Ted’s Woodworking into your learning path
As you progress, you may want a comprehensive library of project plans that align with your growing toolkit and skills. A resource like Ted’s Woodworking offers a broad collection of blueprints, tutorials, and step-by-step guides that cover a wide range of woodworking disciplines—from simple boxes and shelves to more ambitious furniture pieces. While you’ll still rely on your core tools, access to structured plans can help you plan projects that maximize the use of the most essential woodworking tools, ensuring you get repeatable results and continue to learn new techniques without guessing at every step.
When you pair your toolkit with curated plans, you create a learning loop: select a project, gather the essential tools, complete the build, assess results, and iterate. The combination of practical tools and well-designed plans accelerates skill acquisition and helps you avoid common beginner mistakes. And because these plans are designed to scale—from basic to advanced—your toolbox and your confidence grow together over time.
Safety, maintenance, and workspace setup
Every woodworker’s progress depends on a safe, organized workspace. Start with a clean, well-lit area and a stable work surface. Keep clamps, measuring tools, and power cords organized to reduce the risk of accidents. Safety gear—eye protection, hearing protection, and a dust mask—should be standard equipment whenever you cut, sand, or finish wood. Regular maintenance for your tools is essential: keep blades sharp, clean dust from motors, and store tools in a dry, secure place to prevent rust and corrosion. A small shop, properly arranged, can yield excellent results and long-term enjoyment—so invest in a sturdy workbench, proper lighting, and accessible storage from day one.
Remember that most essential woodworking tools perform better when you know how to use them safely and effectively. Practice technique with scrap wood before tackling real projects, and don’t rush the process. The slow, deliberate approach often yields the best results and makes your learning journey far more enjoyable.
Final thoughts and next steps
If you’re serious about building skills with the most essential woodworking tools, start by curating a reliable starter toolkit, selecting a few core projects, and utilizing structured plans that guide your progress. Pair hands-on practice with thoughtful resources—like beginner-friendly guides and project plans—to reinforce technique. As you gain confidence, expand your toolkit thoughtfully, invest in higher-quality pieces where they count, and explore more ambitious builds. The right combination of tools, plans, and practice will transform your woodworking journey from hobby to craft. And if you’re looking for a consolidated resource to propel you forward, consider the comprehensive project library offered by Ted’s Woodworking (affiliate), which can complement your hands-on practice and help you connect the dots between tool use and project outcomes.