carpentry designs shape not just the look of a piece, but the way it functions in daily life. In today’s workshops, a thoughtful design guides every cut, joint, and finish. Whether you’re building a simple bookshelf, a sturdy dining table, or a custom cabinet, the right carpentry designs help you predict material needs, minimize waste, and achieve a durable result you’ll be proud of for years. This article explores how you can approach carpentry designs with confidence, combining practical planning, style awareness, and safe, repeatable workflows.
At its core, carpentry designs blend form and function. You want pieces that are aesthetically pleasing, yet sturdy and practical. That means not only choosing an appealing style but also understanding how the grain runs in your stock, selecting the right joinery, and planning for how the piece will be used. When you start thinking in terms of plans, cut lists, and finishes, you’ll find that even ambitious designs become manageable projects. For many hobbyists and professionals alike, mastering carpentry designs is a continuous journey of learning, testing, and refining techniques.
Understanding carpentry designs
To design well, you must see a project from multiple angles: function, form, and the constraints of materials and tools. Carpentry designs begin with a solid concept—what the piece should do, how it should look, and how it will stand up to use over time. From there, you translate the concept into a plan that includes dimensions, joinery methods, and finishing steps. A well-drawn plan reduces surprises in the shop and helps you stay on track with a realistic cut list.
When you study carpentry designs, you’ll notice the role of finishes, hardware choices, and even the type of wood you select. For example, a rustic farmhouse table benefits from visible joinery and a matte oil finish that enhances texture, while a sleek modern console might rely on hidden fasteners and a clear topcoat to emphasize clean lines. By thinking ahead about grain direction, moisture exposure, and load, you can anticipate future challenges and adapt your plan accordingly.
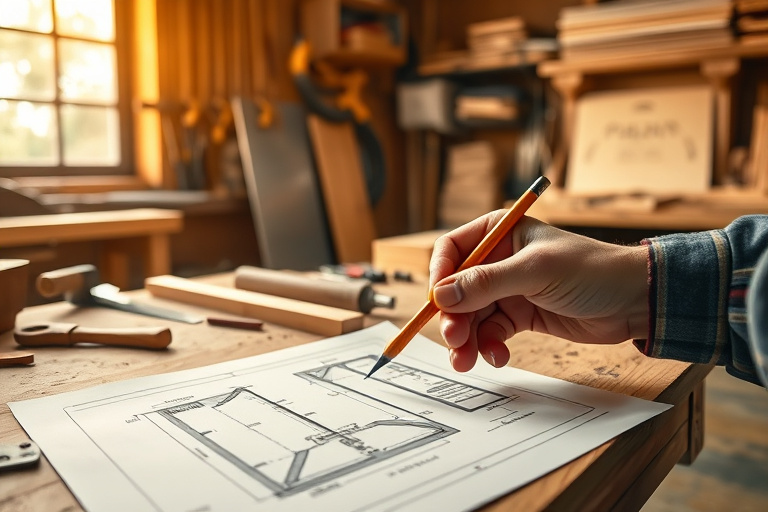
Planning your carpentry designs
Great carpentry designs start with a clear plan. That means sketching your idea, thinking through dimensions, and listing all the materials and tools you’ll need. A practical approach to planning includes:
- Defining the function and constraints of the piece
- Drafting a scaled sketch or using software to visualize proportions
- Creating a precise cut list and a bill of materials
- Considering joinery options and how they’ll affect strength and assembly time
- Accounting for finishes, hardware, and hardware placement
To get you started, check out a practical guide on the tools you’ll need to make furniture—the ultimate practical guide for makers and DIY enthusiasts. This resource walks you through essential equipment and shop setup to support reliable carpentry designs. Tools needed for furniture: an ultimate practical guide provides a solid foundation as you plan your projects.
As you refine your carpentry designs, you’ll also want to consider learning resources that offer structured guidance. For a complete guide to safe, beautiful projects, you can download a helpful woodworking PDF. Complete guide to safe, beautiful projects (PDF) complements the planning process by highlighting safety and efficient workflows.
The design process: steps to success
Executing carpentry designs smoothly hinges on a repeatable process. Here are practical steps you can adopt for most projects:
- Idea to sketch: Start with a concept sketch. Refine dimensions, proportions, and ergonomics.
- Material selection: Choose stock that suits the grain pattern, strength requirements, and finish you want.
- Joinery planning: Decide whether to use mortise and tenon, dowels, biscuits, screws, or wooden dowels—each choice influences assembly time and strength.
- Cut list and timeline: Convert your sketch into a detailed cut list and a realistic project timeline.
- Dry-fit and adjust: Assemble parts dry to verify fit before final assembly.
- Finish and hardware: Plan for stain or oil, protective topcoats, and hardware placement that complements the design.
As you develop your carpentry designs, you may find it valuable to explore curated libraries of plans and patterns. If you’re looking for a comprehensive resource with thousands of plans, Ted’s Woodworking is a well-known option in the maker community. You can explore a broad collection of designs and projects and consider whether it aligns with your learning style and project goals. Ted’s Woodworking (affiliate link) offers a wide range of plans that cover furniture, cabinets, and decorative pieces, which can inspire and inform your own carpentry designs.
Learning resources and practical guides
Beyond individual plans, reliable resources help you build a strong foundation for carpentry designs. Look for guides that cover both theory and hands-on practice—topics like joinery basics, material science, and finishing techniques. Two particularly useful internal resources can deepen your understanding and support your ongoing growth:
- Tools and practical furniture-making strategies: Tools needed: ultimate guide for makers
- Safe, efficient project workflows and downloadable content: Complete guide to safe, beautiful projects (PDF)
These resources complement any exploration of carpentry designs by reinforcing practical approaches and safe practices. If you seek a broader library of plans to study, consider exploring a curated collection like Ted’s Woodworking, which offers inspiration alongside structured plans that you can adapt to your workshop. For many makers, this is a convenient way to cross-pollinate ideas while refining their own design language.
Project ideas across skill levels
Growing your repertoire of carpentry designs begins with simple projects that build confidence and technique. Here are a few progression-driven ideas that allow you to practice planning, joinery, and finishing without becoming overwhelmed:
- Beginner: A minimalist plant stand or a small step stool. These projects introduce measurement discipline and basic joinery without unnecessary complexity.
- Intermediate: A wall-mounted shelf unit or a jewelry box with finger joints. These require more precise cut lists and a better eye for grain alignment.
- Advanced: A storage cabinet with face frames or a living room table that uses contrasting woods and a refined oil finish. This level emphasizes precise fitting, complex hardware considerations, and a high-end finish.
For ongoing inspiration, you can study a broad spectrum of carpentry designs—from simple, sturdy furniture to decorative pieces that showcase joinery and wood pairing. The key is to iterate: design, cut, test fit, adjust, and finish. Each project teaches you something new about how carpentry designs respond to real-world use and how finishes can alter the perception of perspective and depth.
Where to get plans and inspiration
If you’re building a library of carpentry designs, consider using trusted resources that offer clear plans and practical guidance. In addition to the internal guides mentioned above, you can explore curated plan libraries to study how different designers approach scale, proportion, and joinery. While you’re exploring, remember that you don’t have to reinvent every project from scratch—studying well-documented plans can help you understand the decision-making process behind robust designs.
Safety, maintenance, and ongoing learning
Safe, productive woodworking hinges on understanding your tools and the limits of your materials. The two internal resources above emphasize practical safety, planning discipline, and efficient workflows. Safety isn’t optional; it’s foundational to consistent carpentry designs. Regular maintenance of your tools, along with mindful stock selection and workspace organization, keeps your shop efficient and your projects predictable. As you learn, you’ll also encounter opportunities to improve your finishing techniques, from sealers that protect against moisture to waxes that boost luster.
When it comes to ongoing learning, a well-rounded approach combines hands-on practice with reference materials, tutorials, and design studies. If you are drawn to a broad library of project plans and step-by-step instructions, consider supplementing your experience with curated plan collections that align with your preferred styles and skill level. You may also come across paid resources that bundle patterns, diagrams, and tutorials—these can be a time-saver for busy makers looking to broaden their carpentry designs portfolio. If you decide to explore a comprehensive library, you can learn more about Ted’s Woodworking via the affiliate link provided above. This resource is known for offering a wide variety of plans that can spark ideas for your own projects and help you translate those ideas into repeatable, high-quality results.
Beginner-friendly project: a simple, sturdy bookshelf
For those just starting with carpentry designs, a bookshelf is an excellent proving ground. It combines practical function with accessible joinery, giving you a tangible sense of how design influences assembly and finish. Start with a straightforward frame, a couple of shelves, and a robust back panel. As you work, pay attention to grain direction and alignment, ensuring shelves are level and joints are snug. The finishing stage is where your carpentry designs come to life—consider a matte poly or oil that enhances natural wood tones while offering protection from daily use. This approach reinforces a pattern you’ll notice in more complex projects: a clean, deliberate design leads to predictable results in finish and stability.
If you’re seeking a broader set of plans to study as you work on this bookshelf, a curated library can be a valuable reference. And if you’re weighing options for expanding your design toolkit, a comprehensive plan library like Ted’s Woodworking can offer fresh perspectives and ready-to-build ideas that you can adapt to your own carpentry designs. Explore Ted’s Woodworking to see how plans are organized and how you might integrate new styles into your workshop repertoire.
Putting it all together: a practical path forward
Effective carpentry designs come from a blend of planning, practice, and intentional materials usage. Start with a clear concept, then translate that concept into a precise plan that includes measurements, a cut list, and a chosen joinery method. As you practice, you’ll gain confidence in selecting the right woods, layering finishes, and aligning hardware to achieve the exact look you envision. Remember that the most successful carpentry designs are those that reflect both your personal style and your hands-on experience in the shop.
If you’d like a structured route to expand your library of plans and learn through example, consider resources that provide broad collections of projects. While exploring, keep your eyes open for plans that emphasize durable construction, repeatable workflows, and finish-ready details. The combination of solid planning, quality materials, and careful finish work is what elevates carpentry designs from simple projects to enduring furniture and fixtures that withstand daily use.
To recap, the key steps for mastering carpentry designs are: clarify function and style, translate into a workable plan, choose appropriate joinery and hardware, draft an accurate cut list, perform a careful dry-fit, and complete the project with a durable finish. By integrating practical guides and trusted resources into your learning path, you’ll build a portfolio of carpentry designs that reflect growing skill, consistent quality, and a personal design language that stands the test of time.
Images and inspiration
For visual inspiration, look for examples that show the relationship between design intention and finished details. High-quality images of well-crafted pieces reveal how joints are executed, how grain is matched, and how surfaces respond to light. If you’re documenting your own work, photograph your process from sketch to final finish to reinforce your understanding of carpentry designs and to share your progress with fellow makers.
Conclusion
Carpentry designs are more than aesthetics; they’re a blueprint for how a piece will perform, feel, and endure. By combining thoughtful planning, a solid grasp of joinery, and attention to material and finish, you can elevate your woodworking from hobby to craft. Use the internal resources to sharpen your planning and safety practices, and consider expanding your library with curated plans from trusted sources. If you’re curious about a broad collection of ready-to-build designs, Ted’s Woodworking offers a catalog that you can evaluate for alignment with your goals. Remember, every successful project starts with a clear plan, a well-equipped shop, and a commitment to steady practice. Your carpentry designs will improve with each project, and soon you’ll be able to translate inspiration into durable, beautiful furniture and fixtures that you and others will enjoy for years to come.