Carpentry equipment list: your practical roadmap for woodworking success
The phrase carpentry equipment list describes more than a shopping list. It is a strategic map that guides beginners, hobbyists, and seasoned woodworkers toward focused purchases, better project outcomes, and a safer, more organized shop. When you approach carpentry with a well-planned list, you reduce decision fatigue and can allocate budget toward tools that truly move your projects forward. This article breaks down the essential categories, explains how to prioritize gear, and shows how to integrate trusted resources such as Ted’s Woodworking for project ideas and plans.
Note on resources
For beginners looking to pair safety with skills, you might explore a comprehensive guide to woodworking crafts for beginners master simple projects safety and Ted’s woodworking here. It highlights foundational projects and safety practices that align with a practical carpentry equipment list.
Core categories of the carpentry equipment list
The goal is to assemble a practical, scalable list that supports a wide range of projects, from simple shelves to more complex cabinetry. Start with the essentials and expand as your space, budget, and ambitions grow.
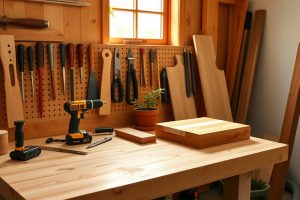
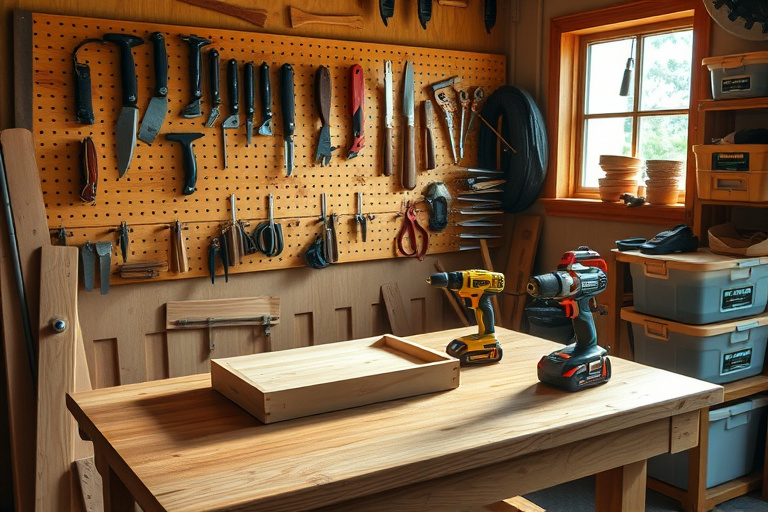
Hand tools
- Measuring tools: a reliable tape measure, a steel ruler, and a combination square
- Marking and layout: pencils, marking knife, marking gauge
- Cutting with hand tools: a sharp handsaw and a backsaw for precision
- A mallet and chisels for precise joinery and clean mortises
Measuring and layout
Accurate measurement and transfer of marks are the backbone of good carpentry. A solid tape measure (ideally 25 feet or longer), a steel ruler, and a dependable combo square help ensure lines stay true. A marking gauge or marking knife offers precise layout for joints, especially when building drawers, boxes, or cabinetry. Consistent markings save time and reduce errors on every cut.
Cutting tools
Quality saws make a real difference in accuracy and finish. A sharp handsaw and a compact coping saw handle curves and crosscuts with ease. For larger work, a backsaw paired with a mitre box keeps angles precise. While power cutting tools speed up work, prioritize blade quality, correct tooth counts, and proper support to avoid tear-out and kickback.
Power tools
Power tools unlock speed and consistency, especially on larger or repetitive projects. A cordless drill/driver is the starting point, followed by a circular saw for straight cuts and a jigsaw for curves. As you mature in woodworking, a miter saw helps with precise angle cuts, and a router expands your joinery and edge details. The aim is to match tools to the projects on your carpentry equipment list, focusing on ergonomics, battery life, and dust collection compatibility to maintain a comfortable, safe shop.
Fasteners and hardware
Wood glue, nails, screws, washers, and small hardware components form the glue that holds projects together. Keep a range of sizes on hand, plus a selection of clamps—from quick-release to bar clamps—for secure assemblies. Wood filler helps blend joints and repairs. The right fasteners complement your carpentry equipment list by ensuring durable, clean results in all kinds of build work.
Workholding and benches
A sturdy, well-designed workbench anchors every project. Benches with vises, bench dogs, and a solid top provide a stable surface for layout, sawing, planing, and assembly. If space is tight, look for compact, versatile clamp systems and portable work surfaces. Good workholding reduces fatigue and raises accuracy across all carpentry projects.
Safety gear
Safety is central to any carpentry equipment list. Invest in eye protection, hearing protection, dust masks or respirators, and cut-resistant gloves as appropriate. A push stick or push block is essential for table saw and jointer work to keep fingers away from blades. Proper lighting and clean air contribute to safer, more precise work over the long term.
Maintenance and sharpening
Sharp, well-maintained tools deliver cleaner cuts and longer life. Include a sharpening setup, honing oil, and quality stones to keep blades and chisels in top shape. Store blades properly, label them, and inspect power cords and batteries regularly. Routine maintenance between projects improves cut quality and reduces the risk of accidents due to dull edges.
Shop setup and dust management
Even a modest dust collection approach can dramatically improve air quality and tool performance. A simple shop vac, dust ports on power tools, and good ventilation help keep the workspace comfortable and reduce debris interference with measurements and assembly. A clean, organized shop supports a more efficient carpentry equipment list in practice.
How to build your carpentry equipment list
Think of the carpentry equipment list as a living guide rather than a fixed inventory. Begin with the basics and grow methodically as you gain space, confidence, and project scope. Here is a practical framework you can use to start building your list:
- Identify the projects you want to tackle in the near term and list the tools each project requires.
- Group tools by function: measuring, cutting, shaping, joining, finishing.
- Set a budget floor for essentials and a plan for incremental upgrades as needed.
- Evaluate your space. For tight areas, consider multi-function tools and space-saving configurations.
- Look for bundles and starter kits that provide good value without sacrificing quality or support.
As you assemble your carpentry equipment list, consider consulting pattern-driven ideas to help you plan more efficiently. For ideas and patterns that can inform your approach, patterns for wood projects is a valuable resource: patterns for wood projects.
Beginner vs pro setups
Beginners benefit from a lean starting kit that covers safety, measurement, and basic assembly. A pro setup emphasizes efficiency, durability, and capability for larger or more frequent tasks. The carpentry equipment list can be adapted for both paths: start with the essentials, then layer in upgrades that address specific project goals. A balanced list avoids redundancy while ensuring you can complete typical carpentry tasks without constant tool-switching. Over time, you may add bench-mounted tools, upgraded blades, and more advanced joinery options as your skills grow.
Practical project planning using the carpentry equipment list
Project planning is where the carpentry equipment list shines. Treat a project as a sequence of operations: measure and mark, cut, shape, join, and finish. Align each operation with the right tool to minimize mistakes and rework. For example, a small joinery project such as a jewelry box or a bookshelf requires precise measurement, accurate cutting, secure clamping, and clean finishing. The right combination of measuring tools, accurate cutting equipment, and reliable clamps makes a significant difference in outcomes.
To broaden your ideas and access curated plans, some woodworkers explore Ted’s Woodworking, a resource offering a wide library of project plans. You can explore the platform here: Ted’s Woodworking.
Leveraging community and resources
Getting feedback from the woodworking community accelerates learning and helps you spot gaps in your carpentry equipment list. Two practical resources include beginner-focused safety content and pattern-driven project guides. For a beginner-friendly safety and project-oriented guide, see the resource linked earlier. For patterns and practical success, explore the patterns for wood projects hub mentioned above.
Conclusion
Crafting a thoughtful carpentry equipment list is a strategic investment in your woodworking journey. It helps you work more efficiently, stay organized, and produce better results. Start with the essentials—tools for measurement, cutting, joining, and safety—and gradually expand to power tools and more advanced joinery as your confidence grows. Maintain what you own, upgrade thoughtfully, and draw inspiration from reliable resources such as Ted’s Woodworking to keep your project ideas flowing. A well-considered carpentry equipment list evolves with your skills and the projects you choose to tackle.