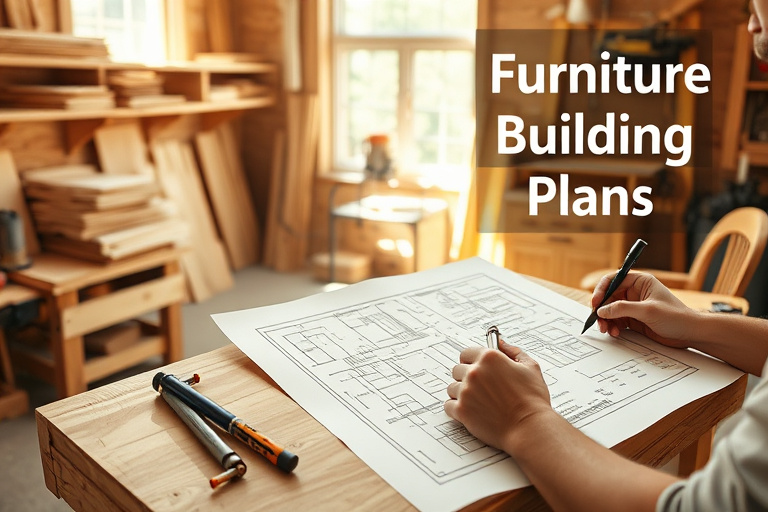
Introduction to furniture building plans
Embarking on a DIY furniture journey starts with something deceptively simple: a solid set of furniture building plans. Whether you dream of a rustic farmhouse table, a sleek mid-century bookshelf, or a compact bedside cabinet, the right plans are your roadmap. The idea of furniture building plans extends beyond a few sketches; it’s a precise blueprint that translates your vision into measurable steps, materials, and finish choices. When you understand what these plans include and how to read them, you dramatically increase your odds of finishing on time, within budget, and with a result you’re proud to display in your home.
As you explore, you’ll encounter a range of terminology and formats—from traditional paper drawings to PDF cut lists and 3D renderings. Throughout this guide, you’ll see how to translate plans into action, why certain details matter, and how to use curated resources to accelerate your progress. If you’re interested in expanding your catalog of plans with a trusted library, consider a resource like Ted’s Woodworking, which provides downloadable plans that can be integrated with your existing collection and adapted to your space.
Understanding the core components of a furniture building plan
Great furniture building plans aren’t a mystery; they’re a structured toolkit. Knowing what to expect helps you evaluate whether a plan will meet your needs and how to adjust it to fit your workshop.
Cut list, materials list, and hardware
A reliable plan includes an itemized cut list that translates the design into the actual pieces you’ll mill. It’s paired with a materials list that specifies wood types, plywood sheets, veneer, and other substrates. Hardware requirements—screws, nails, brackets, hinges, drawer slides—are also itemized. When you have clear lists, you can optimize purchases to minimize waste, which is a core benefit of following furniture building plans carefully.
Drawings, dimensions, and scale
Plans typically feature multiple views: top, side, front, and sometimes isometric 3D views. Each view communicates exact dimensions, angles, and tolerances. Scale matters: a 1:1 scale drawing ensures you cut at the right sizes. Good plans also note tolerances (the permissible deviations) to keep joints snug and surfaces flat.
Assembly steps and diagrams
Clear assembly instructions reduce guesswork. Step-by-step diagrams, fastener placement, and recommended sequence help you avoid mistakes that lead to misaligned panels or wobbly furniture. If a plan includes troubleshooting tips, even better—these notes can save time and material when you encounter common hiccups during assembly.
Choosing the right furniture building plans for your space and skill level
Not every plan is a perfect fit for every space or craftsman. Making a thoughtful choice upfront saves frustration and helps you enjoy the process more.
Assessing your workshop and toolset
Start by listing the tools you own and those you’re willing to invest in. Plans often specify required tools for safe, accurate work—things like a reliable saw, square, clamps, a drill/driver, and a finish sander. If you’re working with a compact space, you might gravitate toward plans for smaller pieces or modular furniture that can be assembled in stages.
Aligning plans with your budget and materials sourcing
Budgeting is easier when you can price out the materials from the plan’s cut list. Look for projects that maximize the use of common hardwoods and plywood panels. If a plan calls for exotic or hard-to-find materials, you might prefer a more accessible version or adapt it with substitutions while preserving joinery quality.
Planning for risk: margins, tolerances, and finishing
Every project carries risk—grain direction, warping, or finish adhesion issues. The best furniture building plans address these risks with practical margins, explicit finishing steps, and recommended adhesives and sealants that suit your environment. By planning ahead for tolerances and finish paths, you’ll achieve a professional look even when you’re still honing your craft.
From plan to project: essential tools and setup
Turning a plan into a finished piece starts with your workspace and your tools. A well-organized shop reduces waste and increases safety, which is especially important for beginners and seasoned hobbyists alike.
Workbench setup and safety basics
Your workbench is the anchor of your project. A stable surface with ample clamping options can transform how accurately you cut and assemble pieces. Implement simple safety habits—eye protection, hearing protection in noisy environments, and a dust collection plan. A tidy workspace also helps you spot misalignment early, before glue dries or parts are permanently joined.
Measuring, marking, and cutting with precision
Precision starts with good measuring habits. Use a sharp pencil, a reliable carpenter’s square, a marking gauge for consistent lines, and a high-quality saw with controlled, clean cuts. When you follow the plan’s cut list and dimension notes, you minimize material waste and ensure that joints fit together cleanly.
Integrating Ted’s Woodworking into your plan arsenal
While any solid set of furniture building plans can guide you, having a curated library of additional plans can accelerate your progress. Ted’s Woodworking is a widely referenced resource that provides downloadable plans spanning furniture, cabinetry, and decorative pieces. You can explore a broad range of styles and complexity levels, which complements your existing plan set. For those who want to expand their library, consider checking out Ted’s Woodworking, accessible here: Ted’s Woodworking.
When selecting plans, align them with your goals: are you building to match a specific space, or experimenting with different profiles to sharpen your skills? A carefully chosen plan can help you learn joinery techniques, finish applications, and project management—without overwhelming you with options you’re not ready to tackle yet.
For those who are just starting, you’ll find value in combining Ted’s Woodworking with the practical guidance found in beginner resources. If you’re exploring a path toward confident, self-reliant woodworking, you may also want to explore the beginner resources linked below to build a solid foundation before tackling more ambitious furniture building plans.
Practical project ideas to practice furniture building plans
Hands-on projects are the best teachers. Start with simple builds that reinforce measurement accuracy, joinery basics, and finishing technique—then progressively advance to more complex pieces.
Beginner-friendly projects that build confidence
Consider small pieces with straightforward joinery, such as a compact end table, a simple bookcase, or a blanket chest. These projects allow you to practice the essential steps of reading plans, cutting parts, and assembling with basic joinery like butt joints or dowels. If you need a gentle onboarding, explore ready-to-build options that emphasize clean lines and forgiving assembly challenges.
As you evolve, you can broaden your plan library with more ambitious pieces, always returning to the core skills each project reinforces: precise measuring, snug joints, and even color-finishing consistency.
Intermediate pieces that teach joinery and finishing
Mid-level builds introduce stronger joints, such as doweled, mortise-and-tenon, or pocket-hole connections. You’ll also encounter more varied finishes—including staining, dyeing, and clear coats—that require careful surface preparation. These projects teach you how different wood species react to finishes and how to achieve a cohesive, durable look across a piece.
Scaling plans for custom spaces
Once you’re comfortable, you can customize plans to fit unique dimensions. This may involve adjusting the cabinet width to match a particular wall, altering leg heights for a specific chair, or resizing a table to accommodate your dining space. Start by proportionally scaling each piece and validating the plan’s joinery integrity after every adjustment.
Leveraging additional learning resources
Supplementing your plans with targeted learning accelerates progress. Short, practical projects help you build momentum, while deeper guides provide context for material selection, finishing, and assembly techniques.
Quick-start projects and skill-building resources
Look for concise projects that reinforce spacing, alignment, and edge treatment. Short projects can be completed in a weekend, offering quick wins and a boost of motivation while you tackle larger furniture building plans.
For beginners and those rebuilding after a break, the following resources can help you develop confidence with the basics and then graduate to more complex projects. You can find a helpful summary here: easy, quick wood projects.
The ultimate starter guide to build with confidence
If you’re starting from scratch, a guided path can reduce overwhelm. The ultimate starter guide to build with confidence walks you through essential tools, safety, and foundational projects that pair well with furniture building plans. For a focused primer, you can read more at this beginner resource: the ultimate starter guide to build with confidence.
Easy, quick wood projects
When you need fast wins to stay motivated, begin with easy, quick wood projects that align with your plans. These projects reinforce good habits and give you practical experience with measurements, cuts, and assembly. See the quick-start ideas here: easy, quick wood projects.
Pro tips to maximize accuracy, finish, and longevity
Even the best plans can fail if execution isn’t consistent. Here are proven strategies to help you get results that look professional and stand the test of time.
Measuring tricks and tool calibration
Invest a little time calibrating your measuring tools and test-cutting small scrap pieces before you begin with full sheets. Use a straightedge to verify flat panels and ensure that edges are square to avoid misalignment in the final assembly.
Finishing strategies for durable, attractive results
A good finish starts with surface preparation: clean, dry, and smooth. Sand progressively through grits, apply a conditioning sealer if necessary, and build your finish in controlled layers. The right finish protects the wood while enhancing the grain, depth, and color you intended from the plan.
Common mistakes and how to avoid them
Rushing assembly or skipping dry-fit sessions are common mistakes. Always dry-fit components to confirm fit before glue-up, and be mindful of building orientation and grain directions to avoid warping or misaligned panels once the finish is applied.
Conclusion: making furniture building plans work for you
Furniture building plans are more than just drawings; they’re your roadmap to turning wood into something functional and beautiful. By understanding what makes a plan effective, choosing the right plans for your space and goals, and incorporating practical learning resources, you set yourself up for consistent progress and rewarding results. Remember to leverage a diverse plan library, including a trusted resource like Ted’s Woodworking, and to enrich your toolkit with targeted learning from the recommended internal resources. With patience, practice, and a methodical approach to reading and executing furniture building plans, you’ll soon craft your dream pieces with confidence and pride.