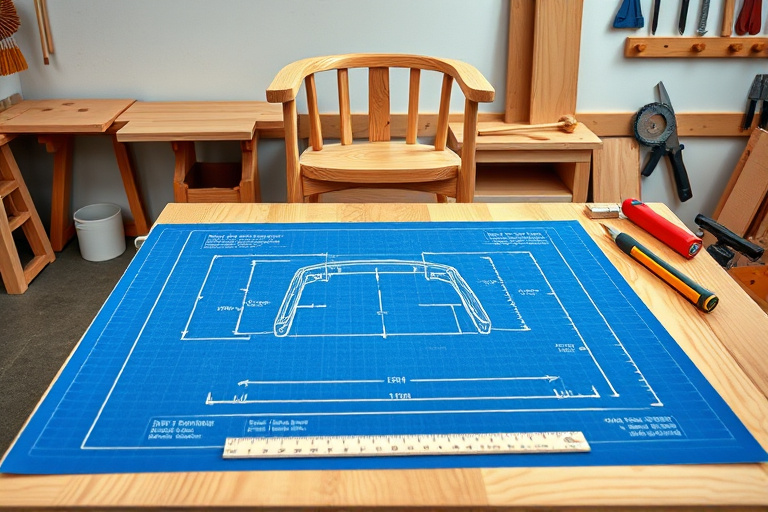
If you’re dreaming of a handcrafted chair that fits your space, comfort preferences, and woodworking skill level, a wood chair blueprint is your compass. A blueprint is more than a simple sketch: it’s a complete plan that translates your design into actionable measurements, material choices, and joinery details. In this guide, you’ll learn how to read, adapt, and implement a wood chair blueprint so you can move from concept to a sturdy, beautiful seat that lasts for years.
Before you pick up a saw, it helps to know what a wood chair blueprint typically contains. You’ll see a cut list with exact timber dimensions, a seat profile that matches ergonomic considerations, leg and frame geometry that ensures stability, and notes on joinery methods. The result is a repeatable plan you can follow with confidence, or adapt if you want to tweak the chair’s height, angle, or aesthetics. If you’re new to woodworking, consider starting with proven blueprints and then gradually customizing them to your own taste. woodworking tool-kit essentials can help you assemble the right set of tools to execute these plans smoothly.
What is a wood chair blueprint and how does it guide DIY projects?
A wood chair blueprint is a detailed map for constructing a chair. It goes beyond a rough sketch by including explicit measurements (inches or millimeters), angles, grain orientation notes, and joinery specifications. With a solid blueprint, you’ll know precisely how to shape the seat for comfort, where to place the legs for balance, and which joints will hold up to daily use. The blueprint acts as a contract between your design vision and the workshop reality, reducing miscuts and wasted material. If you’d like more practical guidance and examples, this resource collection can be a great next step: fun woodworking ideas, creative projects, safety tips and Ted’s woodworking resources.
Core components of a quality wood chair blueprint
A reliable blueprint covers several core components to ensure the final chair is ergonomic, durable, and buildable. Here are the elements you’ll encounter and how to use them in your design process.
Seat design and ergonomics
The seat is the heart of comfort. In a wood chair blueprint, you’ll see seat width, depth, and curvature notes. Some chairs use a flat seat, while others feature a slight camber or saddle shape that follows the user’s thighs. Ergonomic considerations include seat height (typically around 17 to 19 inches for dining chairs, though this varies by user), edge radius, and the slope of the backrest top rail. A well-drawn seat profile reduces pressure points and promotes long-term comfort, especially for extended seating sessions.
Frame geometry and leg placement
Frame geometry determines stability and weight distribution. The blueprint should specify leg angles, foot width, and brace placement. For a sturdy chair, designers often use a slight outward toe on back legs for counteracting forward tipping, and a crossbrace or a front rail to resist racking. Pay attention to grain orientation in the seat and backrest to maximize strength where it matters most. If you’re unsure about geometry, start with a proven frame style and adjust later after test fittings.
Joinery, fasteners, and material selection
Joinery is the secret to durability, especially for a wooden chair that will see regular use. The blueprint should specify joinery types (dowel joints, mortise-and-tenon, or pocket-hole systems) and the exact locations where they’re used. Material choice matters too; consider hardwoods like beech, oak, or maple for longevity, and choose stock with straight grain and minimal defects. The plan may also include a recommended finish and hardware choices that complement the wood and style you’re aiming for.
From blueprint to bench: step-by-step guide to building a chair
Turning a blueprint into a finished chair involves a sequence of precise steps. Below is a practical workflow that mirrors common blueprint-driven projects. Adapt the steps to your specific plan and available tools.
Planning, measurements, and cut lists
Begin by reviewing the blueprint thoroughly. Translate the measurements into a cut list with quantities for each part: seat, backrest, legs, and any braces. Double-check your material stock for board width, thickness, and grain direction. Precise marking and a few test cuts on scrap wood can save you from costly mistakes. Keep your work area organized and labeled so you can easily track parts as you proceed.
Cutting, shaping, and assembling
Cut pieces to the specified dimensions using a sharp, well-maintained blade. Use jigs to ensure consistent angles, especially for legs and back slats. Sand edges progressively to avoid tear-out, starting with coarser grits and finishing with a fine polish. Assemble dry first to check fit, then apply glue to joints and clamp until fully cured. If your blueprint calls for mortise-and-tenon joints, ensure precise mortises and tenons for a snug, strong fit. Remember to work slowly and test fit frequently to maintain alignment throughout the process.
Finishing, maintenance, and care
Finishing not only protects the wood but also defines the chair’s look. A typical finish sequence includes conditioning, staining or tinted oils, and a protective topcoat such as polyurethane or lacquer. Lightly sand between coats for a smooth surface. After assembly, inspect for any gaps or misalignments and address them before final finish. Proper maintenance—occasional dusting, avoiding prolonged exposure to sunlight, and periodic reapplication of a protective finish—will extend the chair’s life and keep its lines crisp for years to come.
Tools, safety tips, and practical resources
Having the right tools is essential for executing a wood chair blueprint. A well-rounded tool kit helps you translate a plan into precise cuts and stable joins. Start with reliable basics and expand as you gain experience. Always prioritize safety—eye protection, hearing protection, dust collection, and careful handling of sharp blades are non-negotiable facets of any project.
Essential tool kit and safety basics
To tackle most wooden chair blueprints, you’ll want a solid set of hand tools and power tools: a quality saw (handsaw or miter saw), a drill/driver, a router for shaping edges, chisels, a square and marking gauge for layout, clamps for assembly, and a sanding system that can handle detailed contours. For an essential starter kit and project ideas, you can explore a curated list here: woodworking tool-kit essentials.
Recommended references and additional ideas
As you grow more confident, diversify your approach by exploring additional ideas and safety tips from trusted woodworking resources. A thoughtful collection of projects and safety tips can broaden your technique and help you apply the wood chair blueprint to other furniture. fun woodworking ideas, creative projects, safety tips and Ted’s woodworking resources is a good starting point for ideas and practical guidance you can reuse across furniture builds.
Leveraging external resources and affiliate opportunities
Beyond the core blueprint, there are countless ways to expand your library of plans and learn from seasoned woodworkers. If you’re looking for more comprehensive blueprints that cover a wide range of furniture styles, Ted’s Woodworking offers an extensive collection of plans and variations for chairs and other projects. Access to these detailed plans is available through an affiliate partner link: Ted’s Woodworking. The catalog often includes multiple chair styles—so you can compare dimensions, joinery approaches, and finishing techniques without starting from scratch.
Using trusted guides like woodworking tool-kit essentials
As you assemble your toolkit and refine your blueprint-reading skills, refer back to practical guides like the woodworking tool-kit essentials page mentioned earlier. Keeping a well-stocked workshop accelerates the building process and reduces frustration when a cut doesn’t fit as planned. For a broader look at creative projects and safety resources, the curated collection linked above can be a valuable companion as you advance from a single chair to a small furniture project line.
Is Ted’s Woodworking worth it? A balanced look
Ted’s Woodworking is marketed as a vast library of plans and design ideas. For woodworkers who enjoy exploring multiple chair silhouettes, backrest angles, and joinery variants, having a large blueprint library can speed up concept generation and prototyping. If you’re evaluating value, consider the following factors:
- Time savings: A well-organized plan base helps you skip trial-and-error stages and jump straight into production-ready layouts.
- Variety and experimentation: With different chair styles at your fingertips, you can compare ergonomics and aesthetics quickly.
- Learning potential: Examining how pros tackle joinery, grain orientation, and finishing can elevate your own projects.
Whether Ted’s Woodworking is a fit for you depends on your goals, your current skill level, and how you prefer to source reference plans. If you’d like to explore a broad library, you can check it out via the affiliate link above. Remember to balance this with hands-on practice and small, iterative projects to build confidence with your wood chair blueprint and related builds.
Conclusion: taking the next steps with confidence
By embracing a wood chair blueprint, you establish a reliable roadmap from concept to finished product. A clear plan helps you optimize seat ergonomics, ensure frame stability, and select joinery that endures. Start with a proven blueprint, adapt it to your space and audience, and expand your builder’s toolkit with the right resources. Whether you’re refining your craft with the two internal references above or exploring a comprehensive library like Ted’s Woodworking through the affiliate link, the key is to translate design into repeatable, enjoyable practice. With patience, precise measurement, and careful craftsmanship, your custom chair can become a signature piece in your home workshop.