When you hear the phrase all carpentry tools, you might picture a crowded workbench, the scent of fresh-cut wood, and the satisfying clack of a well-tuned chisel. For both beginners and seasoned woodworkers, having the right set of tools is not just about finishing a project; it’s about improving accuracy, safety, and efficiency. The goal of this guide is to help you understand the core categories of all carpentry tools, assemble a toolkit that fits your goals, and leverage practical resources to grow your skills and even your side income. Whether you’re planning simple shelves, a full-frame door, or custom furniture, a thoughtfully chosen collection of tools can make a tangible difference in every cut, layout, and joint.
Core categories of all carpentry tools
Hand tools
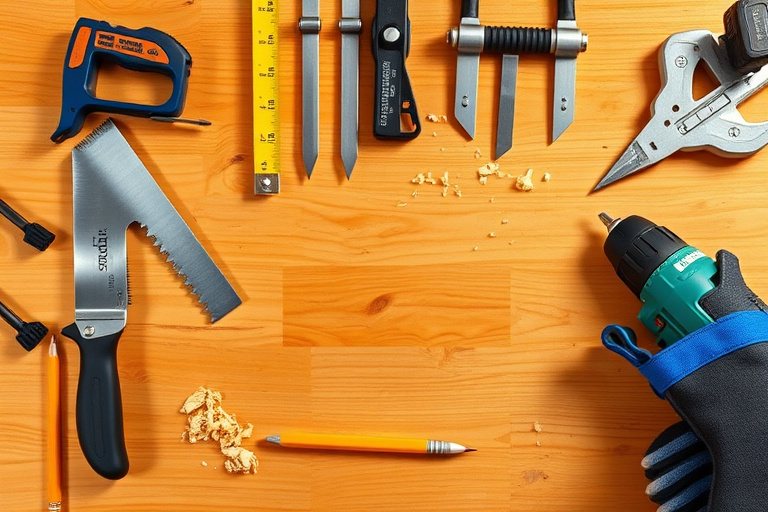
Hand tools form the backbone of any carpentry toolkit. A few reliable staples can cover a surprising number of tasks. Start with a sharp square, a reliable claw hammer, a set of chisels, a brace and bit, and a hand saw that feels balanced in your hand. These tools empower you to check square and plumb, pare wood to fit, and shape edges with precision. For many projects, quality hand tools offer a tactile feedback that is hard to replicate with powered options. Remember: the most important feature is control—tools should feel balanced and comfortable in your grip, reducing fatigue during longer sessions.
Measuring and layout tools
Precise measurements are the difference between a snug fit and a project that doesn’t come together. Tape measures, marking gauges, marking knives, a setup square, and a marking knife or pencil that marks cleanly are essential. A good layout tool setup helps you visualize cuts before you make them, reducing waste and rework. Invest in a dependable ruler or folding rule, and keep your marks crisp with high-quality pencils or mechanical marking tools. The discipline of accurate measurement pays off in every corner joint and each assembled panel.
Cutting and shaping tools
Cutting tools drive most of the work. A sharp handsaw (rim or crosscut), a backsaw for fine joinery, and a coping saw for curved cuts cover a wide range of tasks. For shaping, rasps, wood files, and a block plane help you achieve smooth surfaces and tight joints. When you keep blades sharp and aligned, you’ll notice cleaner edges and dramatically reduced tear-out. If you’re leaning into decorative or joinery-heavy projects, a good selection of rasps and planes can be a game changer for profile work and smoothing difficult curves.
Fastening and joinery tools
Joining pieces securely is the heart of carpentry. A reliable screwdriver set, a hand drill or brace, a variety of drill bits, and an awl support many common tasks. For joinery, invest in chisels that hold a sharp edge, a marking gauge for accurate mortises, and a small mallet to avoid marring wood. Fastening is not just about driving screws; it’s about choosing the right fastener for the wood type and joint. Consider a quality set of screwdrivers, a countersink bit, and a few clamps to hold pieces in place while glue dries. Clamps are often underappreciated, but they are the stabilizers that let you produce professional results even on a home shop budget.
Power tools
Power tools extend your capabilities dramatically and can transform how quickly you complete a project. A compact drill/driver, a cordless impact driver, a circular saw with a straight edge guide, a random-orbit sander, and a miter saw are often cited as the core power tools for many hobbyists and pros. If space and budget permit, a router can unlock architectural details and dado joints, while a compact palm sander keeps surfaces immaculate. The key with power tools is to prioritize ergonomics and safety: choose well-balanced tools with comfortable grips, good dust collection, and safety features that align with your workspace setup.
Building a reliable toolkit for different projects
For beginners
New woodworkers should focus on reliability and scalability. Start with a quality hammer, a dependable measuring setup, a single saw that fits your grip well, a couple of chisels, a basic drill/driver, and a few clamps. You’ll quickly learn what you reach for most and can gradually expand your collection as you tackle more complex projects. The goal is to create a practical, repeatable workflow that builds confidence with each project. For more structured guidance on starting points and plan-based practice, explore the general concept of blueprints and projects from reputable resources.
For intermediate projects
As you progress, your toolkit should adapt to more precise cuts, more joints, and cleaner finishes. Consider adding a jointer or plane to refine flat surfaces, a table or miter saw for accurate cross-cutting, and a palm router for edge profiles. A stronger clamp setup and dust collection will help maintain a clean, safe workspace as projects become larger and more complex. At this stage, you’ll also start refining your technique with different woods and finishes, which often means adding tools that handle specific tasks more efficiently.
Planning, learning, and scalable projects
Free resources for blueprints and plans (internal link)
Every successful woodworking journey starts with a plan. To help you find credible, free wood building plans and an ultimate guide to discovering and profiting from DIY blueprints, check out a comprehensive resource that compiles actionable blueprint strategies and practical templates. This kind of guide helps you understand how to pick projects that match your skill level, your available space, and your budget. It’s not just about following plans; it’s about learning how to adapt blueprints for your workspace and your ambitions. free wood building plans and ultimate guide to DIY blueprints can be a solid starting point for mapping your first 3–5 projects and building momentum without overspending on equipment you don’t yet need.
Turning woodworking into profits (internal link)
If you’re exploring the potential of making carpentry a profitable hobby, there are practical steps you can take to monetize your skills. From small furniture pieces to bespoke repair services or home décor items, the market often rewards craftsmanship and reliability. A thoughtful approach to pricing, marketing, and product selection can turn your hobby into revenue. A detailed guide on carpentry projects that sell can help you identify in-demand items, assess the competition, and tailor your toolkit to produce profitable items efficiently. carpentry projects that sell offers insights that can complement your hands-on practice and planning sessions as you grow your workshop demand.
Premium resources and optional boosts (affiliate)
Ted’s Woodworking as a comprehensive library (affiliate link)
Many woodworkers glance at premium project libraries to supplement their own designs and learn new joinery, cutting, and finishing techniques. One popular option that frequently comes up in discussions about expansive plans and project ideas is Ted’s Woodworking. This resource is presented as a large collection of woodworking plans, tutorials, and patterns that can inspire your next build and provide a structured curriculum for building skills. If you’re curious about expanding your project library and exploring a broad spectrum of techniques, you can explore this resource via the official affiliate link: Ted’s Woodworking. Remember, investing in a structured plan set can accelerate learning, especially when you’re tackling more ambitious projects or aiming to reproduce professional-level finishes consistently.
Practical tips: tool care, safety, and maintenance
All carpentry tools perform best when well cared for. Here are a few practical tips to help you maintain accuracy and extend the life of your gear:
- Keep blades sharp and true. Dull blades force you to push harder, increasing the risk of slips and imperfect cuts.
- Clean and dry tools after use to prevent rust, especially in damp environments.
- Store tools in a dedicated rack or cabinet to protect edges and avoid misplacement.
- Check alignment on power tools regularly, and follow safety procedures like wearing eye protection and using clamps to secure workpieces.
- Develop a simple maintenance routine: oil moving parts, replace worn bits, and recalibrate gauges as needed.
Conclusion
Whether you’re a hobbyist, a DIY enthusiast, or aiming to transition into a small business, mastering all carpentry tools is a journey that blends practical skill with thoughtful planning. A well-rounded toolkit supports accurate measurements, clean cuts, solid joints, and safe operation—each a building block toward higher-quality projects and increased confidence. Use reputable resources to educate yourself, leverage both free and premium plans, and consider curated libraries to broaden your repertoire. By combining the right tools with a strategic learning path, you’ll be able to tackle a wide range of projects—from simple shelves to refined furniture—while maintaining a high standard of craftsmanship. If you’re ready to explore a broader design library and structured projects, the affiliate option noted above may offer additional inspiration and practical guidance to complement your hands-on practice. And remember: the best way to grow is to start with solid fundamentals, then build gradually, learning from each cut, each joint, and each finished piece.


