What are Adirondack plans and why they matter
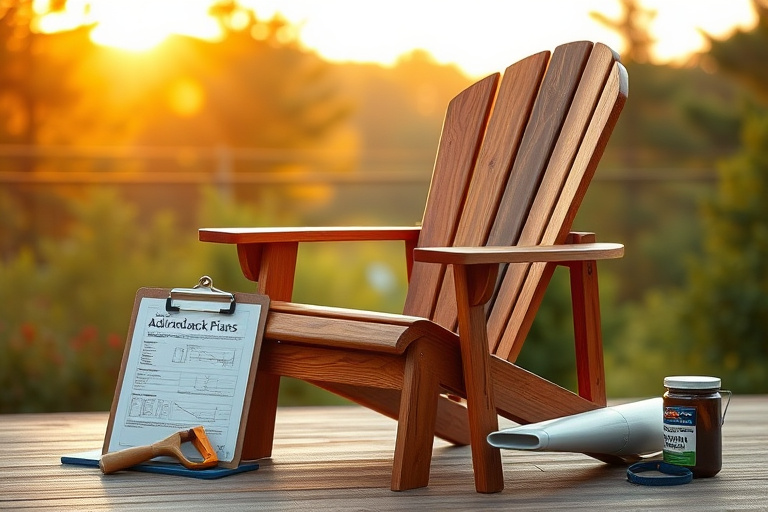
Adirondack plans are the blueprint for building the iconic Adirondack chair—an outdoor favorite known for its wide armrests, slanted back, and comfortable seat. If you’re considering a weekend woodworking project, understanding how Adirondack plans fit together helps you create a durable chair that can withstand sun, rain, and season after season of use. The exact measurements and cutting diagrams in a good set of Adirondack plans prevent common build mistakes, save time, and ensure your chair ends up both sturdy and comfortable.
When you search for adirondack plans, look for designs that match your space, climate, and skill level. Some plans provide a simple, space-saving version tailored for small decks, while others offer reinforced joints, different wood species, and optional cushions. The keyword adirondack plans should guide you to resources that include a complete cut list, step-by-step assembly, and a clear material schedule. With the right plan, you’ll move from rough sketches to a finished chair that’s inviting, functional, and built to last.
Choosing the right Adirondack plan for your space and skill
Choosing the right Adirondack plan starts with a realistic assessment of your workspace and tools. If you’re new to woodworking, you’ll want a plan that breaks down every cut and assembly step, with a printable cut list and a clear hardware count. For seasoned woodworkers, you may prefer premium plans that offer alternative wood species, more robust joinery, and enhanced weatherproofing options. Regardless of skill level, the best Adirondack plans will cover a few core elements: seat height and depth that match ergonomic comfort, backrest angle that supports long conversations outdoors, and a robust leg and armrest design that can handle frequent use.
Look for plans that include material lists, tool requirements, and a detailed step-by-step process. Some plans also offer printable diagrams and exploded views that make it easy to visualise each assembly stage. If you’re aiming to turn this into a repeatable project library, a scalable plan set that includes multiple chair variations can be a real time-saver. To maximize learning while you build, consider pairing your Adirondack plans with related woodworking ideas and tutorials that bolster your understanding of joinery, wood selection, and finish techniques. For inspiration and practical tips, you can explore a couple of curated resources we’ve found particularly helpful: Mastering Fun DIY Woodworking Projects and Woodworking Projects That Sell: The Practical Blueprint to Turn Craft into Profit.
Materials, tools, and cut lists to look for
Your Adirondack plan should specify the type of wood best suited for outdoor exposure (cedar and teak are popular for their rot resistance, while treated pine can be a budget-friendly option). It should also include a full cut list with quantities for each component: seat slats, back slats, arms, rails, legs, and supports. Pay attention to recommended fasteners—stainless steel or galvanized hardware are preferred for outdoor use. The plan may also note optional add-ons such as a contoured seat, a cushion path, or a rocking feature. If you’re building several chairs, a scalable plan set can help you standardize joints and hardware across projects, reducing waste and making assembly faster.
Important tools typically include a saw (circular or miter), a drill/driver, clamps, a square, measuring tape, and sandpaper or a power sander. A simple jigsaw can be handy for curved back slats, while a router might be used to achieve smoother edges. If you’re new to woodworking, opting for a plan that provides a printable, step-by-step cut list and a clear exploded view will make the project much more approachable. The goal is a straightforward workflow that minimizes guesswork and maximizes accuracy, so you finish with a chair that’s both comfortable and durable for years of outdoor use.
Step-by-step overview for building Adirondack plans
Preparing your workspace and safety considerations
Before you start cutting, set up a clean, well-lit workspace with ample ventilation if you’re finishing on-site. Safety glasses, hearing protection, and a dust mask are essential, especially during cutting and sanding. Lay out your plan on a worktable or use a tablet stand to reference it as you go. A clear, organized workspace reduces mistakes and keeps you moving smoothly from one step to the next.
Cutting, assembling, and fastening details
Adirondack plans typically guide you through a sequence: cut the seat and back slats to their specified lengths, cut the arms with the correct curvature, and prepare the rails and legs. Dry-fit the pieces first to ensure joints align, then apply glue to the joints and clamp until dry. Use a biscuit joiner or dowels if your plan calls for additional strength at the seat and back joints. Finish each connection with stainless steel screws or bolts, tapered countersinks, and proper sealing. Sand thoroughly to a smooth finish before applying stain or sealant. The step-by-step approach in a reliable Adirondack plan helps you maintain consistent angles and proportions, resulting in a chair that looks balanced and feels comfortable from the first sit.
Finishing, weatherproofing, and long-term care
The finishing stage is where Adirondack plans shine by guiding you toward a durable, weather-resistant result. Outdoor furniture benefits from a protective finish that resists UV light, moisture, and temperature changes. You’ll typically have a choice between a penetrating stain, a semi-transparent exterior stain, or a low-sheen finish that preserves the wood’s natural character. If you live in a wet climate, consider applying a sealant or multiple coats of protective finish to extend the chair’s life. Sand between coats to maintain a smooth surface and ensure even absorption of the next layer.
Weatherproofing should be part of your Adirondack plans from the start. Some plans recommend applying sealant to the wood before assembly to reduce glue absorption, while others advise finishing after assembly to seal joints and edges more effectively. Whichever method you choose, be consistent across all chairs if you’re building a small fleet for a deck or patio. The right finish not only enhances aesthetics but also protects your investment from sun, rain, and seasonal wear.
Learning resources and practical tips to boost success
Expanding your knowledge beyond a single project helps you master more complex woodworking techniques and improves your ability to adapt Adirondack plans to different spaces. For beginner-friendly ideas and a broad range of DIY woodworking projects, you can explore Mastering Fun DIY Woodworking Projects. These ideas can strengthen your foundational skills, making it easier to tackle an Adirondack chair with confidence and precision.
For aspiring woodworkers who want to monetize their craft, a practical blueprint to turn craft into profit is a valuable resource. Check out Woodworking Projects That Sell: The Practical Blueprint to Turn Craft into Profit to understand how to package and price your finished pieces. The combination of solid Adirondack plans and proven business strategies sets you up for both enjoyment and opportunity.
Why Ted’s Woodworking can be a game-changer for Adirondack plans
When you’re deep into outdoor furniture projects, a robust library of plans can save a lot of trial and error. Ted’s Woodworking is a popular resource that bundles a wide range of woodworking plans, including Adirondack-style chairs and related outdoor furniture. Access to a large collection can help you compare different designs, customize a chair to fit your space, and learn from a variety of build approaches. This kind of resource is especially helpful if you’re planning to scale from a single chair to a small set for a porch or backyard. If you decide to explore this option, you can learn more about the total plan library and purchase details here: Ted’s Woodworking.
Beyond the Adirondack chair, Ted’s Woodworking can provide a broader education on joinery, material selection, and finishing techniques that translate well to outdoor furniture. While you may start with a single adirondack plans project, the skills you gain—proper cut lists, alignment checks, and finishing workflows—are transferable to a range of outdoor and indoor woodworking endeavors. As you build confidence, you’ll be better prepared to tackle variations, such as a larger lounging chair, a footstool, or a weatherproof bench, using the same solid design principles you applied to your Adirondack plans.
Actionable steps to start today and a bonus plan
Ready to start building your own Adirondack chair? Here are concise, actionable steps to get moving today:
- Choose a specific Adirondack plan that matches your space and skill level, focusing on a proven cut list and clear assembly steps.
- Gather your materials based on the plan’s list—prefer outdoor-grade wood and corrosion-resistant hardware.
- Prepare your workspace, safety gear, and the basic tools needed for cutting and assembly.
- Cut pieces according to the plan, dry-fit first, then glue, clamp, and screw joints securely.
- Finish with a weatherproof sealant or stain, applying multiple coats as recommended by your chosen finish product.
- Document your build with notes and photos so you can replicate or improve on future Adirondack projects.
- Consider expanding your project portfolio with related outdoor furniture built from your growing knowledge base.
As you progress, you might find that a broader plan library offers additional inspiration and structure. If you’re curious about expanding your toolkit and learning how to turn craft into profit, the two recommended resources above provide great complements to Adirondack plans. For a comprehensive woodworking plan library, you can explore Ted’s Woodworking via the affiliate link noted earlier, which offers a wide range of designs that can help you scale your woodworking projects beyond a single chair.
Frequently asked questions
Q: Are Adirondack plans suitable for absolute beginners?
A: Yes, many Adirondack plans provide beginner-friendly cut lists and step-by-step instructions. Look for plans with detailed exploded views and straightforward assembly sequences. If you’re unsure, start with a basic plan and gradually tackle more complex variations as your skills grow.
Q: What wood should I choose for outdoor Adirondack plans?
A: Common choices include cedar, redwood, and teak for their natural resistance to moisture and insects. If budget is a concern, treated pine is a workable option, but ensure you seal all surfaces well and follow safety guidelines for outdoor finishes.
Q: How important is finishing for outdoor furniture?
A: Finishing is essential. Outdoor finishes protect wood from UV damage, moisture, and temperature fluctuations. Reapply as recommended by the finish manufacturer to maximize longevity.
Conclusion and next steps
Adirondack plans open the door to creating a timeless outdoor staple—one that invites rest, conversation, and fond outdoor memories. By selecting well-structured plans, you ensure proper dimensions, robust joinery, and an ergonomic experience that stands up to the elements. Combine these plans with a thoughtful finishing strategy and the right learning resources, and you’ll be well on your way to building a small collection of outdoor furniture that’s both beautiful and functional.
If you’re looking for a broader toolkit and plan library to support your Adirondack projects and beyond, consider the resources highlighted in this article. And if you’re ready to explore a wide range of woodworking plans, including additional outdoor furniture, you can check out Ted’s Woodworking via the affiliate link provided above. It’s a practical way to access many different designs while you continue to refine your craft.