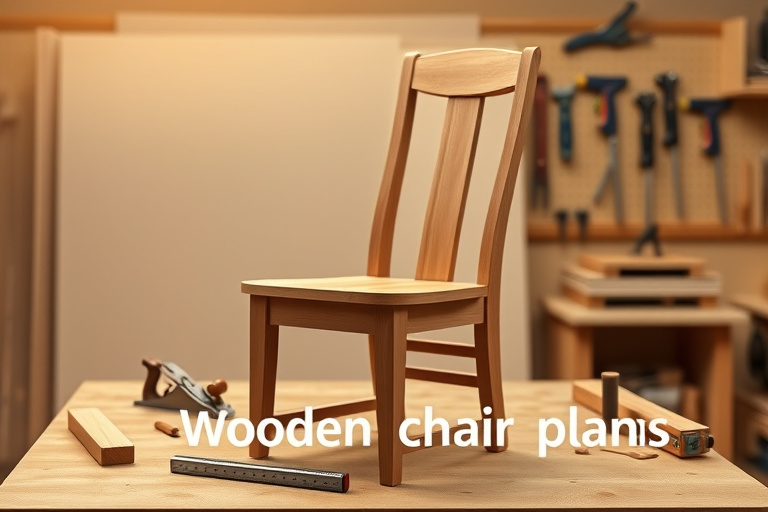
Wooden chair plans are more than just a blueprint; they are the roadmap to comfort, durability, and personal pride in a handmade seat. If you’ve ever sat on a DIY chair that wobbled slightly or didn’t feel right when you sat down, you know how important a well-designed set of wooden chair plans can be. The keyword here is “plans,” because a good plan translates your vision into precise dimensions, clean joints, and a final piece that stands up to daily use.
Whether you’re starting with a simple dining chair or aiming for a vintage rocker, the craft starts with solid plans. You’ll consider ergonomics, weight-bearing constraints, wood selection, and finishing options long before you toggle the saw. This guide focuses on practical steps, practical tools, and practical design ideas that will help you move from blank lumber to a sturdy, stylish chair—the kind you’ll be proud to pass down to the next generation.
Why wooden chair plans matter
Having a clear set of wooden chair plans matters for several reasons. First, it sets realistic expectations for the project’s scope and time. Second, it allows you to map out the joinery and weight distribution so the finished chair can safely support everyday use. Third, good plans help you optimize material usage, reducing waste and keeping costs manageable. And finally, a well-detailed plan helps you choose the right tools and machine settings, which speeds up the build and improves accuracy.
For woodworkers of all levels, starting with high-quality chair plans minimizes errors and makes it easier to customize the design to your space. If you’re curious about related chair projects, you can explore broader guidance like Rockler rocking chair plans for a deeper dive into ergonomics and seating comfort. You can also broaden your understanding with Cool woodworking: the ultimate guide to easy projects, tools, and tips, which covers essential techniques and tool choices that apply to wooden chair plans as well.
Choosing the right wooden chair plans
Choosing the right wooden chair plans starts with aligning the project with your skill level, available space, and the style you want to achieve. Below are two critical considerations that influence your choice:
Skill level and tools
If you’re new to woodworking, start with a chair plan that emphasizes straightforward joinery, such as mortise-and-tenon connections or straightforward dowel joints. Simpler lines and fewer curved components reduce complexity while still delivering a sturdy result. For more adventurous woodworkers, a plan that includes compound angles or steam-bent elements can be a rewarding challenge. Regardless of a plan’s complexity, ensure you have access to the right tools—saws, a good drill, clamps, a plane or rasp for finishing, and a capable finish system for protection and aesthetics.
Wood types and joinery considerations
Wood choice greatly affects the chair’s feel, weight, and longevity. Common options include maple for a durable, smooth finish; oak for strength and a pronounced grain; and cherry for a warm tone that ages beautifully. The joinery method matters too; well-documented wooden chair plans will specify whether a chair uses mortise-and-tenon joints, dowel joints, or screw-and-connector systems. If you’re aiming for a classic dining chair with long-lasting performance, prioritize plans that clearly outline gluing surfaces, clamping strategies, and drying times to minimize wood movement over seasons.
A step-by-step approach to wooden chair plans
Here is a practical workflow to translate wooden chair plans into a tangible piece. The steps are designed to be adaptable whether you’re building a compact desk chair, a traditional dining seat, or a modern lounge chair.
Step 1 — Define ergonomics and design intent
Start by defining how the chair will be used. Will it see daily family meals, long study sessions, or occasional seating? Gather measurements from the people who will use it most. Consider seat height (commonly 17 to 19 inches for dining chairs), seat depth, backrest height, and overall footprint. A good plan should include a clear set of ergonomic targets, with dimensions that feel comfortable in your space. If you’re unsure where to begin, study existing chairs in your home and note what works and what doesn’t. Then compare those observations to the dimensions in your wooden chair plans to ensure the final piece aligns with real-world use.
Step 2 — Source reliable plans
Reliable plans are the backbone of a successful build. Look for plans that provide cut lists, pattern drawings, and exploded views of joints. A well-documented set of wooden chair plans saves you time and reduces miscuts. If you want to explore broader project ideas and technique-rich guidance, you may come across curated resources such as the Rockler chair plan collection mentioned earlier, which can broaden your understanding of dimensions and assembly methods. Finding a plan that matches your style—whether it’s farmhouse, mid-century modern, or traditional—will help keep you motivated through the project.
Another route to consider is bundling a wide library of plans for ongoing projects. For a comprehensive library of woodworking plans, many builders turn to curated collections like Ted’s Woodworking, which offers a broad spectrum of chair and furniture plans that you can reference as you grow more confident in your craft.
Step 3 — Gather materials and tools
With the plan chosen, inventory the materials. You’ll want boards with consistent grain and appearance, plus offcuts for shaping components like spindles or back slats. Create a cut list straight from the plan and pre-check your stock to minimize joints misalignment. Don’t forget safety gear, a quality sharpening setup for blades and chisels, and a trustworthy finish compatible with indoor use. The best wooden chair plans acknowledge the importance of material preparation, including stock moisture content and orientation to reduce warping after assembly.
Step 4 — Cutting, shaping, and smoothing
Follow the plan’s sequence to minimize errors. Start with rough cutting to the general dimensions, then work toward precise shaping. If you’re routing curved legs, backrests, or intricate cutouts, take slow, measured passes and test-fit each component before final shaping. Fine sanding follows, typically progressing through grits from 120 to 220 to achieve a smooth surface ready for finishing. This stage is where your wooden chair plans reveal their true value—their accuracy determines how cleanly the parts fit together and how comfortable the final product feels against your body.
Step 5 — Joinery and assembly
Joinery is the heart of a sturdy chair. Depending on the plan, you’ll use mortise-and-tenon, dowel, or other mechanical fasteners. Anchor rails securely, ensure the backrest aligns with the seat at an ergonomic angle, and check for any twisting or racking as you clamp the assembly. A dry fit before glue helps you spot stress points and adjust. When gluing, wipe away excess glue to prevent dried residue on the surface; clamp tightly and allow adequate curing time. The goal is a rigid, comfortable chair that remains solid for years of daily use.
Step 6 — Finishing and maintenance
Finish selection should complement your room while protecting the wood. Options range from penetrating oils that enhance grain to polyurethane or varnish for tougher surfaces. Apply thin, even coats, sand lightly between layers, and cure in a dust-free environment. For family-friendly spaces, a durable finish with easy touch-ups will keep your wooden chair plans turning into a piece you can enjoy for decades. Regular maintenance—gentle cleaning and periodic reapplication of protective coatings—extends the life of your chair and preserves its beauty.
Integrating the plans into your home décor
Your wooden chair plans are a starting point, not a constraint. The style of the final chair should harmonize with your interiors, from color palette to furniture scale. For a rustic or farmhouse vibe, consider a chair with slightly rounded edges, visible joinery, and a matte finish that highlights the wood’s natural character. For a clean, contemporary look, choose simpler silhouettes, tighter tolerances, and a light or mid-tone stain to keep the piece feeling airy. If you’re unsure how to pair chairs with tables or other seating, refer to examples within the Rockler chair plans resource and the broader guidance in the cool woodworking guide to understand dimensions, alignment, and spacing for comfortable dining areas and living rooms.
In practice, the right combination of wooden chair plans and finishing can make an entire room feel cohesive. The chair’s height, seat depth, and backrest slope influence how people interact with the table and surrounding furniture. By selecting a plan with a proven balance of comfort and aesthetics, you’ll be better prepared to execute a finished piece that complements your existing décor while showcasing your woodworking skills.
Resources and options for chair projects
When you’re shopping for wooden chair plans, diversify your sources to compare design elements, joinery options, and finish recommendations. In addition to the plan collections above, you can explore related content that deepens your understanding of chair construction and woodworking fundamentals. For instance, the Rockler rocking chair plans article offers a timeless, comfortable rocker concept with tested dimensions and ergonomics. And the Cool woodworking guide is a practical companion for beginners and seasoned builders alike, delivering tips on tool selection, project planning, and execution that apply across chair projects and beyond.
The value of bundled woodworking plans
For builders who want speed, variety, and a steady stream of inspiration, bundled plan libraries offer unmatched value. Bundles typically include a wide range of furniture plans, including multiple wooden chair plans, so you can practice different techniques and styles without hunting for new sources each time. These bundles also help you learn how to adapt plans to your available stock, enabling customizations that reflect your space and taste. If you’re exploring a large collection, you may find that investing in a curated library like Ted’s Woodworking (affiliate link below) pays off quickly as you tackle more ambitious projects and refine your craftsmanship over time.
To explore a broad catalog of projects and techniques that complement chair-building journeys, consider starting with Ted’s Woodworking: Ted’s Woodworking. This resource can help you quickly access additional wooden chair plans and related furniture designs that you can adapt to your space.
FAQs about wooden chair plans
- How do I choose between solid wood and plywood for chair components? Solid wood provides great longevity and a premium feel, while plywood can reduce weight and cost for certain parts like back supports. Your plan’s material recommendations will guide this choice, so start there.
- Are pre-made plans safer than free plans found online? Reputable, well-documented plans are generally safer because they include weight considerations, joinery details, and finishing guidance. Always verify the source, read reviews, and confirm that you understand the recommended joinery before starting a build.
- Can I customize a chair plan to fit a small space? Yes. Start with a plan that provides scalable dimensions and clear cut lists. You can reduce seat width or overall height while preserving ergonomic comfort, then re-check clearances in your space.
- What tools do I need to begin with wooden chair plans? At minimum, you’ll want a circular or handsaw, a drill, clamps, a square, a measuring tape, sandpaper or a power sander, and a finishing setup. A router or chisel set is helpful for shaping and joinery, depending on the plan you choose.
Conclusion
Turning wooden chair plans into a tangible, comfortable, and durable piece is a rewarding journey that blends design thinking with hands-on craft. A solid plan guides you through ergonomics, material selection, joinery, and finishing so you can craft a chair that not only looks great but stands up to the rigors of daily life. By starting with a clear plan, you’ll reduce waste, minimize errors, and accelerate your progress from lumber to living room centerpiece.
Remember that you don’t have to reinvent the wheel for every project. Look at established examples like Rockler rocking chair plans for ergonomic insights, and consult the practical guidance in Cool woodworking: the ultimate guide to easy projects, tools, and tips to sharpen your technique. If you’re seeking a broader library of plans to fuel multiple builds, consider expanding with a comprehensive collection like Ted’s Woodworking, which provides a wealth of chair designs and other furniture plans to inspire future projects.