Introduction
If you’ve ever dreamed of relaxing in a sunny garden or on a shaded patio, an Adirondack chair can be the centerpiece of your outdoor oasis. The charm lies in its classic silhouette, generous seat, and relaxed recline that makes lingering outside a daily pleasure. For woodworkers, the project is an inviting weekend blueprint: strong, straightforward, and highly customizable. When you search for adirondack chair plans free download pdf, you’re looking for a set of plans that balances comfort, durability, and ease of execution. The right free download should include a clean cut list, clear dimensions, and guidance on wood types and fasteners so your chair stands up to weather and time.
In this guide, we’ll cover what makes a solid Adirondack chair plan, how to choose a plan that suits your workshop, and how to bring the project to life with practical, illustrated steps. Along the way, you’ll learn how to evaluate plan quality, what tools you’ll need, and how to customize the design to fit your space. If you’re after more than one set of plans, there’s a wealth of resources out there—including curated plan libraries like Ted’s Woodworking. While we’ll mention it as a resource, you’ll also find a couple of related guides linked below to help you broaden your DIY horizons. If you’re curious about UK-specific approaches or broader at-home projects, see the two internal guides linked in this article for deeper dives.
Why choose adirondack chair plans free download pdf for DIY projects
Choosing an Adirondack chair plan that’s available as a free download pdf is a smart starting point for beginners and seasoned woodworkers alike. Free plans often present a clear cut list, cut diagrams, and step-by-step instructions that help you gauge whether the project aligns with your shop space and skill level. The Adirondack design is forgiving: broad armrests, a tall back, and a seat that angles slightly downward to promote comfort. When you pick a plan that’s well laid out in pdf format, you can print, annotate, or import the measurements into your cutting station without fuss.
Beyond the aesthetics, the chair is a practical build. It can be assembled with a handful of basic tools and common lumber, and it adapts well to a range of woods—from pressure-treated pine for outdoor durability to cedar for its natural rot resistance. The adirondack chair plans free download pdf you choose should also address maintenance: how to sand, stain, seal, or paint for long-lasting performance in sun, rain, and humidity. A robust plan leaves you with options for refinishing down the line, so your chair continues to look great after years of patio weather.
Key features to look for in Adirondack chair plans
Not all plans are created equal. When you’re evaluating an adirondack chair plans free download pdf, keep an eye on three essential features: comfort and dimensions, wood selection and weather resistance, and joinery quality. Here’s how to assess each area.
Comfort and dimensions
The hallmark of an Adirondack chair is comfort. Plan sections should include precise dimensions for the seat height (often around 15-17 inches) and the back angle that supports a relaxed posture. Look for a cut list that yields a seat width large enough to accommodate different body types and a back slat arrangement that supports the upper spine without feeling confining. If the plan includes optional ergonomic tweaks—like a slightly curved back or a contoured seat—consider incorporating them for extra comfort.
Wood selection and weather resistance
Outdoor furniture faces sun, rain, and temperature swings. The best plans specify suitable woods and rotating finishes that hold up to weather exposure. Common choices include cedar for natural rot resistance, redwood for beauty and durability, and pressure-treated pine for cost-effective outdoor use. Your adirondack chair plans free download pdf should also address proper fasteners (galvanized or stainless steel) to resist corrosion and a finish system (stain, sealant, or paint) that protects against UV damage and moisture.
Joinery and fasteners
Sturdy joinery translates into a chair that remains tight and stable after years of use. Look for plans that specify mortise-and-tenon or strong pocket-hole joints, along with a clear cut list for screws, washers, and glue. The assembly section should offer a logical sequence—starting with the base framework and moving toward the backrest and armrests—to minimize misalignment and save time.
Materials, tools, and a simple cut-list plan
Before you grab wood, it helps to have a concise plan of materials and tools. A typical Adirondack chair build uses simple hardwood or good-quality exterior-grade lumber, along with hardware like stainless screws, waterproof wood glue, and optionally dowels for added strength. A compact cut-list keeps you focused and reduces waste. Here’s a practical example of what you might find in a reliable plan:
- Two side frames (front legs, back legs combined in one piece per side)
- Seat slats (7-9 slats, depending on width)
- Back slats (6-8 vertical slats, plus a decorative top rail)
- Arms (two long components with a slight curve)
- Cross supports and cross braces
- Hardware: stainless screws, washers, wood glue, optional dowels
- Finish: outdoor stain or sealer
Tools you’ll typically need include a saw (circular or miter), a drill/driver, clamps, a sanding block or palm sander, and a router for clean edges if you want a polished look. A well-written plan adds a brief section on the order of operations, which helps you avoid rework and makes the build more enjoyable.
Step-by-step overview: How to build an Adirondack chair
Below is a condensed, practical workflow that mirrors what you’ll find in solid plan PDFs. This overview is designed to complement the detailed diagrams in your chosen plan and serves as a quick reference as you prepare your shop.
Preparing your workspace and planning cuts
Set up a clean, stable workspace with good lighting. Read through the entire plan once, then lay out the wood and rough-cut parts with a little extra waste for miscuts. Dry-fit critical joints before applying glue to ensure everything aligns properly. Mark your cut lines on the wood, double-check measurements, and use a square to keep angles precise.
Cutting components: seat, back, arms, and legs
Begin with the seat and back rails, then move to the arms and legs. Take care to keep each piece labeled to avoid confusion later in assembly. If you’re new to woodworking, consider practicing with a scrap piece to dial in your saw’s depth and cut quality before touching the final stock.
Back slats typically run vertically, while seat slats run horizontally. Ensure even gaps between slats for both aesthetics and drainage. Rounded edges or chamfers on the top of the arms are a nice touch that helps prevent splinters and adds comfort.
Assembly sequence and joinery tips
Assemble the base frame first, then attach the seat slats, followed by the backrest and arms. Use a combination of glue and screws for strong joints, and consider mechanical fasteners as an insurance policy against loosening over time. Dry-fit joints before final assembly to confirm alignment. A light coating of exterior-friendly wood conditioner can help accept stain evenly if you’re using softwoods.
Sand, finish, and weatherproofing
Finish quality is equally important as the build itself. Sand progressively from coarse to fine grit to a smooth surface. Wipe away dust, then apply your chosen finish—stains for color and penetrating protection, or paint for color and extra weather resistance. Apply a sealant suitable for outdoor use, paying attention to end grains where water absorption is highest. Multiple coats often yield the best protection, with light sanding between coats to maintain a smooth surface.
Where to find adirondack chair plans free download pdf and how to evaluate quality
Finding a reliable adirondack chair plans free download pdf means looking for clear diagrams, a credible cut list, and instructions that suit your skill level. A quality plan will provide:
- Clear overall dimensions and a printable cut list
- Material recommendations and a basic hardware list
- Step-by-step assembly guidance with photos or diagrams
- Finish and maintenance recommendations for outdoor use
Always check the fine print on free downloads. Some plans are educational excerpts or ad-supported PDFs that point you toward paid upgrades or additional resources. If you’re new to the hobby, you may want to compare multiple sources to identify a plan that consistently demonstrates clean drawings and practical guidance. For readers who are curious about broader woodworking resources, two useful guides are available: free woodworking plans (UK guide) and a practical guide to crafting at home. These internal references can help you expand your toolkit beyond a single chair project.
Leveraging Ted’s Woodworking: expanding your plan library
If you’re excited by the idea of building more furniture or trying variations on the Adirondack theme, you may want to explore Ted’s Woodworking. This kind of curated plan library provides a broad range of designs, including outdoor chairs, garden benches, and other weather-resistant projects, with detailed cut lists and step-by-step instructions. It’s common for DIY enthusiasts to build a few high-impact projects from a single resource before branching into independent plans. When you’re ready to explore, you can check out the product that bundles many projects together here: Ted’s Woodworking – exclusive offer. This affiliate resource is designed to complement the free download path by offering additional expertise and project inspiration.
Practical DIY resources and additional project ideas (internal links)
Beyond Adirondack chairs, you’ll likely want to explore a variety of furniture and outdoor projects. The two internal guides linked earlier provide practical, approachable content for expanding your woodworking repertoire. For instance, the UK-focused guide to building with Ted’s Woodworking can help you understand variations in regional materials and supply chains, while the at-home crafting guide offers broad project ideas you can tackle with common tools. These resources can complement the adirondack chair project and keep you moving from one successful build to the next.
Bonus tips, maintenance, and long-term care
To extend the life of your Adirondack chair, consider the following maintenance practices:
- Seal or stain the wood with outdoor-grade products to reduce moisture uptake.
- Store or cover chairs during harsh winter months to minimize weathering.
- Inspect joints yearly and tighten hardware as needed to maintain stability.
- Clean with mild soap and water to remove dirt buildup rather than abrasive cleaners.
In addition to routine care, you can revisit your plan’s instructions if you decide to modify the design for a taller back, wider seat, or a lighter weight. The beauty of woodworking is that plans can be adapted to suit your preferences and the constraints of your space. If you’re curious about other project paths, the internal resource pages mentioned above can broaden your scope beyond a single build while keeping your workflow cohesive and manageable.
Conclusion and next steps (CTA and affiliate links)
Building an Adirondack chair from a trusted plan is a satisfying way to invest in your outdoor comfort. The adirondack chair plans free download pdf option is a smart starting point, especially when you pair it with careful material selection, precise cutting, and a durable finish. If you enjoy the process and want to deepen your plan library, consider exploring Ted’s Woodworking, which offers an expansive collection of woodworking plans and ideas. You can explore it here: Ted’s Woodworking.
For additional ideas and guidance, don’t miss the two internal resources linked earlier. They can help you compare plan quality, discover new project types, and build confidence as a DIY woodworker. Remember: the right plan makes the build smoother, more enjoyable, and more likely to become a treasured piece of outdoor furniture for years to come.
Image prompt section (featured image)
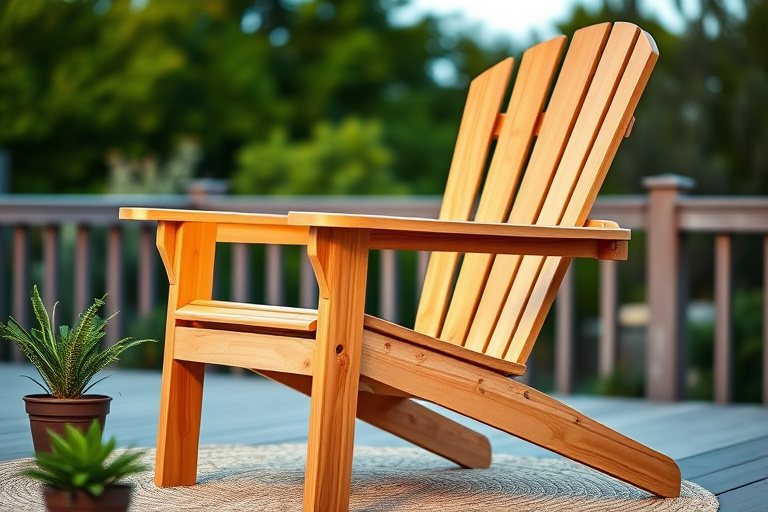
Image concept: A high-resolution, editorial-style photograph of a classic Adirondack chair placed on a sunlit wooden deck with a softly blurred garden background. The chair should be made of warm, natural cedar tones with visible wood grain and a clear finish that enhances the grain. Composition centers the chair at a slight angle to showcase the curved arms and slatted back. Include subtle foreground props such as a small potted plant and a woven outdoor rug to convey a lifestyle setting. Color palette: earthy browns, greens, and soft blues from the sky. Lighting: golden hour or soft midday lighting to emphasize texture and depth. Style: realistic, professional outdoor furniture photography with shallow depth of field to keep focus on the chair while the background remains inviting but unobtrusive.