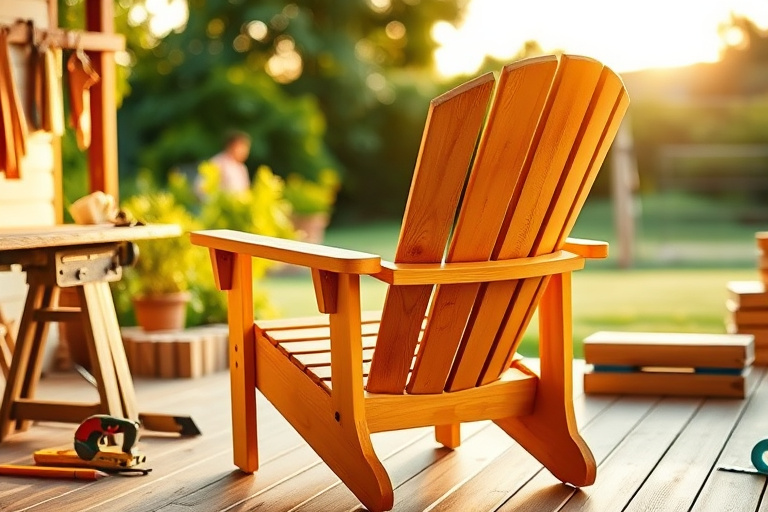
adirondack diy: A Timeless Outdoor Project You Can Master
The allure of the adirondack diy project is timeless: a sturdy, comfortable chair that invites you to linger on a warm afternoon, read a book, or sip a cold drink while enjoying a backyard sunset. If you’re new to woodworking, this project provides a perfect blend of straightforward geometry and practical joinery that builds confidence while delivering a functional reward. With the right planning, a few essential tools, and a dash of patience, you can craft a durable Adirondack chair that stands up to years of outdoor use.
In this guide, you’ll discover why the adirondack diy approach feels so satisfying, what materials work best, a clear step-by-step plan, and how to leverage high-quality woodworking plans without complicating the build. You’ll also learn how to make your chair endure the elements with smart finishes and hardware choices. If you’re curious about expanding your project library later, I’ll point you toward a couple of trusted resources that pair well with this chair project without overwhelming you with options.
Why Adirondack Chairs Are Great for DIY
Adirondack chairs are iconic for their wide, slatted backs, roomy seats, and gently reclined angles that encourage relaxed posture. They’re a natural fit for adirondack diy because the design relies on simple, repeatable parts rather than complex curves or advanced joinery. Here are a few reasons this project is ideal for beginners and seasoned woodworkers alike:
- Simple geometry. The chair is essentially a few straight components cut at specific angles. This means you can achieve precise results with basic saw skills and a trustworthy square.
- Versatile materials. Cedar, pine, spruce, or even responsibly sourced hardwoods can work, so you can tailor the project to your budget and climate. The key is selecting wood with good outdoor durability or applying a robust finish.
- Scalability. Start with a standard size, then customize later. You can adjust seat height, leg length, and armrest width to fit your body and space.
- Satisfaction factor. Completing a DIY chair gives you a tangible, comfortable piece you’ll use for years, and the process reinforces practical carpentry skills that apply to other outdoor builds.
For readers who want a mix of architecture and accessibility, this adirondack diy journey also invites you to explore related planning resources. If you’re seeking broader woodworking guidance, you might enjoy a practical guide like the article on Totally Free Woodworking Plans, which covers strategies that translate well to any outdoor furniture project. And if you want more project ideas and planning insights, another helpful article is available at Generated Article 6.
Essential Tools and Materials for Adirondack DIY
Before you cut a single board, assemble a focused kit. The adirondack diy chair is forgiving, but accuracy matters. Here’s a practical list to keep you on track:
a simple router for clean edge profiles, a palm sander for finer surfaces, and a small router bit set if you want to add decorative touches to slats or armrests.
Choosing the right wood is a critical factor in adirondack diy success. Cedar is naturally resistant to rot and insects, making it a popular choice for outdoor furniture. If you opt for pine or spruce, plan to apply a high-quality outdoor finish and possibly a sealant to extend the life of your chair. Regardless of your wood choice, pre-stain the interior faces of all parts to minimize uneven water absorption and color drift over time.
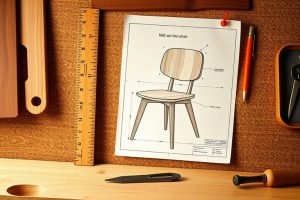
Step-by-Step Adirondack Chair Plan
This section walks you through a practical plan you can follow start to finish. The steps are designed for clarity and repeatability, so you can tackle the project with confidence. Each step can be adapted to your chosen chair size, but keep proportions consistent to ensure the chair sits and reclines correctly.
1. Planning and Cutting
Begin by selecting your chair size. A standard adult Adirondack chair usually has a seat height of roughly 17 to 18 inches and a back height around 30 to 34 inches from the seat. Draft templates for the major components: back slats, seat slats, legs, armrests, and the upper backrest frame. Cut the parts using your chosen wood, allowing for a little extra for sanding and a clean fit. Use a miter saw or angle cuts to achieve the characteristic angles that define the style. Label each piece clearly to minimize confusion during assembly. Accurately rough-cutting creates a smoother assembly process later, which is a crucial part of the adirondack diy workflow.
2. Joinery
Most Adirondack chairs rely on simple butt joints reinforced with screws and wood glue. For added strength, consider dowels or pocket-hole joinery if you’re comfortable with a doweling jig or pocket-hole jig. Important joints include the backrest-to-seat connection, the armrest-to-back interface, and the leg assembly. Dry-fit the pieces first to check angles and alignment. If a joint seems loose, re-cut the angle slightly or add a longer screw and glue for a secure bond. A well-executed joinery plan ensures your adirondack diy chair remains sturdy through years of outdoor use.
3. Sanding and Finishing
Once your pieces are joined, sand the entire chair from coarse to fine grits (start around 80 or 120, then finish with 220). The goal is a smooth surface that won’t snag clothing or cushions. Remove all sanding dust, then apply a durable outdoor finish. A penetrating oil or a spar varnish with UV protection is a good choice for exterior furniture. For maximum longevity, apply two coats with light sanding between coats. If you live in a harsher climate, consider a ready-made outdoor finish that’s designed for decks and exterior furniture. The finishing step is where your adirondack diy project becomes resilient, so don’t rush it.
4. Cushion Options
Most Adirondack chairs look great with cushions, but cushions aren’t essential for the structural success of the chair itself. If you plan to add cushions, size the seat and back areas carefully to accommodate standard outdoor cushions. Use weather-resistant fabric and sealed seams to resist moisture. Cushions add long-term comfort and can be swapped out for seasonal color changes, enhancing your adirondack diy project’s appeal without requiring a completely new build.
Incorporating Ted’s Woodworking Plans
As you gain confidence with adirondack diy, you may want to explore more advanced patterns or alternative chair styles. Ted’s Woodworking provides an extensive catalog of plans, templates, and step-by-step instructions that can expand your repertoire without sacrificing quality or clarity. If you’re curious about a broader set of woodworking ideas, here’s a natural way to approach it: explore a ready-to-follow plan bundle to compare joinery techniques, cutting diagrams, and finish recommendations. You can learn more about the entire catalog from Ted’s Woodworking, which complements practical outdoor projects like adirondack diy and helps you think through future builds with greater confidence.
For those who prefer free, practical guidance alongside paid plans, you can also consult the free woodworking plans article linked earlier. It’s a great way to validate your approach before committing to a full plan package. The combination of hands-on practice and curated plans can accelerate your progress and boost your overall project success rate.
Tips for Outdoor Durability and Weatherproofing
Durability is the heart of any outdoor furniture project. The adirondack diy chair should withstand sun, rain, and seasonal temperature changes. Here are strategies that help your chair live a long, useful life:
- Material choice matters. Cedar is a popular choice for outdoor furniture due to its natural rot resistance and pleasant scent. If you choose pine or spruce, plan to apply a robust outdoor finish or sealing treatment.
- Finish with intention. Use a UV-resistant stain or sealant to prevent color fading and surface cracking. Outdoor finishes with built-in UV blockers help maintain the chair’s color and integrity for years.
- Proper drainage and air flow. Build the chair with slight gaps between slats to promote air circulation and water drainage, reducing the chance of moisture-related warping.
- Hardware considerations. Use stainless steel or galvanized screws to resist corrosion in damp environments. Avoid attaching metal hardware directly to the wood without protective washers to prevent staining or staining-related issues.
Maintenance is simple: wipe the chair down seasonally, inspect joints for looseness, and reapply finish every couple of years or as-needed. This proactive care keeps your adirondack diy chair looking good and performing well for a long time.
Common Mistakes and Troubleshooting
Even seasoned hobbyists encounter snags, but most issues stem from these common missteps:
- Imprecise cutting angles. If your angles aren’t precise, the back and seat may sit unevenly. Always dry-fit first and adjust if needed. Use template jigs or clamps to hold pieces at exact angles during cutting.
- Rough edges on slats. Skipping the final sanding passes results in splinters and an uncomfortable feel. Sand with intent and check for rough spots with your hand after each coat of finish.
- Weak joints. Relying solely on glue can lead to loose joints in outdoor conditions. Reinforce with screws or dowels, and consider pilot holes to prevent wood splitting.
- Underestimating weather exposure. In colder climates, water infiltration can cause wood to expand and contract. Pre-treat all surfaces and choose finishes formulated for exterior use to prevent peeling and cracking.
If you hit a snag, revisit your plan, re-check the template angles, and test-fit any problematic joints. Small adjustments are often all that’s needed to get back on track and keep your adirondack diy journey moving forward.
Free Resources and Further Reading
Learning is an ongoing process, and free resources can accelerate your comfort level with woodworking. For broad guidance on planning, project variation, and efficient techniques, I recommend exploring the following two resources, which complement this adirondack diy journey without overwhelming you with options:
Read more in the comprehensive guide at Totally Free Woodworking Plans and discover additional article ideas at Generated Article 6. These pieces offer practical tips you can apply to outdoor furniture and beyond, helping you grow your skill set while you complete your current project.
Conclusion and Next Steps
The adirondack diy chair is more than a simple outdoor seat; it’s a stepping stone to building confidence, expanding your tool kit, and enriching your backyard with a piece you crafted with your own hands. Start with a clear plan, pick durable wood, and commit to a solid finish. As you gain experience, you’ll find yourself tackling more ambitious outdoor furniture projects—perhaps a matching Adirondack coffee table or a side chair with a similar silhouette. The key is to start small, stay consistent, and enjoy the learning process.
If you’re ready to take the next step in your woodworking journey, consider exploring Ted’s Woodworking for a broader set of plans and project ideas. It’s a helpful resource that complements hands-on practice with structured guidance. You can explore their catalog here: Ted’s Woodworking.