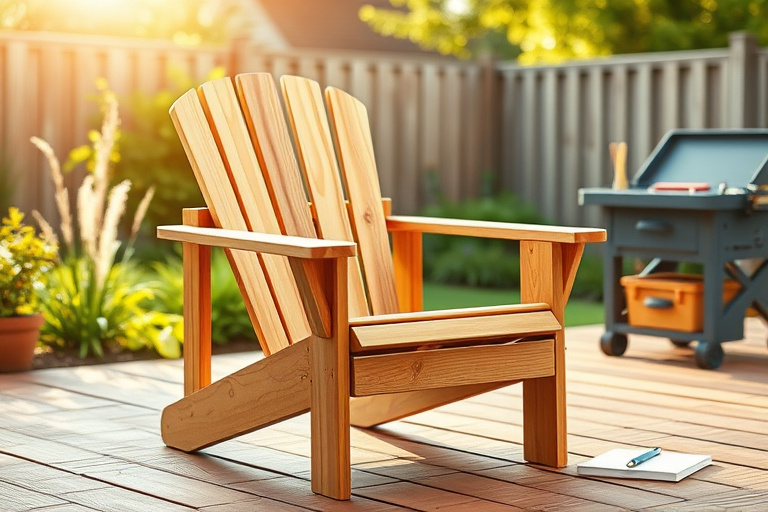
Every homeowner deserves a reliable spot to unwind, and the adirondack chair 2×4 design delivers comfort, durability, and a satisfyingly simple build. This classic outdoor chair uses straightforward stock size—2×4 boards—making it an approachable entry point for a wide range of woodworkers, from weekend hobbyists to seasoned DIYers. With the right plans, a few common tools, and a bit of finish, you’ll have a sturdy seat that ages beautifully in sun, rain, and seasonal shifts.
Choosing the adirondack chair 2×4 approach is not just about nostalgia; it’s about practical woodworking. The straight lines and forgiving joinery suit beginners who want to learn basic cuts, dadoes, and assembly while still delivering a polished, magazine-ready result. If you’re new to woodworking, this project also reinforces essential skills like measuring, layout, sanding, and finishing, all of which translate to more ambitious builds down the line.
Materials, tools, and planning for the adirondack chair 2×4
Understanding stock sizes and dimensions
The adirondack chair 2×4 project relies on commonly available lumber: 2x4s, which are about 1.5 inches by 3.5 inches in cross-section. Although the exact dimensions can vary slightly by region, the universal goal is to achieve a comfortable back angle and a seat that supports longer lounging sessions. Typical chair dimensions sit around 32–36 inches high from the floor to the top of the back and 25–28 inches wide, but you can tailor the size to fit your space after confirming seat depth and backrest angle with a simple prototype cut.
Essential tools and safety considerations
For a clean and durable build, you’ll want: a saw (hand saw or circular/miter saw), a drill/driver, a biscuit joiner or pocket-hole jig (optional but helpful), clamps, sanding block or orbital sander, and a square for accurate angles. Safety should be your priority: wear eye protection, dust mask for sanding, and use push sticks for table- or miter-saw work. If you’re new to these tools, consider following a comprehensive plan such as those offered by Ted’s Woodworking to optimize your setup and avoid common mistakes.
Step-by-step guide to building an adirondack chair 2×4
Cut list and layout for precise parts
Start with a simple cut list: seat slats, seat supports, back slats, back supports, arms, leg components, and the front crossmember. Using 2×4 stock, cut pieces to consistent lengths to ensure clean alignment. A well-marked layout saves time in assembly and reduces the need for shimming later on.
Assembly sequence: frame, knees, and supports
1) Assemble the seat frame by attaching seat slats to two parallel seat supports. 2) Create the back frame by aligning back slats to form the curved, comfortable backrest. 3) Attach the arms to the front legs, ensuring the arm height provides ergonomic elbow clearance. 4) Connect the back to the seat with sturdy supports or “knees” that resist racking and keep the reclined posture consistent. 5) Install a front crossmember to stabilize the frame and prevent wheeliness when you lean back. A dry fit before final fastening helps you catch misalignments early.
If you’re aiming for a more refined look, you can employ pocket-hole joinery or a biscuit joiner to blend strength with a tidy surface. Remember to countersink and predrill to avoid splitting on the 2×4 stock, which tends to be a bit reactive to changes in moisture.
Finishing touches: sanding, stain, and sealing
Sand progressively from 120 to 180 grit for a smooth surface. Wipe away dust and apply a finish that suits your climate. A penetrating oil-based stain followed by a protective sealant offers weather resistance while preserving the wood’s natural warmth. If you expect heavy sun, consider UV-resistant coatings. Regular maintenance—re-sanding and re-oiling every couple of seasons—will extend the life of the adirondack chair 2×4 and keep the wood looking fresh.
Design options and upgrade ideas
Ergonomic tweaks and comfort enhancements
Modify the back slats or the tilt angle to achieve a deeper recline or firmer support for the lower back. Optional features include a small built-in footrest extension, a detachable cup holder mounted to the arm, or a small tray on the arm for a book or a drink. Cushions can be added for extra comfort, though outdoor-grade cushions should be designed to resist moisture and fading.
Weatherproofing and long-term maintenance
For climate zones with heavy rainfall or high humidity, you might want to incorporate waterproofing details, such as drainage slits in the seat frame and slanted seat boards to prevent puddling. A solid outdoor finish—like a marine-grade varnish or an exterior-grade polyurethane—will improve longevity. When you re-finish, lightly scuff the surface with 220-grit sandpaper to help the new layer adhere well.
How Ted’s Woodworking can help your project
What the Ted’s Woodworking program offers
Ted’s Woodworking is a well-known collection of project plans, including step-by-step diagrams, cutting lists, and material requirements. For someone tackling the adirondack chair 2×4 project, a curated set of chair plans can reduce guesswork and speed up decision-making. The program is designed to streamline the planning phase, ensuring you have a clear route from raw stock to finished seating.
Many carpenters value the breadth of plans in Ted’s Woodworking because it creates a reliable library of projects you can revisit as you take on more home improvement tasks. If you’re curious about broader woodworking ideas, this resource can be a practical companion as you expand into bookcases, garden benches, and other outdoor furniture projects.
Real-world use cases and success stories
Builders frequently share how access to well-documented plans helped them optimize material use and reduce waste. With the adirondack chair 2×4 project, a clean plan means fewer trial-and-error sessions and more time enjoying the finished product. For many, the confidence gained from following a proven plan translates into more ambitious outdoor builds, from porch swings to full garden seating sets.
Curious about how this approach translates into a broader plan library? You can explore a comprehensive overview here: Ultimate Guide to DIY Mastery with Ted’s Woodworking.
Additional resources and plans
Internal link 1: Ultimate Guide to DIY Mastery with Ted’s Woodworking
For a broader view of how Ted’s Woodworking fits into a DIY mastery journey, this resource offers insights, project ideas, and strategies to build confidence across a variety of woodworking tasks. Access it here: Ultimate Guide to DIY Mastery with Ted’s Woodworking.
Internal link 2: DIY Adirondack Chair Plans: Build Cozy Outdoor Seating
If you’re seeking step-by-step Adirondack chair plans specifically, this article provides detailed guidance and diagrams tailored to comfortable outdoor seating. Explore the plans at: DIY Adirondack Chair Plans: Build Cozy Outdoor Seating.
Beyond these resources, many woodworkers also explore additional plans and bundles via affiliate programs that offer curated libraries of projects. For a comprehensive woodworking library, consider exploring Ted’s Woodworking through the following affiliate link: this woodworking bundle.
Tips for a successful outdoor build and budget-friendly upgrades
Budgeting, sourcing, and anticipating common hurdles
Smart budgeting begins with a precise cut list and an accurate materials estimate. When you plan for a 2×4-based adirondack chair, the majority of your cost comes from lumber and finish. If you maximize scrap usage and choose basic, exterior-grade materials, you’ll typically stay well within a modest budget. Consider visiting a local mill or lumber yard to compare prices on exterior-grade stock and to pick up offcuts that can be repurposed for accents or a matching footrest.
Another common hurdle is moisture management. Exterior finishes will shed water, but the wood’s natural tendency to expand and contract can cause joints to loosen over time. Regular maintenance—re-sanding and re-applying finish every season or two—will keep the chair from loosening and popping.
Frequently asked questions
- Can I use pressure-treated wood for the adirondack chair 2×4?
- What is the best finish for outdoor exposure?
- Do I need power tools to complete the project?
- How can I customize the dimensions for a taller or shorter user?
Conclusion
Building an adirondack chair 2×4 is a practical, rewarding DIY project that yields a timeless outdoor seating option. With careful planning, a straightforward cut list, and accurate assembly, you’ll enjoy a sturdy chair that looks great and stands up to the elements. If you want a structured path to more woodworking success, exploring Ted’s Woodworking can be a smart move, whether through a bundled library of plans or targeted guides. Remember to tailor the plan to your space, test fit before final assembly, and commit to a durable finish for years of outdoor comfort.