Introduction
If you’ve ever considered taking up woodworking, starting with beginner joinery projects is a smart, confidence-building move. The phrase beginner joinery projects signals plans that emphasize clean lines, precise cuts, and sturdy joints while keeping a gentle learning curve. This approach helps you develop essential skills—measuring, marking, cutting, fitting, gluing, and finishing—without getting overwhelmed by overly complex joints or exotic woods. As you gain comfort with these foundational techniques, you’ll naturally progress to more ambitious tasks and joinery styles.
To support your journey, this guide blends practical project ideas with practical safety, tool setup, and resource recommendations. Along the way, you’ll find natural references to helpful articles and vetted resources, plus a curated library of plans that many hobbyists rely on to power their own workshops. If you’re curious about budget-friendly ideas or fast, rewarding builds, you can explore related topics through the internal resources linked below.
Tools and safety for beginners
Before you start any project, assemble a small, reliable toolset and establish a safe workspace. The right tools make beginner joinery projects more enjoyable and more accurate, while a clean, well-lit space reduces mistakes and accidents.
What you’ll typically need for most beginner joinery projects:
- Measuring tools: tape measure, combination square, marking gauge
- Cutting tools: a handsaw or backsaw, coping saw for tight curves
- Chisels: a small set (10 mm, 15 mm, 22 mm) for cleaning joints
- Mallet or hammer: helps seat joints without damaging wood
- Drill/driver and bits: for pilot holes and assembly
- Clamps: a couple of bar clamps or F-clamps to hold joints tight while gluing
- Gluing supplies: wood glue, brushes or rollers for even spread
- Finish: sandpaper (grits 120, 180, 220), sanding block or orbital sander
- Safety gear: eye protection, dust mask, ear protection, and a clean workspace with good ventilation
Beyond the tools, safety is paramount. Always wear eye protection when cutting or sanding, keep your workspace tidy to prevent trips, and work with a dust collection or a simple shop vacuum to minimize airborne particles. If you’re unsure about a technique, practice on scrap stock before proceeding to your project parts. A calm, organized approach makes beginner joinery projects both safer and more enjoyable.
How to choose your first projects
Choosing the right first projects is as important as the tools you own. Look for projects that offer a clear path to mastering basic joints and finishing techniques. A good starting point is to prioritize projects that use straight cuts, simple joints, and minimal waste. This approach lets you practice grip, line alignment, and glue-up with forgiving materials.
When evaluating a plan, check for:
- Clear cut lists and material requirements
- Simple joints (butt joints, simple rabbet or lap joints)
- Step-by-step instructions with photos or illustrations
- Notes on sanding, finishing, and assembly order
If you’re exploring budget-friendly ideas for your first set of projects, this collection offers reliable, cost-conscious options that still deliver solid results. You can explore budget-friendly wood projects through the following resource: budget-friendly wood projects. For time-crunched hobbyists, there are also quick, rewarding builds that fit a busy schedule: fast woodworking projects.
Project 1: Simple coffee table
The first project I recommend for beginner joinery projects is a simple coffee table. It’s a practical piece that teaches you to square up stock, align edges, join panels, and finish with a durable surface. It also scales well—start with a compact version and then modify dimensions as your confidence grows.
Materials and cut list
Assume a compact table about 36 inches long, 18 inches wide, and 16 inches tall. Your cut list will vary with stock width, but a common setup uses:
- Top: 1 sheet of 3/4-inch plywood cut to 36 x 18 inches, with a finished hardwood edging
- Apron: 4 boards, 3/4 inch thick, 2 x 18 inches for long sides and 2 x 16 inches for short sides
- Legs: 4 pieces, 1 1/2 x 1 1/2 inches, 16 inches long
- Glue, clamps, screws, and a simple top finish (oil or polyurethane)
Step-by-step build guide
1) Prepare stock: Plane, square, and sand the edges of all boards to ensure flat, true surfaces. 2) Build the apron frame by joining long and short sides with butt joints or simple through-screws from underneath for a stronger feel. 3) Attach legs to the apron with glue and screws, using a square to keep everything perpendicular. 4) Attach the top. If you’re using edged plywood, route or plane a small edge to accept a thin solid wood surround for a cleaner look. 5) Sand the assembled piece progressively from 120 to 220 grit. 6) Apply your finish of choice; a water-based polyurethane provides durability while preserving color.
This project offers an immediate sense of achievement and helps you practice alignment, clamping, and finishing—core skills for any future joint work. As you become more confident, you can experiment with different edge profiles or grow the size of the table to suit your space.
Project 2: Wall-mounted shelf
A wall-mounted shelf is an excellent next step in beginner joinery projects. It introduces you to accurate measuring, precise drilling for mounting hardware, and how to create a sturdy bracket-to-shelf connection without relying on complex joints. A simple shelf also gives you a small, visible project that you can proudly display while refining your skills.
Materials and cut list
For a compact floating shelf (about 24 inches long):
- Shelf board: 1 piece, 3/4 inch thick, 24 inches long, 8 inches deep
- Support brackets or cleats: 2 pieces (1 x 2 inch stock) for mounting
- Screws, wood glue, sandpaper, and a finish of your choice
Step-by-step build guide
1) Prepare the shelf board with a light sanding and rounded edges for a pleasing finish. 2) If using cleats, cut them to fit the wall space and screw them to the wall studs first, ensuring level mounting. 3) Attach the shelf to the cleats with screws from underneath, using two countersunk fasteners per side. 4) Sand and apply a protective finish. 5) Add trim or edge banding if you want a more polished look. 6) Hang at a comfortable height and confirm it’s level.
Even a modest shelf teaches you about weight distribution, mounting accuracy, and the importance of a level surface in woodworking. If you’re looking for inspiration on how to combine function with style, consider exploring other projects with similar skill requirements, or revisit the budget-friendly ideas to keep your project list affordable while you learn.
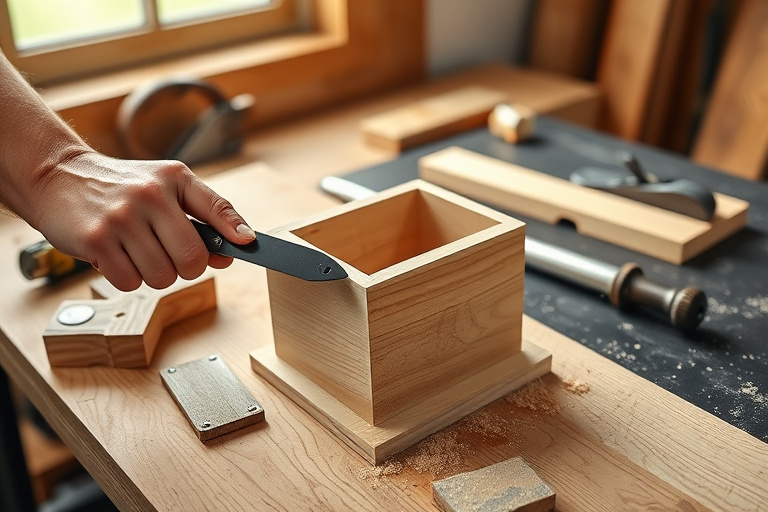
Project 3: Small jewellery box
A jewellery box is a classic project for practicing fine joinery and precise fitting. The lid and the box sides require careful alignment, a fundamental skill in many joinery methods. A simple design emphasizes accuracy more than complexity, making it a satisfying conclusion to your initial set of beginner joinery projects.
Materials and cut list
For a small keepsake box (about 6 x 4 x 3 inches):
- Box stock: 1/2 inch to 3/4 inch plywood or hardwood panels for sides
- Joint options: simple butt joints reinforced with small dowels or biscuits, or a basic rabbet joint along the lid for a snug fit
- Hinges or a small lid-latch, depending on preference
- Finish: oil, wax, or varnish; soft interior lining optional
Step-by-step build guide
1) Cut the four sides to size, then cut a shallow rabbet notch on the back edge of the sides to receive the back panel. 2) Assemble the box with glue and clamps, using dowels or biscuits to align joints if desired. 3) Fit the bottom panel into a rabbet groove; ensure it sits flat and square. 4) Attach the lid and hinge, ensuring a smooth opening. 5) Sand through 220 grit and finish with your preferred oil or varnish, applying a light coat and allowing adequate drying time between layers.
The jewellery box is a great way to practice precise work and reveals how even small projects can deliver big satisfaction when joints are tight and surfaces are smooth. As you wrap up this project, you’ll find your confidence growing, not just in tool handling but in project planning and finishing technique as well.
Progressive skills and troubleshooting
With beginner joinery projects, the learning curve is gradual. Here are some practical tips to avoid common pitfalls and continue progressing:
- Measure twice, cut once: use daylight or a bright workshop light to ensure lines are visible and true.
- Clamp securely: improper clamping leads to gaps and misaligned joints. Take time to line up parts before applying glue.
- Test-fit before final assembly: dry-fit components to verify alignment and fit.
- Use sharp blades and clean cuts: a sharp blade yields cleaner edges and less tear-out.
- Choose the right joint for the job: simple butt joints are fine for many beginner projects; as you gain confidence, experiment with dowels, mortise-and-tenon, or box joints for stronger joints.
As you practice, you’ll realize that many “mistakes” are opportunities to refine your technique. If you find a particular step challenging, take a break, re-check your measurements, and try again with a slightly different approach. The key is consistency and curiosity—the two fuel the journey from beginner joinery projects to more advanced work.
How Ted’s Woodworking can support beginner joinery projects
When you’re ready to expand your library of plans and patterns, a comprehensive resource like Ted’s Woodworking can be a valuable companion. It offers a broad collection of detailed plans, step-by-step instructions, and diagrams that complement hands-on practice. If you’re curious to explore more plans and ideas, you can access the program via this affiliate link: Ted’s Woodworking.
Incorporating a curated plan library into your routine can help you choose projects that steadily increase in complexity, while still aligning with beginner-friendly techniques. It’s not about rushing to the most ambitious project; it’s about creating a sustainable path where you learn, apply, and repeat with confidence.
Resource round-up: fast, rewarding projects (internal link to fast projects)
Busy woodworkers often need projects that deliver a quick payoff without sacrificing quality. If you’re pressed for time but still want meaningful results, check out fast woodworking projects designed for rapid completion and quick rewards. These ideas can be a great complement to your regular practice sessions. See this collection of quick, rewarding builds here: fast woodworking projects.
Additionally, if you’re hunting for budget-friendly inspirations, the other internal resource can be a helpful reference: budget-friendly wood projects.
Conclusion
Starting with beginner joinery projects is a smart way to build confidence, skill, and a sense of accomplishment in woodworking. By focusing on simple joints, careful measurements, and a steady finishing routine, you pave a solid foundation for more complex joinery techniques in the future. Remember to prioritize safety, keep your workspace organized, and practice regularly. As you progress, you’ll find you’re not just making objects—you’re shaping your capability and your creative process.
If you’d like additional guidance and curated plans to accelerate your journey, Ted’s Woodworking can be a helpful resource. This affiliate program provides a broad library of projects that align well with beginner joinery projects and can help you plan your next set of builds with confidence. And if you’re exploring related ideas, you can also explore budget-friendly and fast projects via the internal links above to keep your learning curve steady and engaging.