Introduction to carpentry furniture making
Carpentry furniture making is more than assembling wood into a chair or table. It’s a craft that blends design thinking, precise measurement, and thoughtful finishing to produce pieces that can be loved for generations. When you commit to carpentry furniture making, you’re investing in skills that translate across a wide range of projects—from a simple stool to a mid-century inspired cabinet. This guide walks you through planning, tools, techniques, and a practical build so you can gain momentum quickly while building durable, beautiful furniture.
Whether you’re a dedicated hobbyist or a budding carpenter, the journey starts with clarity: what piece are you making, who will use it, and how will it fit within a space? Read on to discover how to design, cut, join, and finish with confidence, and know where to look for deeper guidance as you advance your craft.
Planning your carpentry furniture making project
Defining purpose, dimensions, and ergonomics
Every successful furniture project begins with a clear brief. What is the piece’s function? How will it be used in daily life? Take measurements not just of space, but of how people will interact with the piece. For example, a coffee table benefits from a comfortable height and a surface that accommodates magazines, drinks, and remotes without crowding the legs. Ergonomics matter in carpentry furniture making because comfort and usability are part of the design language. Sketch your ideas, note required clearances, and plan for access to stored items or open spaces beneath the furniture.
Material selection and budgeting
Material choice dramatically affects both cost and performance. Solid hardwoods such as oak or maple offer durability and a rich finish, while softwoods like pine keep costs lower for beginners. Engineered woods and plywood can yield strong panels with stable behavior, particularly for tabletops and cabinet faces. Create a rough budget that includes stock wood, joinery hardware, and finish products. In carpentry furniture making, accounting for waste and tool wear up front helps prevent mid-project budget anxiety. If you’re unsure where to start with tool lists and project planning, you can explore a structured approach to tools here: Basic Carpentry Tools List: Your Essential Guide to Start Cutting, Measuring and Building.
Sketching, design, and measurements
A measured sketch is your blueprint before the first cut. Translate ideas into precise dimensions, taking into account seat heights, leg angles, drawer depths, and clearance for movement. A simple approach is to design with a grid: width × depth × height, plus the thickness of each component. Even at the planning stage, you’ll gain confidence by referencing established guides that discuss tool use and measurement practices, such as the essential guide linked above. If you’re ready to escalate beyond basics, consider exploring more intermediate projects to deepen your understanding of mid-level woodworking excellence. This resource can be helpful when you’re ready to level up: Mastering Intermediate Wood Projects: A Practical Guide to Mid-Level Woodworking Excellence.
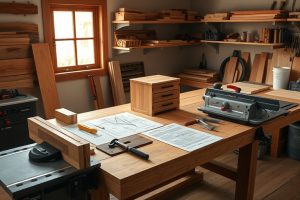
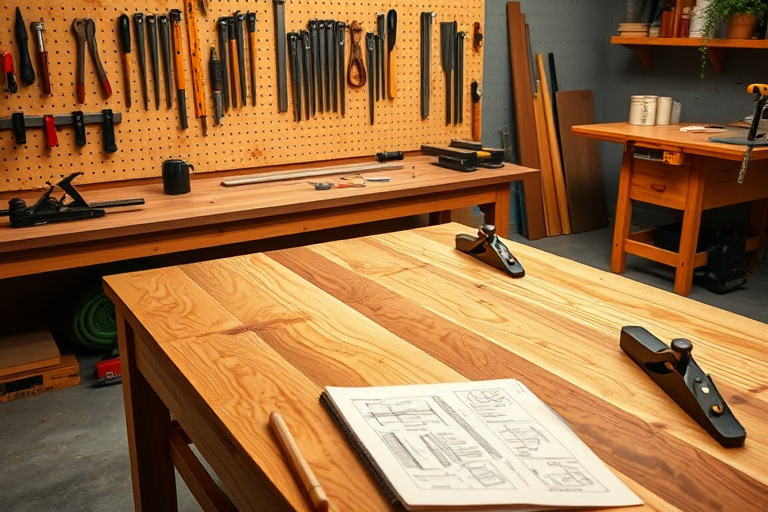
Essential tools and workshop setup
Core hand and power tools
Quality furniture starts with the right tools. A reliable saw (handsaw or a powered cut in a controlled setup), a sharp block plane, chisels, a measuring tape, squares, and a drill are the backbone of carpentry furniture making. In addition, a bench or sturdy work surface, dust collection or at least a broom for cleanup, clamps in a few sizes, and a card scraper will dramatically improve your accuracy and finish quality. If you’re building a new workshop from scratch, create a clean, organized space that minimizes wasted motion and protects your work. Remember that the best tool you own is the one you know how to use well. For a concise overview of the essential tools, see the linked resource above, which walks you through the basics of cutting, measuring, and building with confidence.
Safety, dust control, and workspace organization
Safety comes first in carpentry furniture making. Wear eye protection, hearing protection, and a breathable dust mask when sanding, planing, or routing. Keep cords managed and switch to a dust-collection approach if you’re working on larger pieces or in a dense workshop. An organized shop reduces errors and helps you maintain focus during longer builds. Alongside safety, a clean, well-lit space makes the process more enjoyable and productive, which is a big part of mastering any woodworking craft.
Techniques for durable, beautiful furniture
Joinery basics: mortise and tenon, dowels, screws, biscuits
Joinery is the heart of long-lasting furniture. Mortise-and-tenon joints offer excellent strength for frames and legs, while dowels and biscuits can simplify alignment when assembling panels. Screws and confirmat fasteners are useful for flat-pack style furniture or internal reinforcements. A polished project uses a combination of joints tailored to the piece’s function. As you grow more confident, you’ll appreciate how precise alignment and consistent glue application influence both strength and the final appearance of the piece. If you’re curious about progressing to more advanced joinery techniques, revisit your plan and consider additional resources that cover intermediate approaches to woodworking excellence.
Cutting, planing, and precise measuring
Consistency in measurement translates directly into snug joints and clean lines. Use a sharp blade for clean cross-cuts, and check right angles with a quality square. Planing stock before assembly helps achieve uniform thickness and reduce misalignment. Maintaining a steady pace, setting aside time for test fits, and validating each joint’s fit is how you avoid surprises on the final assembly. The guidance in the planning stage helps you keep carpentry furniture making on track as you move from concept to a precise, gluing-ready set of parts.
Sanding, finishing prep, and surface repairs
Sanding is where a rough-cut piece becomes refined. Start with a coarser grit to flatten any tool marks, then move through finer grits to achieve a smooth surface for finish. Wipe away dust between grits to prevent scratches. For most furniture, a pre-finishing wipe-down prepares the wood for the final coat, whether you choose oil, varnish, or polyurethane. If you encounter a dent or a small cupping issue, a carefully controlled moisture application and a light subsequent sanding can restore planarity while preserving the piece’s integrity. A good finish not only enhances color but protects wood against daily wear and moisture exposure—an essential consideration in carpentry furniture making.
Finishing touches and protection
Finishes: oils, stains, varnishes, polyurethane
Finishes come in a spectrum from penetrating oils that highlight the grain to high-build varnishes that yield rock-hard protection. Oils such as tung or linseed bring out natural depth without creating a film, while lacquers and polyurethanes build a durable surface perfect for tables and high-use pieces. Stains add color while preserving grain; topcoats seal and protect. The choice depends on the application, desired sheen, and level of maintenance you’re willing to perform over time. In some cases, a hand-rubbed oil finish followed by a wax coat creates a warm, tactile surface ideal for furniture you intend to feel and use daily.
Testing durability and wear resistance
Before you declare a project finished, test its durability. Open drawers, check joints under load, and wipe the surface to observe how the finish holds up. Conduct a simple scratch test in an inconspicuous area to determine whether a light buffing or re-coating is needed. These tests give you confidence that your work will endure in real-world use, which is the ultimate goal of carpentry furniture making: pieces that age gracefully and serve reliably for years.
A practical build: from plan to completion
Step-by-step workflow for a small coffee table or cabinet
Here is a practical blueprint you can apply to a modest project, such as a coffee table or a small storage cabinet. Start with a clear cut list: table top (board width and thickness), legs (length and thickness), aprons every couple of inches, and any drawers or shelves. 1) Cut stock to size with precise measurements. 2) Joint edges and test-fit panels. 3) Assemble using a dry-fit to verify alignment. 4) Glue up panels, clamp evenly, and check for square as you go. 5) Sand the assembled piece progressively from rough to fine grits. 6) Apply your chosen finish and allow adequate cure time. 7) Reassess the piece for cosmetic touch-ups. This workflow emphasizes careful planning, accurate cutting, and meticulous finishing—key practices in carpentry furniture making that yield professional-looking results.
Along the way you may want to explore curated libraries of woodworking plans. For a broader selection of project blueprints and ideas, some builders turn to established woodworking libraries and communities. If you’re interested in a curated library of professional plans and patterns, you can learn more through Ted’s Woodworking (affiliate). While not every plan will fit your exact project, a well-chosen set of plans can shorten development time and expose you to joinery and assembly techniques you might not have considered. If you want to deepen your practice beyond this guide, the following resources can help you refine your craft: Basic Carpentry Tools List: Your Essential Guide to Start Cutting, Measuring and Building and Mastering Intermediate Wood Projects: A Practical Guide to Mid-Level Woodworking Excellence.
Learning paths and recommended resources
Internal resource for basic tools and setup
To begin your journey, ensure you have a solid toolkit and an organized workspace. The basic carpentry tool list provides a practical starting point for beginners and helps you understand essential gear before you cut your first piece. This kind of foundational knowledge is critical in carpentry furniture making because a precise cut is built on precise planning and proper tool use. See the resource above for a concise, practical guide to what you’ll need as you begin to cut, measure, and build with confidence.
Internal resource for moving into intermediate projects
Once you’ve mastered the basics, shifting to intermediate projects expands your skill set and introduces more complex joinery and design considerations. The intermediate guide explores practical approaches to mid-level projects, helping you push beyond beginner builds toward furniture that reflects stronger technique and refined finishes.
An affiliate option for broad project plans
If you’re looking for a comprehensive library of project plans and design ideas, consider exploring an extensive collection of woodworking patterns through the featured affiliate link mentioned earlier. This resource can complement the knowledge in this guide and accelerate your ability to execute diverse furniture projects with confidence.
Cost, maintenance, and sustainability in carpentry furniture making
Wood types, hardware, and long-term care
Cost-effective choices don’t have to compromise quality. A well-chosen combination of solid wood, plywood, and hardware yields durable furniture without breaking the bank. When you consider maintenance, a careful schedule of cleaning, refinishing, and occasional tightening of joints keeps pieces performing well over time. Regular dusting, a light oiling or wax application for exposed surfaces, and prompt attention to any moisture exposure help maintain the finish and structural integrity. Sustainability matters in carpentry furniture making: selecting responsibly sourced wood and minimizing waste by planing stock efficiently can make a big difference in the long run.
Eco-friendly practices and waste reduction
Waste reduction can include reusing scrap stock for secondary components, repurposing offcuts for small project pieces, and optimizing cut plans to minimize waste. Sanding dust can be recycled for various uses or disposed of in an environmentally safe manner. By adopting mindful practices, you align your craft with broader sustainability goals while still delivering high-quality, beautiful furniture.
Conclusion: Your ongoing journey in carpentry furniture making
Carpentry furniture making is a continually evolving craft. With a clear plan, the right tools, and disciplined technique, you can build furniture that blends functional design with lasting beauty. Each project teaches you something new about wood, joinery, finishes, and the importance of patient workmanship. Stay curious, practice regularly, and use solid planning to keep your projects on track. Remember, the goal isn’t merely to complete a piece, but to develop skills that enable you to tackle increasingly ambitious designs with confidence. If you’re exploring broader patterns of inspiration and plan sets, the affiliate resource linked above can complement your learning journey, while the internal guides offer practical foundation knowledge to keep you moving forward in your carpentry furniture making endeavors.