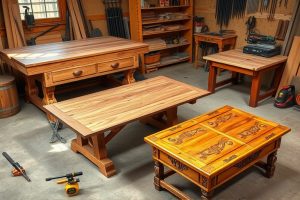
Introduction to cool woodworking
In recent years, cool woodworking has shifted from a niche hobby to a popular, approachable craft. It isn’t about owning every expensive tool in a pro shop; it’s about learning the basics, building confidence with small projects, and gradually expanding your toolkit. Whether you’re carving a decorative piece for your living room or designing a sturdy outdoor chair for your patio, the pursuit blends creativity with practical problem-solving. If you’re unsure where to start, remember that the best projects grow your skills, not your frustration. The journey in cool woodworking is as rewarding as the finished piece.
Getting started: planning and safety
Before you pick up a saw or clamp, take a moment to plan. A clear plan reduces waste, saves time, and keeps you motivated to finish what you start. The first step is defining your goals and securing a simple workspace. Do you want sturdy outdoor furniture, precise cabinetry, or charming novelty items? Your goal shapes the tools you buy, the types of projects you choose, and the projects you’ll tackle first.
Define your goals and workspace
Start by mapping out the space you can dedicate to woodworking. Even a small shed, a corner of a garage, or a sturdy kitchen table can serve as a functional shop. Write down the kinds of projects you’d like to complete in the next 6–12 months. That could include outdoor furniture, shelves, picture frames, or small wooden toys. Once you have a rough list, you can prioritize projects that use similar tools and materials, which keeps your learning curve steady and your budget under control.
Essential tools and safety practices
Grow your toolkit gradually, prioritizing quality over quantity. A basic starter set might include a handsaw, a square, a marking gauge, a level, a set of chisels, a block plane, clamps, a power drill, and an orbital sander. Add safety gear like eye protection, ear protection, a dust mask, and a sturdy pair of gloves. Safety matters in all stages of woodworking, from layout to finishing. Remember to work in a well-ventilated area, keep your blades sharp, and follow the manufacturer’s safety guidelines for each tool. A calmer, methodical approach often yields better results and helps you stay motivated for the long haul.
Beginner-friendly project ideas
Starting with approachable projects builds confidence and momentum. You’ll learn essential techniques like accurate measuring, clean cuts, and proper clamping—foundation skills that pay dividends across all kinds of woodworking tasks. One of the most satisfying first projects is a comfortable, functional outdoor chair. For a guided, proven plan, you can explore a classic outdoor chair project here: Adirondack chair plans.
Adirondack chair project
The Adirondack chair remains a staple for beginners because its construction emphasizes fundamental carpentry skills—simple geometry, comfortable angles, and sturdy joinery. You’ll practice cutting precise angles, aligning parts for a wobble-free stance, and finishing with a weather-ready sealant. As you follow a well-laid plan, you’ll see how a few well-chosen cuts and careful assembly lead to a comfortable chair that you’ll be proud to show off outdoors.
Beyond chairs, consider other cool woodworking projects such as a small bookshelf, a plant stand, or a wall-mounted garden tool rack. These items use straightforward joinery and provide quick wins to build your skills. If you’re seeking broader inspiration, check out 12 creative ideas for beginners and beyond for ideas that scale as your confidence grows.
Techniques and fundamentals
Mastery in cool woodworking comes from mastering the basics with consistency. Here are a few core techniques that every beginner should practice as soon as you pick up your toolkit.
Measuring, marking, and cutting for accuracy
Good measurements prevent waste and ensure parts fit together cleanly. Learn to double-check your measurements, use a reliable square, and set aside a dedicated space for your marking and layout. Practice marking lines, then making cuts with a sharp blade. Focus on clean edges and square shoulders; these two factors dramatically improve the final appearance and structural integrity of your pieces.
Joinery basics and finishing touches
Even simple projects benefit from solid joinery. Dowel joints, butt joints with glue and screws, or small pocket-hole connections can yield durable results after you’ve milled and dry-fit pieces. Finishing touches—sandpaper grits, watchful edges, and the right sealant or paint—help protect wood while elevating its appearance. A smooth finish highlights the care you’ve put into your work, turning a basic project into something that looks polished and professional.
Building a budget-friendly home workshop
Your space doesn’t have to be a dream dedicated to industrial equipment to produce solid results. A well-planned, budget-conscious setup supports steady growth in cool woodworking skills without overwhelming you financially.
Choosing the right mix of hand tools and power tools
Begin with essential hand tools that offer control and precision. A sharp saw, a block plane, and a smoothing plane keep costs down while teaching fundamental technique. As you progress, gradually add power tools that save time and improve consistency—think a reliable drill/driver, a small miter saw for quick angle cuts, and a dependable random-orbit sander. With smart tool choices, you’ll avoid buyer’s remorse and keep your budget manageable while you build your capabilities.
Workspace layout and safety considerations
Arrange your shop to minimize unnecessary movement. Mount a durable workbench at a comfortable height, ensure good lighting, and provide clear space for clamps and supports. Implement a dust collection plan, even if it’s a simple shop vac and a dedicated dust path. Keeping your workspace tidy and safe accelerates learning and reduces the risk of mistakes—an important factor in any growing woodworker’s journey.
Learning resources and inspiration
Learning in public can accelerate your progress. Structured plans, tutorials, and inspirational projects help you stay motivated and see tangible results. A couple of curated resources can be especially helpful for someone pursuing cool woodworking as a long-term hobby or even a small side project business.
For expansive ideas and guided plans that cover a wide range of beginner to advanced projects, check out additional resources like those found in curated plan libraries and tutorials. If you’re seeking a broad collection of plans and patterns to study, you may want to explore comprehensive plan libraries that compile styles and techniques from across the spectrum of woodcraft.
To keep expanding your repertoire, revisit the Adirondack chair project described earlier and explore related ideas for outdoor plans. For more inspiration tailored to beginners and beyond, the 12 creative ideas page above can spark fresh projects that align with your skill level and timeline.
Monetization and affiliate resources
As your skills grow, you might consider exploring professional plan libraries that offer a wide range of patterns and projects. An established resource many woodworkers turn to is Ted’s Woodworking, which provides a large library of woodworking plans and patterns to help you jump-start your projects, stay organized, and tackle more ambitious builds. If you’re curious about expanding your library, you can explore Ted’s Woodworking here: Ted’s Woodworking.
Remember, the goal is to support your learning journey with quality plans that fit your space, tools, and budget. A well-chosen resource complements practice, reduces downtime, and helps you keep the momentum you’ve built with warm, confident finishes on each piece you craft. Use these resources as a reference, not a replacement for hands-on practice and patience—the true drivers of skill in cool woodworking.
Conclusion
Whether you’re starting with a simple plant stand or working toward a comfortable outdoor chair, cool woodworking offers a practical path to creativity and personal achievement. By planning carefully, mastering core techniques, and gradually expanding your toolkit, you’ll gain confidence and joy in the process. The key is consistency: practice regularly, celebrate small victories, and let each project teach you something new. If you ever feel stuck, revisit beginner-friendly guides and project ideas, such as those outlined earlier, to rebuild momentum. With the right approach, your next project can be as satisfying as the last—and your workshop can become a place where ideas turn into durable, beautiful pieces.


