Introduction to diy adirondack chair plans free
If you love relaxing on your patio or deck, but are tired of flimsy, uncomfortable chairs, the idea of diy adirondack chair plans free can be a game changer. This guide walks you through a practical, beginner-friendly approach to building a classic Adirondack chair tailored to your space, climate, and personal style. You’ll learn everything from choosing wood and measuring space to cutting, assembly, and finishing. Along the way, you’ll discover where to find reliable resources that expand your project scope, including a broad woodworking plan library that many builders rely on for inspiration and exact plans.
Why DIY Adirondack Chairs?
Adirondack chairs have a timeless silhouette with an ergonomic, sloped back and wide arms that offer a comfortable perch for hours of sunlit porch time. Building your own version using diy adirondack chair plans free lets you customize for scale, wood species, and finish that withstands your local weather. When you start from a free plan, you can test fit and comfort without a large upfront investment. You also gain a sense of pride from creating a durable piece of outdoor furniture that can be repaired, repainted, or upgraded over the years.
Benefits of Building Your Own Outdoor Seating
Choosing to craft outdoor chairs rather than buy them off the shelf offers several practical benefits:
- Cost savings over time: While high-quality outdoor furniture can be expensive, DIY typically costs less per chair and you control materials and hardware quality.
- Customization: You can tailor seat height, arm width, and overall footprint to fit your space and comfort needs.
- Learning opportunity: The process teaches measurement discipline, tool handling, and finish chemistry, which helps you tackle bigger outdoor projects later.
- Repairability: If a board warps or a finish wears, you can replace or refresh components without buying a whole new chair.
As you explore diy adirondack chair plans free, remember that the goal is not just a chair but a durable, weather-ready piece that ages gracefully with your yard. For a broader education in woodworking setups and budget-friendly gear, you can consult a Essential Tools and Setup guide and a deeper dive into outdoor chair plans in another helpful resource.
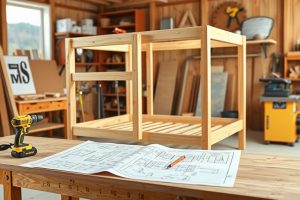
Before you grab the first board, a little planning goes a long way. The standard Adirondack chair geometry is comfortable, but you’ll want to adapt it for your space and the wood you choose. In this section we cover measuring space, selecting wood, and the basic geometry that underpins a sturdy, comfortable chair. If you’d like more in-depth guidance on tool choices and setup, see the Essential Tools and Setup resource mentioned earlier; it’s a great way to start your workshop journey.
Measuring Space and Wood Selection
Begin by estimating how much seating you want in your outdoor area. A comfortable Adirondack chair typically sits around 36 to 40 inches wide with a seat height of about 15 inches. If you’re building for a narrow patio or a breezy deck, you may want to scale down the footprint slightly. When selecting wood, choose materials that weather well and are compatible with your climate. Cedar and redwood resist rot, while pressure-treated pine can be sealed to reduce moisture uptake. If you’re aiming for low maintenance, consider weather-resistant composites designed for outdoor use. Always factor in the finish you’ll apply; the right sealant will dramatically extend the life of your chair.
Basic Adirondack Geometry
The classic Adirondack seat is deep and slightly angled, with a backrest that reclines for comfort. A basic approach uses a front rail, two side rails, and slats for the seat and back. A rough cut list might include: two front legs, two rear legs, two side panels, a seat frame, several slats for the seat, and a backrest assembly. The exact counts depend on your chosen design and whether you plan to add armrest extensions or a weatherproof stain. Start with a simple plan and then iterate as you gain confidence in your joints and assembly technique.
Here’s a practical, step-by-step approach that keeps the workflow smooth and beginner-friendly while still yielding a robust finished piece. If you want more variations and ideas, you can explore larger plan libraries that cover outdoor furniture in depth, including chairs and other seating options.
Cutting Parts and Router Safety
Begin with a clean, flat workspace. Mark your cut lines on the stock using a square and a marking gauge to ensure consistent angles. When cutting profiles for the legs, arms, and back slats, maintain smooth, even curves to avoid kickback or binding. If you’re using a router to shape the edges, keep the router base flat against the board and progress with light passes. Always wear eye protection and hearing protection, and clamp workpieces securely to prevent shifting during cuts. If you’re new to cutting or joinery, consider practicing on scrap stock before tackling your actual pieces.
Assembly Techniques for a Sturdy Chair
Glue and reinforce joints where possible. A combination of pocket screws for the seat and back slats with traditional dowel or mortise-and-tenon joints for the arms and rails creates a durable build. Pre-drill holes to minimize wood splitting, and use outdoor-rated wood screws with corrosion resistance. When assembling, lay out the pieces on a flat surface and double-check alignment before applying glue. Clamps are essential to keep joints tight while the glue cures. If sticks or gaps appear, gently coax them into place with a rubber mallet and sanded shims. A well-glued chair will hold up to years of sun, rain, and occasional shifting.
Finishing Touches: Sanding and Protective Coatings
Sand the chair progressively with 120, 180, and 220 grit sandpaper to create a smooth surface that accepts stain or paint evenly. Remove all dust with a tack cloth before applying any finish. For outdoor longevity, apply a penetrating exterior sealant or a high-quality exterior stain with a UV blocker. Reapply every 1-3 years depending on climate and exposure. Consider a two-coat approach: a penetrating primer or stain, followed by a protective topcoat for maximum moisture resistance. This routine keeps your diy adirondack chair plans free project looking sharp season after season.
Choosing the right materials and finish is critical for outdoor longevity. Cedar and redwood balance beauty and rot resistance, while treated pine offers cost savings with proper sealing. If you’re in a damp environment, you may want to favor wood species that resist warping and splitting. For paints and stains, select products designed for exterior use and compatible with your wood type. The goal is a finish that protects from moisture, allows for breathability, and remains easy to refresh when needed. Regular maintenance helps your chair look great and serve you well for many seasons.
Even a simple project benefits from a thoughtful tool setup. A reliable miter saw, track saw, cordless drill, and an assortment of clamps will handle most steps in the diy adirondack chair plans free workflow. If you’re building more than one chair, or planning more outdoor furniture, a well-organized shop makes all the difference. For a deeper dive into essential tools and setup, check out the Essential Tools and Setup guide. It covers budget-friendly picks and practical tips to keep your workshop efficient.
Once you’ve completed a single chair, you’ll likely want to add more pieces to your outdoor sitting area. Building variations of Adirondack chairs or combining chairs with a matching table can create a cohesive outdoor lounge. If you’re eager to explore more outdoor chair plans and durability tips, another useful resource focuses on mastering woodworking plans for outdoor chairs and building sturdy patio seating that lasts. This article can be a great companion for expanding your project library and improving your technique: Outdoor Chair Plans and Durability.
For woodworkers who want a broader library of plans beyond Adirondack chairs, a well-known resource is Ted’s Woodworking. It bundles hundreds of plan sets, including outdoor furniture ideas and variations for different skill levels. If you’re curious about expanding your project horizon, you can explore a trusted offer here: Ted’s Woodworking. While you don’t need a whole library to complete a single diy adirondack chair plans free project, having access to a wide range of plans can spark ideas and help you tackle future outdoor builds with confidence.
Plan your budget around wood costs, fasteners, finishes, and tools you might need to upgrade. A basic Adirondack chair can be built with modest investment, but higher quality hardwoods and finishes will demand more upfront. Time-wise, a single chair projects can take anywhere from a weekend to a full week, depending on your experience and the complexity of your chosen plan. Maintenance is simple: wipe down with mild soap, reapply sealant as needed, and store indoors during harsh winters if possible. With proper care, your chair will remain comfortable and visually appealing for many seasons.
Q: Do I need special tools to start diy adirondack chair plans free?
A: Not necessarily. A basic set of tools, a good saw, clamps, a drill, and some sanding gear are enough to begin. As you progress, you may add a few specialty tools to speed up the process or improve precision.
Q: How do I prevent warping and cracking in outdoor wood?
A: Choose species with natural rot resistance, seal the wood well, and maintain the finish over time. Seasonal changes can cause movement in wood; allowing for loose joints and using expandable finishes helps manage this risk.
Starting with diy adirondack chair plans free is a practical, satisfying way to bring comfortable outdoor seating to your space while learning valuable woodworking skills. The process emphasizes planning, safe cutting, solid assembly, and durable finishing. By using reliable resources for planning, tool setup, and technique, you can complete a chair that not only looks good but also lasts. If you want to broaden your toolbox of ideas, Ted’s Woodworking can be a helpful companion that offers a broad range of plans for future projects. Remember to pace yourself, measure twice, and enjoy the craftsmanship as your outdoor area transforms into a true living space.