Whether you’re a weekend warrior or someone who loves the satisfaction of a well-made piece, diy wood working projects can be incredibly rewarding. This guide walks you through practical steps to plan, execute, and finish projects with confidence. We’ll cover how to choose the right projects for your space, how to assemble an essential toolkit, where to find reliable plans, and how to read schematics so you can translate a design into realidad. And because great projects are built on quality planning, we’ll also discuss how a curated library of plans can accelerate your learning curve and keep you motivated along the way.
What makes diy wood working projects enjoyable and sustainable
When you commit to diy wood working projects, you’re not just making objects—you’re building skills, saving money, and creating items that fit your space perfectly. The keyword diy wood working projects captures the hands-on nature of this hobby: you measure, cut, shape, join, and finish, all while learning from mistakes and improving with practice. If you’re new to the craft, starting with small, well-scoped projects helps you gain confidence without feeling overwhelmed. For more seasoned woodworkers, expanding into more complex joints, drawers, and inlays keeps the challenge alive and your skills sharp.
Step-by-step approach to your first diy wood working projects
To maximize your success with diy wood working projects, follow a simple, repeatable process. This approach ensures you stay organized, reduce waste, and produce results you’ll be proud of.
Define scope and space
Begin by surveying the space you’re aiming to improve. Whether you’re building a wall shelf, a small workbench, or a planter box, define its footprint and consider how it will be used. Ask yourself: What problem does this project solve? How will it look in the room? What are the tolerances for fit and finish? Writing a short project brief can save you time and prevent scope creep—an essential tactic for diy wood working projects, especially when you’re balancing work, family, and other hobbies.
Gather the right tools
A common pitfall for beginners is trying to rush a build with inadequate tools. Before you start, assemble a reliable set of basics: a solid square, a measuring tape, a carpenter’s pencil, a hand saw or miter saw for clean cuts, a drill/driver, a set of chisels, clamps, and sandpaper. Having the right tools keeps you from improvising risky or sloppy methods. If you want a consolidated list of essentials, you can explore resources like the essential carpentry equipment list, which helps you build confidence with the right gear for diy wood working projects.
Choose a project with learning goals
Pick projects that align with your current skill level and offer a clear learning path. For beginners, simple items such as a wall shelf or a small planter box teach essential jointing, measuring, and assembly skills. As you progress, you can tackle projects that introduce more complex joinery, finishes, and hardware. The key is to choose something you’ll enjoy and finish, which fuels motivation for future diy wood working projects.
Essential tools and equipment
Beyond the basics, there are a few pieces that make many diy wood working projects easier and more accurate. A well-organized shop not only improves efficiency but also reduces frustration and the risk of mistakes. Invest in quality blades, a reliable vise, a workbench with proper height, and clamps that hold pieces securely during cutting, drilling, and sanding. You’ll notice a difference in accuracy and finish when you pair the right tools with a thoughtful plan. If you’re curious about expanding your toolkit, a well-curated guide on carpentry equipment can be invaluable for shaping your setup as you pursue more diy wood working projects.
As your toolkit grows, so will your confidence. For those who want a structured path to comprehensive plans, Ted’s Woodworking can be a valuable resource, offering a wide range of templates, drawings, and step-by-step instructions that align with different tools and jigs. You can explore one reputable source for plans and reference materials by visiting this overview of woodworking schematics and masterful projects, which includes references to Ted’s Woodworking for further inspiration: woodworking schematics.
Finding reliable plans for diy wood working projects
Quality plans save you time and help ensure accuracy. The best plans break down each project into a clear bill of materials, cut lists, and sequence of operations. When you’re learning diy wood working projects, having access to reliable plans reduces the guesswork, enabling you to learn faster and achieve cleaner results. Look for plans that include detailed diagrams, tool recommendations, and finish specs. If you want a curated library of proven plans, Ted’s Woodworking is a popular option that many hobbyists turn to for consistent results. To explore the broader value and context of these plan libraries, you may also find value in resources that cover the basics of wiring, joints, and joinery, all of which often appear in plan collections.
Ted’s Woodworking as a curated library of plans
Ted’s Woodworking is frequently referenced as a comprehensive source of woodworking plans and tutorials. It can serve as a practical accelerant for diy wood working projects by providing repeatable steps and tested cut lists. If you’re at a point where you want to scale your projects or try new styles, exploring Ted’s Woodworking through the official affiliate link can offer a broader range of ideas and layouts to adapt for your space. The aim is to pick plans that teach you transferable skills—like how to set up a cut list, how to select the right joinery, and how to prep pieces for finishing. If you’re ready to explore a larger library of proven designs, you can learn more through the product resource here: Ted’s Woodworking.
How to read schematics and blueprints
Reading woodworking schematics is a crucial skill in diy wood working projects. Plans usually include a detailed cut list, a hardware schedule, and a sequence for assembly. The ability to interpret a drawing—understanding grain direction, material thickness, and joint types—translates directly into better fits and stronger builds. For deeper guidance on schematics and how professional plans are structured, refer to the woodworking schematics guide mentioned above. These blueprints help you anticipate material needs, reduce waste, and ensure that your finished piece looks and functions as intended.
Project ideas across skill levels
Having a few project ideas in mind that match your current experience helps you stay motivated and steadily build competency in diy wood working projects. Here are tiered ideas to consider as you grow from beginner to more advanced builder.
Beginner projects
- Wall shelf with decorative brackets
- Simple planter box with a drip tray
- Milk crate-style organizer for a workshop or mudroom
- Small step stool, using straightforward butt joints
Intermediate projects
- Rectangular coffee table with a mitered edge
- Floating shelf with hidden brackets
- Tool caddy with integrated handles and a finish that resists moisture
- Bedside table with drawers and smooth slides
Advanced projects
- Corner cabinet with adjustable shelves and doors
- Storage bench with hinged lid and RT joints
- Dining chair with sculpted seat and curved backrest
- Workbench with integrated vise and pegboard wall
Each project type reinforces a core set of skills—precise measurement, careful material selection, effective clamping, clean cutting, and reliable finishing. The diy wood working projects you pursue should align with your goals, whether those goals are practical storage solutions, stylish furniture, or personalized tools for your workshop.
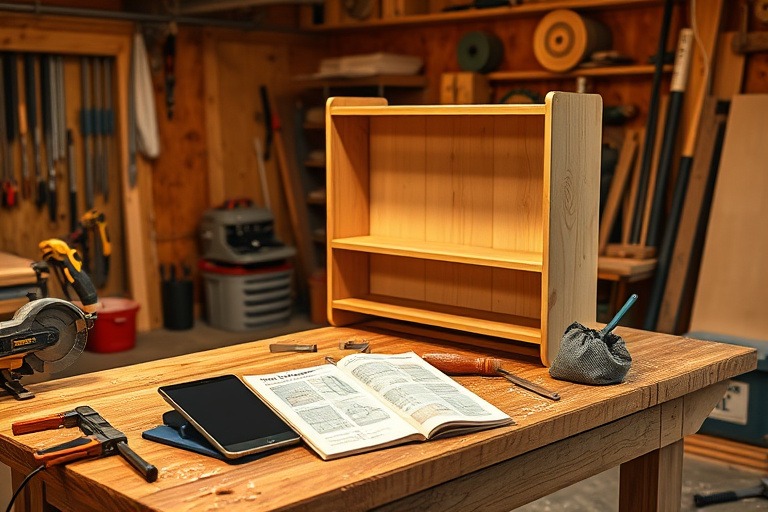
Step-by-step project example: Build a wall shelf
A great way to apply your growing toolkit and reduce project risk is to start with a wall shelf. It teaches essential joinery concepts, fasteners, and finishing techniques without demanding too much space or time.
Materials and cut list
Typical components include: two supporting boards, a backboard, wall mounting brackets, and a few finishing nails or screws. Material selection matters—softwoods like pine are forgiving for beginners, while hardwoods add durability and a refined look. You’ll also need sandpaper (grits 120-220 for a smooth finish) and a wood finish (polyurethane or water-based poly). A simple cut list might include: two 1×6 boards (sides), a 1×8 back, and two 1×2 supports, cut to the shelf length you desire. Having a clear plan helps keep your diy wood working projects on track and reduces waste.
Assembly steps
1) Sand all pieces to remove rough edges. 2) Pre-drill holes for screws to avoid splitting the wood. 3) Attach the backboard to the sides for rigidity. 4) Install the supports and attach the shelf boards. 5) Sand lightly again and apply a light coat of finish. 6) Mount the shelf to the wall with appropriate hardware. Following a structured plan ensures clean joints, proper alignment, and a professional look for your diy wood working projects.
Finishing touches
Finish selection can dramatically influence the final look. A clear polyurethane keeps the wood’s color while offering protection, while a staining step can transform light woods into a richer tone. Always test finishes on scrap pieces to avoid surprises on the final shelf. Finishing is a crucial step in diy wood working projects because it seals the surface, enhances grain, and prolongs durability.
Finishing, maintenance, and durability
Durability is a practical consideration for any diy wood working project. Choose materials suited to the environment: outdoor pieces benefit from pressure-treated or weather-resistant wood and exterior-grade finishes. Indoor pieces should be sealed, sanded smooth, and finished to resist wear. Regular maintenance—wipe downs, reapplication of finish as needed, and checking for loose joints—helps keep your projects looking good and functioning well for years to come. As you refine your craft, you’ll notice that working with the grain, choosing the right joinery, and applying an even finish significantly affect the longevity of your diy wood working projects.
Why investing in a plan library pays off
As your curiosity grows, you’ll likely find that a comprehensive plan library accelerates learning and expands your options for diy wood working projects. A good collection provides reliable cut lists, step-by-step assembly instructions, material recommendations, and finish guidance. It also offers variations and scaling options so you can adapt a single design to fit different spaces or needs. If you want a curated option, Ted’s Woodworking is a widely referenced resource that many hobbyists use to access structured plans and project ideas. You can explore the broader ecosystem of plans and inspirations here: Ted’s Woodworking, which can complement your own practice and help you stay motivated as your repertoire of diy wood working projects expands.
Conclusion and next steps
The journey through diy wood working projects is built on curiosity, practice, and smart planning. Start with small, achievable goals, build a solid toolkit, and use precise plans to guide your builds. Integrating the right resources—like detailed plans, reliable schematics, and a few beginner-friendly projects—can transform a slow start into a confident, satisfying, ongoing hobby. If you’re ready to broaden your library of plans and gain access to a wide range of methodologies, consider exploring Ted’s Woodworking through the affiliate link, and combine that with trusted guides that explain how to read schematics and set up your workspace for success. The key is consistent practice, careful measurement, and attention to finish—the hallmarks of becoming proficient at diy wood working projects.