Whether you are building a small hobby shop or upgrading a professional woodshop, the quality of your equipment for woodworking influences every cut, join, and finish. This guide blends practical tool recommendations with workflow considerations, so you can select gear that fits your space, budget, and project goals. It also highlights reliable resources, including Ted’s Woodworking, to help you access detailed plans and project ideas—without sacrificing safety or quality.
What counts as equipment for woodworking
When people first start collecting gear, they often focus on the biggest machines. In reality, a well-rounded setup balances hand tools, power tools, measuring and layout gear, and supporting accessories. Here’s a practical breakdown to help you build a complete, efficient shop.
Hand tools and power tools
Core hand tools include chisels, scrapers, marking gauges, block planes, and saws. Power tools such as a good quality circular saw, miter saw, router, drill/driver, and a compact handheld sander expand what you can build and how precisely you work. When selecting equipment for woodworking, aim for smooth operation, comfortable grip, and solid accuracy. For many woodworkers, quality hand tools stay in service for decades, while reliable power tools accelerate routine tasks and open doors to more complex projects.
Measuring, marking, and layout tools
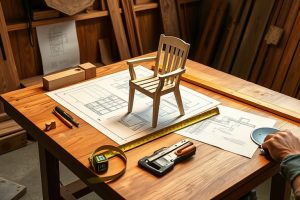
Accuracy begins with precise measurement. Calipers, rule rulers, marking gauges, combination squares, and a solid carpenter’s square are essential. A good digital caliper or a high-quality steel rule helps you verify dimensions before you cut. These tools ensure that joints fit snugly, reducing waste and the need for rework.
Clamps, vises, and workholding
Clamps, vises, and bench dogs hold workpieces securely during cutting, gluing, and sanding. A mix of quick clamps, bar clamps, and a sturdy workbench vise covers most tasks. The right setup minimizes movement, keeps hands free, and improves both safety and accuracy. When your equipment for woodworking includes solid clamps and a dependable bench, you’ll notice fewer mistakes and cleaner joints.
Dust collection, safety gear, and workshop infrastructure
Dust control protects your lungs and keeps your shop clean. A capable dust extractor or shop vac, plus a well-sealed dust-collection system, is worth the investment. Safety gear—eye protection, hearing protection, dust masks, and push sticks—should be accessible and used consistently. Don’t underestimate the value of a dedicated workbench with a stable top, proper lighting, and an organized tool cabinet. A well-planned shop reduces fatigue and mistakes, helping you progress faster with equipment for woodworking.
Designing a functional workshop
Beyond the tools themselves, the layout determines how efficiently you work. A logical workflow typically moves from measuring and cutting (far left) to joinery and assembly (center) to sanding and finishing (near the finishing area). Plan enough space for outfeed, material handling, and safe storage for hazardous items. A clean, organized shop makes it easier to select the right equipment for woodworking when you’re ready to tackle your next project.
Space planning and workflow
Start by measuring your space and listing must-have gear. Then map a workflow: cutting station, assembly, sanding, and finishing. Magnetic strips for small hardware, labeled bins for fasteners, and a rolling cart for frequently used accessories keep the shop moving. If space is limited, you can start with core items and expand over time as your projects grow in complexity.
Lighting, dust control, and shop organization
Good lighting reduces eye strain and helps you see subtle grain and joint alignment. Aim for a mix of ambient, task, and accent lighting. Dust control isn’t just about cleanliness; it protects your lungs and extends equipment life by reducing buildup. Organizing your tools by function and keeping a dedicated maintenance corner for lubrication and sharpening makes long sessions more comfortable and productive.
Choosing the right equipment for woodworking
Choosing gear is less about chasing every latest gadget and more about aligning tools with your typical projects, space, and budget. Here are practical tips to help you balance quality, cost, and long-term value.
Budgeting and quality considerations
Establish a baseline budget that covers essential tools first, then invest in specific upgrades that yield the biggest gains in accuracy and safety. For example, a sharp set of chisels and a solid user-friendly saw are often more impactful than an assortment of mediocre tools. When evaluating equipment for woodworking, consider reliability, customer support, and the availability of replacement parts. It’s better to buy fewer high-quality pieces than many cheap, temperamental items that fail when you’re mid-project.
Brand choices, warranties, and future-proofing
Choose brands with a track record of durability and good service. Warranties and access to replacement parts matter just as much as initial performance. If you anticipate expanding into larger projects, you can plan to add machines in a staged way to avoid overreaching your space and budget. This approach protects your investment in equipment for woodworking and reduces the risk of early obsolescence.
Ted’s Woodworking as a resource
For woodworkers who want structure and direction, resources like Ted’s Woodworking can help you expand your library of plans and project ideas. The collection is designed to provide scalable projects, from simple to advanced, which helps you practice technique while building confidence with your equipment for woodworking.
Practical guides and plan libraries
A practical approach to using plans is essential. If you’re exploring how to locate and utilize Ted’s Woodworking plans effectively, you can consult a practical guide that walks you through the process. This resource covers how to select plans that fit your tools and space, how to interpret measurements, and how to adjust designs to accommodate your equipment for woodworking. Learn more in this guide: teds-woodworking-plans-free-download-a-practical-guide-to-finding-and-using-teds-woodworking.
Digital plans vs. print resources
Digital woodworking plans offer portability and quick updates, while print resources can be invaluable for shop-wide reference. The ultimate guide to digital woodworking plans and Ted’s Woodworking helps you assess which format fits your workflow, from tablet-friendly blueprints to printed sheets that stay pinned on your workbench. It’s a helpful companion when you’re evaluating equipment for woodworking and the best way to integrate plans with your actual tools. See the guide here: wood-work-design-pdf-the-ultimate-guide-to-digital-woodworking-plans-and-teds-woodworking.
For those ready to take action, Ted’s Woodworking can be accessed through an official affiliate resource that provides a comprehensive library of project plans. This can be a quick path to expanding your repertoire while ensuring you have reliable, tested layouts that align with your current equipment for woodworking.
Getting started with projects using the right equipment
Starting with the right combination of gear and plans reduces overwhelm for beginners and accelerates progress for seasoned woodworkers. A thoughtful path might begin with a few essential projects that gradually introduce joinery, finishing, and plan-reading skills. Using reliable plans and a steady upgrade trajectory helps you keep momentum without breaking the bank.
A beginner-friendly project path
Begin with simple items like a cutting board, a small end table, or a wall-mounted shelf. These projects typically require a handful of tools and straightforward joinery, allowing you to practice square cuts, clamping, and even some light finishing. As confidence grows, you can add a router table for decorative edges, a dedicated sanding station, and a small dust collection setup. Throughout this process, the right equipment for woodworking supports steady skill development and enjoyable results.
From plans to finished pieces
Plans from credible sources—such as Ted’s Woodworking—provide cut lists, dimensions, and finishing tips that help you translate drawings into real objects. When you follow a plan, you tend to waste less material and experience fewer miscuts. If you want to explore a library of plans and see how professional layouts are organized, consider visiting a guide and then pairing the knowledge with hands-on practice in your workshop.
Maintenance, safety, and longevity of gear
Tools that are well-maintained last much longer and deliver consistent results. Create a simple maintenance routine: keep blades sharp, lubricate moving parts, and store bits and accessories in labeled containers. Dust collection components should be checked regularly for clogs, and electrical cords must be inspected for wear. Safety is paramount: use push sticks, keep guards in place, and wear hearing protection and eye protection during all potentially hazardous tasks.
Caring for your tools
Sharpening chisels and plane blades regularly improves edge quality and reduces chatter. Clean power tools after use to prevent resin buildup, and check alignment on tools like routers and saws before major projects. A well-kept toolkit makes any future project feel less daunting and helps you maintain momentum in your woodworking journey.
Safety practices and risk management
Adopt a safety-first mindset: plan projects, measure twice, cut once, and never work with dull blades. Use clamps to secure pieces, wear protective gear, and keep a first-aid kit and fire extinguisher accessible in your shop. By embedding safety into your routine, you protect yourself and your equipment for the long haul, ensuring that each session improves your skills and confidence with your equipment for woodworking.
Cost-saving strategies and learning pathways
Smart buying often beats impulse purchases. Start with versatile, high-impact tools (like a dependable power saw and a quality chisels set) and supplement with specialty items only as you encounter needs in your projects. Consider watching tutorials, reading model specs, and using plan libraries that align with your current equipment for woodworking setup. If you want structured guidance and a broad plan library, Ted’s Woodworking can be a practical complement to your toolkit. You can explore the broader offering and related resources through trusted partner channels linked in this article.
Conclusion
Building a productive, enjoyable woodworking practice hinges on balancing the right equipment for woodworking with clear plans, safe habits, and a space that supports your workflow. Whether you’re just starting out or upgrading an established shop, the combination of sturdy tools, reliable plans, and deliberate practice will compound your skills over time. Consider exploring Ted’s Woodworking as part of your learning path, and use the linked guides to assess how best to integrate new plans with your existing gear.
If you’re ready to take the next step, you can access a curated set of plans through the affiliate option below to complement your current equipment for woodworking setup. This resource provides a broad library of plans, enabling you to practice a wide range of joinery and finishing techniques while you shop for upgrades that fit your space and budget: Ted’s Woodworking.