When you embark on any woodworking project, the quality of your results starts long before the first cut is made. The right set of essential carpentry hand tools not only speeds up work but also improves accuracy, safety, and enjoyment. In this guide, you’ll learn what tools belong in every serious woodworker’s belt, how to use them effectively, and how to build a dependable starter kit that fits your budget. From measuring and layout to cutting, shaping, and joining, these tools form the backbone of a functional shop and provide a solid foundation for any future project.
First, it’s important to understand that “essential” isn’t about owning a shelf-full of gadgets. It’s about selecting reliable, comfortable tools that cover the core tasks you’ll encounter. If you’re looking for a curated resource that complements hands-on practice, many makers also explore dedicated project plans and design libraries. For those who want a broader set of patterns and step-by-step instructions, consider exploring resources like carpentry designs and timeless woodworking projects after you’ve established your basics. And for furniture-focused guidance, check out the ultimate practical guide for makers and DIY enthusiasts.
Core categories of essential carpentry hand tools
Dividing tools into categories helps you prioritize what to buy first and what to add later. Below are the main groups, each with essential examples and tips on how they contribute to clean, precise work.
Measuring, marking, and layout tools
Accurate layout is the secret sauce of good carpentry. Start with:
- Measuring tapes and rulers for quick, dependable measurements.
- Combination squares for establishing square corners and checking angles.
- Marking gauges and a marking knife for transfer marks that won’t smudge or tear wood fibers.
- Chalk line for long, straight reference lines on large boards.
These tools are the first step toward repeatable results. They also play a critical role when you’re following plans from your favorite project guides and will help you reproduce components with confidence.
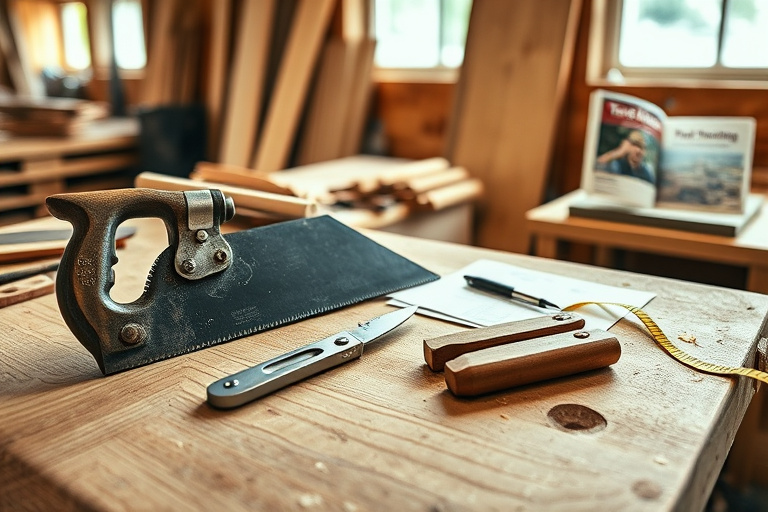
Cutting tools for precision
Cutting accuracy determines how well parts fit together. A solid cutting toolkit includes:
- Handsaws (rip and crosscut) for straightforward cuts without electricity.
- Saw frames and backsaws for precise, controlled cuts in joinery work.
- Japanese pull saw for fast, clean crosscuts with minimal effort.
- Coping saw for intricate internal cuts and curves.
Choosing well-made blades and keeping them sharp makes a world of difference. A sharp blade feels like an extension of your own hand, producing smoother edges and less tear-out.
Planing, smoothing, and shaping tools
Even with well-cut parts, the final surface matters. A good set includes:
- Hand planes (jack plane for leveling, smoothing plane for finishing) to flatten and smooth boards.
- Rasps and files for faster material removal and shaping curves.
- Chisels (paring and bench chisels) for cleaning out joints and fine detailing.
Proper technique with planes and chisels reduces the need for power tools and delivers a solid, traditional feel to handmade pieces.
Fastening, joining, and holding tools
Joining methods determine both strength and aesthetics. Equip yourself with:
- Clamps (micro to bar clamps) to hold pieces securely during assembly.
- Malets or hammers for driving joints and tapping pieces into place without marring the wood.
- Vises for secure workholding on the bench.
- Marking and layout tools revisited for accurate-cut alignment during joinery.
As you gain experience, you’ll see which clamping setups work best for your common project types, whether frames, panels, or drawers.
Sharpening, maintenance, and safety gear
Maintenance is the quiet backbone of a durable toolkit. Essential items include:
- Sharpening stones and honing guides to keep edges true and aligned.
- Strops for polishing blades to an ultra-smooth edge.
- Oil, wax, and protective coatings for rust prevention and smoother operation.
- Safety gear such as eye protection, work gloves, and dust masks to keep you safe during planning and cutting.
Regular maintenance extends tool life and improves performance, especially when you’re working on multiple projects with varying timetables.
How to build a reliable starter kit on any budget
Starting with essential carpentry hand tools doesn’t require breaking the bank. Here’s how to prioritize wisely and grow your kit over time.
Budget-friendly picks vs. premium options
Begin with a few versatile, well-made pieces that perform well under a range of tasks. For example, a quality combination square, a sharp marking knife, a dependable handsaw, and a sturdy hand plane can handle a surprising number of jobs. As you complete more projects, you can upgrade specific items—especially blades and planes—when you notice performance bottlenecks.
Investing in a small set of ergonomic tools often yields a bigger payoff than purchasing a large number of low-cost options. Comfort matters: tools that feel balanced in your hand reduce fatigue and improve accuracy during longer sessions.
Ergonomics, comfort, and tool longevity
Pay attention to grip design, weight, and balance. A well-balanced plane, for example, reduces push force and improves control. Look for tools with brass or steel hardware that won’t rust easily, and blades that stay sharp longer with proper maintenance. If you’re working with hardwood, your cutting tools need robust construction and durable teeth or edge geometry to maintain accuracy through dense fibers.
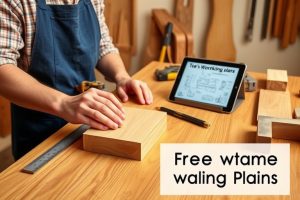
How Ted’s Woodworking can support your projects
For woodworkers who want a structured approach to project planning and execution, a trusted resource like Ted’s Woodworking offers a broad library of plans, patterns, and step-by-step instructions. These materials can complement your essential carpentry hand tools by providing clear methods, cut lists, and layouts that you can practice with your starter kit. While the tool lineup is essential, having dependable project plans helps you maximize the efficiency and accuracy of every cut and joint you make. If you’re eager to explore curated project ideas, Ted’s Woodworking can be a practical addition to your workshop, offering structured guidance and inspiration as you grow your skill set.
Integrating this kind of resource into your workflow is natural for builders who want a practical, repeatable process. As you refine your technique, you’ll find that you can tackle more ambitious projects with confidence and less trial-and-error. If you’d like to explore more design-focused content and timeless woodworking projects, consider visiting the article linked above for broader context and advanced layouts.
Integrating practical resources and guides
Beyond your toolbox, expanding your library of guides helps you translate technique into tangible results. For example, exploring a guide on furniture-making tools and practical steps can illuminate how your essential carpentry hand tools fit into a broader workflow. This kind of learning path is especially valuable when you’re aiming to reproduce professional-grade results in a home shop. If you’re curious about how tools interact with different materials and joinery, the practical guides linked earlier can serve as a valuable companion to your hands-on practice.
Related reading for masterful woodworking designs
For readers who want a deeper dive into design patterns and timeless execution, the carpentry designs article offers insights into planning and layout—crucial for efficient use of your essential carpentry hand tools. As you sharpen your eye for proportion and balance, you’ll find that your ability to translate plans into precise cuts improves dramatically.
Furniture-making tools and project planning (internal resources)
If you’re focused on furniture, the ultimate practical guide for makers and DIY enthusiasts provides a bridge between design intention and bench-side realities. Review this resource alongside your toolkit to ensure your tool choices align with the needs of drawers, rails, and panel work. Furniture-making tools and project planning can help you map a path from concept to finished piece while keeping essential carpentry hand tools front and center.
Safety, care, and maintenance tips for essential carpentry hand tools
Good safety practice starts with the basics: wear eye protection, keep your blades sharp (dull blades are more dangerous because they require more force), and maintain a clean, organized workspace. Regularly inspect handles for cracks, tighten loose hardware, and clean dust and resin buildup from blades and planes. A small upkeep routine—cleaning after each session, oiling metal parts, and storing tools in an organized rack—extends tool life and keeps you productive longer. Remember, the healthier your hands and the more comfortable your tools feel, the more enjoyable carpentry becomes.
Practical project ideas to practice essential carpentry hand tools
Practice is the best teacher. Start with simple projects that exercise layout, cutting, and joining before moving to more complex builds. Here are a few ideas that naturally incorporate your essential carpentry hand tools:
- Build a wall-mounted shelf using a combination of marking and layout tools, a handsaw, a plane for smoothing, and a few clamps for a clean, square installation.
- Construct a small jewelry or keepsake box with precise box joints, applying chisels and marking gauges to ensure tight, decorative joints.
- Create a simple picture frame or a small table using a plane, marking knife, and a handful of well-placed clamps to secure joints as you glue and dry-fit pieces.
Each project reinforces core skills, from measuring accurately to executing clean cuts and precise finishes. If you’d like a structured path with plans and patterns, a curated program may provide a boost as you progress through more challenging tasks.
Conclusion and next steps
Mastering essential carpentry hand tools is a journey that grows with your projects. Start with the basics, invest in a few high-quality pieces that feel comfortable in your hand, and gradually expand your kit as your projects demand. Use reliable resources to guide your practice and accelerate your learning—whether that means detailed project plans from Ted’s Woodworking or the design-focused insights in linked guides. By building a strong foundation in measurement, cutting, planing, joining, and maintenance, you’ll soon find that your DIY ambitions can scale from simple shelves to sophisticated, durable furniture. Remember to revisit the collected resources as your skill set evolves, and keep a daily log of what works best for you and your workshop routine.