Introduction: why free diy plans matter
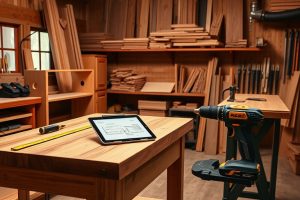
Whether you’re new to woodworking or you’re a seasoned DIYer, the idea of free diy plans is compelling. They lower the barrier to entry, provide a clear roadmap, and help you predict material needs and cut lists before you buy a single board. When you start with solid, well-presented plans, you’re more likely to stay motivated, finish projects, and learn with every cut. The phrase free diy plans isn’t just about saving money; it’s about accessing dependable patterns, step-by-step instructions, and practical tips that move you from idea to finished piece with confidence.
In this guide, we’ll explore how to evaluate and use free diy plans effectively, how to blend them with premium resources, and how to structure a workflow that keeps your workshop productive. You’ll also discover two reliable internal resources that can save you time and help you scale your projects: one focused on a beginner-friendly outdoor chair and another offering a broad, planning-oriented perspective for woodworking projects and tools. And if you’re ready to expand your library beyond free options, we’ll point you toward a trusted premium resource designed for serious hobbyists and even pros.
What makes a plan worth using (and what doesn’t)
Not all free diy plans are created equal. A great plan should include a clear project overview, a cut list, materials list, step-by-step instructions, and ideally diagrams or photos showing critical joins and assembly flow. Look for plans that offer:
- Materials and cut lists that align with standard sizes, reducing wasted wood and time
- Detailed diagrams or exploded views that show how pieces fit together
- Notes on wood type, fasteners, finishes, and tool requirements
- Safety guidance, including clamping strategies, safety checks, and dust control
- Realistic project scope — something you can complete in a weekend or two, not a multi-month construction
Be wary of plans that skip essential details, rely on vague measurements, or assume specialized tools. Great free diy plans empower you to make accurate decisions in the shop, not guesswork during assembly. If you’re ever unsure, cross-reference with a trusted resource or two to confirm measurements and steps before you start cutting.
Where to find reliable free diy plans
The web is full of free resources, but the quality varies. The best approach is to treat free diy plans as a starting point, then build from there with additional measurements, tool checks, and your own material substitutions. Here are two reliable perspectives you can explore through the linked resources below:
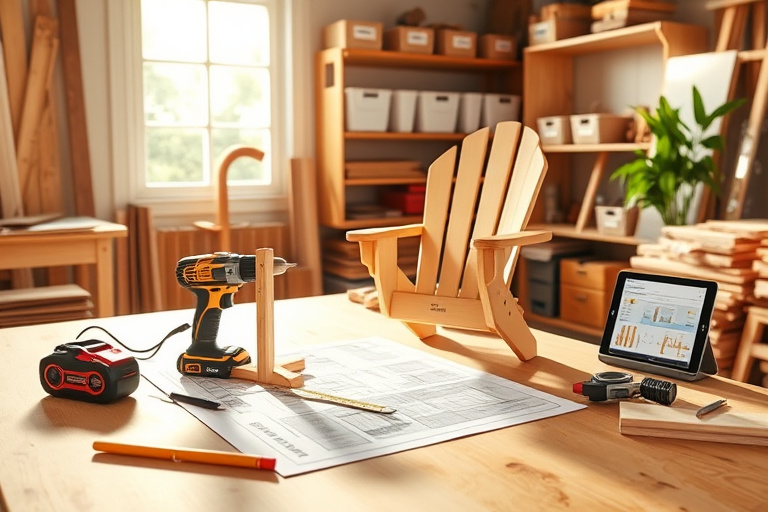
First, for a beginner-friendly outdoor seating project, consider the small Adirondack chair plans. These are a classic option that helps you practice joinery like pocket holes, butt joints, and proper seat angling. The plan comes with practical notes on materials, dimensions, and assembly steps. For direct access, see this resource: small Adirondack chair plans.
Second, if you want a broader look at planning projects, tools, and how to approach a library like Ted’s Woodworking, check out the comprehensive guide to wood making plans and project planning: wood making plans: the ultimate guide.
How Ted’s Woodworking fits in: evaluating paid resources
Paid woodworking libraries can be a powerful accelerator for your learning curve. Ted’s Woodworking, for example, is a well-known collection that bundles thousands of patterns, templates, and project blueprints. While the core idea of free diy plans is to get you started, premium resources offer expanded access to:
- Comprehensive project plans with detailed cut lists and material estimates
- Blueprints for a wide range of projects, from simple furniture to more ambitious builds
- Organized libraries that help you search by project type, tool requirements, or skill level
- Step-by-step assembly guidance and photos that illustrate complex joints or finishes
When evaluating any paid library, consider your goals, space, and budget. If you’re just starting, a curated starter collection paired with solid free diy plans can deliver the best mix of guidance and affordability. If your ambition grows, a premium library can provide ongoing inspiration and a structured learning path.
What to expect from a woodworkers collection
A robust collection should not only include print-ready plans but also guidance on tool selection, shop setup, material sourcing, and project sequencing. It’s also helpful when a library offers tips on safety, finishing techniques, and maintenance. If you’re curious about the idea of a broader project library and want to explore a trusted offering, you can explore a reliable premium option here: Ted’s Woodworking.
A practical workflow: turning free diy plans into solid projects
Turning free diy plans into a finished piece requires a repeatable process. Below is a practical workflow that keeps projects on track, reduces waste, and helps you learn as you go:
- Define the project scope: Start with a clear idea of what you want to build and the room or space it will occupy. Is it indoor furniture, outdoor seating, or a storage solution?
- Assess your space and materials: Check available workshop space, wood types you prefer, and what tools you already own. Use a free diy plans blueprint as a template, then tailor it to your resources.
- Check the cut list and tooling: Review the material list to ensure you have the right stock sizes and cutting plans. This helps you order wood efficiently and minimize waste.
- Prepare a task sequence: Break the project into stages (cutting, sanding, assembly, finishing). A clear sequence prevents rework and keeps your shop organized.
- Prototype and test joints: If a plan includes unfamiliar joins, practice on scrap pieces first. This builds confidence and reduces mishaps on the real project.
- Finish with care: Sand progressively, apply even coats, and test durability. A good finish can transform an ordinary build into something you’re proud of.
Throughout this workflow, keep notes. Jot down adjustments you make, materials you substitute, and any lesson learned. This habit turns every project into a personalized learning experience and helps you refine future free diy plans into precise outcomes.
Step-by-step approach from idea to finished piece
To illustrate, let’s map a typical path using a beginner-friendly plan like an Adirondack chair. Start by studying a reliable free diy plan for the chair, then compare it against your available lumber and hardware. If you find the seat height or armrest angle isn’t quite right for your space, adjust your cut list accordingly. Document the changes so your next chair design benefits from concrete data. For readers who want a guided exploration of planning and tools, the second internal resource links you to a comprehensive approach that helps you align your shop with your project ambitions.
A real-world example using the two recommended internal resources
When you’re new to woodworking, having a couple of dependable internal references can be invaluable. The Adirondack chair plans link offers a concrete, approachable project to build your confidence with free diy plans. It’s a hands-on way to practice measurement accuracy, material planning, and assembly technique. Access it here: small Adirondack chair plans.
For a broader primer on planning projects and understanding how to leverage tools and a library, the guide to wood making plans is ideal. This resource helps you map your projects, select the right tools, and understand when a paid library like Ted’s Woodworking makes sense as your skills grow: wood making plans: the ultimate guide.
In practice, you can start with free diy plans and then introduce a library to accelerate your progress. If you decide to explore more templates and patterns beyond the free sources, you’ll find a curated collection that many hobbyists rely on — Ted’s Woodworking — available here: Ted’s Woodworking.
Safety, planning, and tool readiness
Safety should always be your top priority. Free diy plans are a fantastic entry point, but a few prudent practices go a long way:
- Wear eye and ear protection whenever you cut or shape wood.
- Secure your workpieces with clamps to prevent kickback or slipping.
- Use sharp blades, clean dust collection, and a well-lit workspace to improve accuracy.
- Double-check measurements twice before making a cut; a scrap piece can save you from costly mistakes.
Additionally, plan your shop layout so you can access tools without bending or reaching awkwardly. A good workflow reduces fatigue and helps you maintain precision across long sessions. As you grow, you’ll appreciate how a premium library can broaden your toolkit, providing more precise patterns and a deeper library of finishes to experiment with.
Getting the most from Ted’s Woodworking: tips and best practices
Premium resources like Ted’s Woodworking aren’t just about more patterns; they’re about structure, organization, and a language of woodworking that accelerates learning. If you’re weighing whether to invest, consider these practical tips:
- Start with a core set of projects that match your skill level and available space, then expand gradually.
- Use the library’s search features to filter by tool type, difficulty, and project size to keep your projects focused and relevant.
- Cross-check with free diy plans you already trust to validate measurements and joinery details before cutting into expensive lumber.
- Keep a project journal to track what works well and what doesn’t; this makes future projects faster and more reliable.
For readers aiming to maximize value, the Ted’s Woodworking bundle offers a broad catalog of plans that can complement the free diy plans you’re already using. If you’re curious and want to see what a larger library can offer, you can explore the official option here: Ted’s Woodworking.
Conclusion and actionable next steps
Free diy plans are a powerful starting point for any woodworking journey. They help you practice fundamental techniques, understand cut lists and material requirements, and gain confidence in your ability to bring ideas to life. By combining reliable free resources with a curated premium library, you can accelerate progress, expand your repertoire, and tackle more ambitious projects over time. Start with a simple plan like the Adirondack chair project to build momentum, then branch into broader planning resources to structure your workflow and tool choices. And if you’re ready to take your projects to the next level, consider Ted’s Woodworking as a practical investment in your skills and library of patterns.
To recap, here are the next steps:
- Choose a starter free diy plan that matches your space and skill—begin with an outdoor chair or similar simple project.
- Use the two vetted internal resources to broaden your understanding of planning and execution: the Adirondack chair plans and the comprehensive planning guide.
- Consider expanding with Ted’s Woodworking if you want a larger library of patterns and step-by-step instructions: Ted’s Woodworking.
Happy building, and may your shop be filled with the satisfaction of turning free diy plans into real, lasting furniture and projects.