For anyone who loves hands-on projects, the allure of free muskoka chair plans is clear: you can build a durable, iconic outdoor chair without breaking the bank or hunting down hard-to-find dimensions. A Muskoka chair is more than a simple bench; its wide armrests, curved back, and angled seat create a relaxed lounging experience that’s ideal for evenings on the patio or by the fire pit. In this guide, we’ll explore how to approach free muskoka chair plans with a practical mindset, from selecting a plan to finishing touches that endure weather and sun.
Before you dive in, it helps to understand the core appeal of these plans. They simplify the woodworking journey by providing a tested cut list and joinery approach, which minimizes guesswork and maximizes your chances of a comfortable, sturdy result. If you’re new to woodworking, or if you’re returning after a break, committing to free muskoka chair plans can be a confidence booster and a practical way to learn essential techniques. And while free plans are a solid starting point, you may eventually want to expand your library with more options as your skills grow.
One of the practical advantages of beginning with free muskoka chair plans is the chance to practice jointing and assembly using low-risk materials. Cedar and redwood are popular for outdoor pieces because they resist moisture and decay, but choose what’s most available and within your budget. The important part is to verify that any free plan you use includes a clear cut list, a material list, and step-by-step assembly guidance. If you’re curious about foundational techniques for any project, you can also explore beginner-friendly resources to sharpen your skills. For example, a practical, safe guide to practical projects is available at the following beginner resource: Cool Beginner Woodworking Projects. This resource can help you build a solid base before tackling outdoor furniture like the Muskoka chair.
When you’re ready to expand beyond the basics, you might find additional perspective in a guide focused on precision. The guide Mastering Woodworking Drawings covers how to translate ideas into precise plans and how to adjust dimensions for different stock, seating heights, and backrest angles. Together, these two references can help you move from a simple free plan to a customized solution that fits your space perfectly.
Step-by-step build: from planning to finish
Planning, materials, and workspace setup
Successful woodworking starts long before you pick up a saw. Begin by measuring the intended outdoor space and choosing a chair scale that complements nearby furniture. For most Muskoka chairs, plan for a seat height around 16 to 18 inches and a backrest angle of roughly 65 to 70 degrees for a comfortable recline. Review the free muskoka chair plans you’ve chosen and verify the cut list against your stock. Decide on stock material—common choices include pressure-treated pine for economy, cedar for natural rot resistance, or tropical hardwoods for longevity. Create a simple cutting diagram, labeling each piece so you don’t confuse the seat slats with the back slats during assembly.
Having a clean, well-lit workspace makes a big difference. If you’re outdoors, set up a stable table or workbench, clamp boards securely, and protect your work surface with a drop cloth or scrap plywood. Don’t skip safety gear—glasses, hearing protection, and a dust mask are essential, especially when cutting or sanding. A small, portable dust extractor or a shop vacuum can help keep shavings off your project and away from your lungs.
Cut lists, joints, and assembly
The essence of any free muskoka chair plans lies in its joinery. Typical Muskoka chairs use a combination of dowels, screws, and durable cross-rail connections to create a sturdy frame. As you cut, double-check piece lengths against the plan and label each part clearly. A reliable plan will specify the exact number of slats for the seat, the back slats, and the arm support pieces. When you begin assembly, dry-fit major components first to ensure alignment, then insert dowels or screws with appropriate wood glue to maintain strength. Use clamps to hold joints as the glue cures, and avoid overtightening screws or clamps that could starve glue joints of adhesive.
If you’re new to the joinery, consider a few beginner-friendly techniques that are forgiving in practice. For example, drilling pilot holes before driving screws helps prevent wood from splitting near end grains. When you’re gluing and clamping, keep a relative humidity-friendly environment and allow sufficient curing time before sanding and finishing. If you’d like to broaden your approach to project planning and precision, exploring the linked guides can help you translate a plan into real-world adjustments and scale the design to fit your space.
Finishing touches and weatherproofing
Finishing is what separates a good Muskoka chair from a great one. Start with thorough sanding to remove rough edges and to achieve a smooth surface that takes finishes evenly. Wipe away dust with a tack cloth, then apply a penetrating exterior oil or a robust outdoor polyurethane designed for outdoor furniture. If you expect heavy sun exposure or rain, consider a two-coat or three-coat finish and reapply as recommended by the product’s instructions. Some wood species, such as cedar, accept finishes differently than pine, so you may need to adjust the number of coats or the drying time between coats. A quality finish not only improves aesthetics but also extends the chair’s life by preventing moisture intrusion and checking cracks as wood expands and contracts with humidity and temperature changes.
Additionally, you can protect the chair with an optional sealant on the underside of the arms or slats to reduce surface wear and prevent water from seeping into end grains. A well-sealed Muskoka chair will maintain its color longer and resist weathering more effectively. If you want a broader set of plan options after finishing your first chair, a curated library like Ted’s Woodworking can offer a broader set of outdoor furniture plans and refinements—helpful when you’re ready to tackle more complex builds or experiment with different wood species and joinery styles.
Choosing the right plans: free muskoka chair plans vs paid resources
Pros and cons of free plans
Free muskoka chair plans are excellent for testing the waters. They are typically straightforward, well-suited for beginners, and provide a clear path to a completed project without financial risk. The main advantage is accessibility: you can start right away with common stock, basic tools, and a plan that’s been vetted in many hobbyist projects. The trade-off is that some free plans may lack detailed tolerances, precise cut lists for alternate stock sizes, or advanced customization options. If your goal is a reliable, comfortable outdoor chair and you’re learning as you go, free plans can be a strong foundation.
How premium resources can save time and expand options
Premium resources—like Ted’s Woodworking—offer a different kind of value. They provide larger collections of plans, sometimes including variations on the Muskoka chair design, additional angles, stacking options, and measurements tailored to different wood species or weather conditions. For the curious maker who wants to experiment with refinements or scale up production, a subscription or one-time access to an extensive library can be a wise investment. If you’re considering exploring more than one outdoor furniture project or you want to compare several design approaches, a premium library can help you accelerate the learning curve while maintaining quality and consistency across projects.
Learning pathways: grow from beginner to pro
Beginner-friendly projects to build confidence
Starting with simple projects helps you understand stock selection, tool use, and accuracy without getting overwhelmed. The principle behind free muskoka chair plans is that you can complete a satisfying DIY project while building your confidence for more complex builds. As you complete the chair, you’ll gather experience in measuring, cutting, gluing, and finishing. If you’re looking for a curated list of beginner projects beyond a single chair, you can explore beginner-focused guides like the one mentioned earlier, which can offer a practical framework for choosing your first pieces and gradually increasing complexity.
Mastering woodworking drawings and precision plans
Once you’ve finished your first chair, you may notice places where a tighter tolerance or a more precise drawing would help future projects. That’s where learning about woodworking drawings becomes valuable. The guide on precision plans and projects can help you interpret plans more accurately, adjust measurements for material variations, and translate on-paper ideas into exact cuts. Applying precise drawings to future builds—whether you’re replicating a Muskoka chair in a different wood or tacking on a personal modification—can dramatically improve consistency and quality. If you want to dive deeper, the linked guide provides practical steps for scaling, adjusting for stock variability, and maintaining repeatability across multiple chairs or related outdoor furniture designs.
SEO and content strategy for DIY woodworking
Keyword usage and natural linking
For a woodworking-focused article, weaving in the primary keyword in a natural, reader-friendly way is essential. The phrase free muskoka chair plans should appear in headers and within paragraphs, but never in a way that feels forced. Related keywords and synonyms—such as Muskoka chair plans, outdoor chair plans, DIY chair build, and outdoor furniture plans—help you capture a broader audience without stuffing a single keyword. When you reference resources, use natural anchor text that clearly describes the linked resource, like the two beginner and precision guides mentioned earlier. You can also direct readers to extended resources without overshadowing the main topic.
Affiliate and internal linking best practices
Incorporating affiliate links should feel like a helpful nudge rather than a hard sell. In this guide, we’ve integrated a single, clearly labeled affiliate link to Ted’s Woodworking, which provides access to an extensive library of professionally designed plans. The aim is to offer value to readers who want more project options while maintaining trust and credibility. The two internal links to the beginner and precision guides are included to support readers on their learning journey and to keep them within a curated set of high-quality resources. Remember to place internal links where they naturally fit within the flow of the article, avoiding disruption to readability.
Visuals and design: crafting a compelling article image
Featured image concepts and style notes
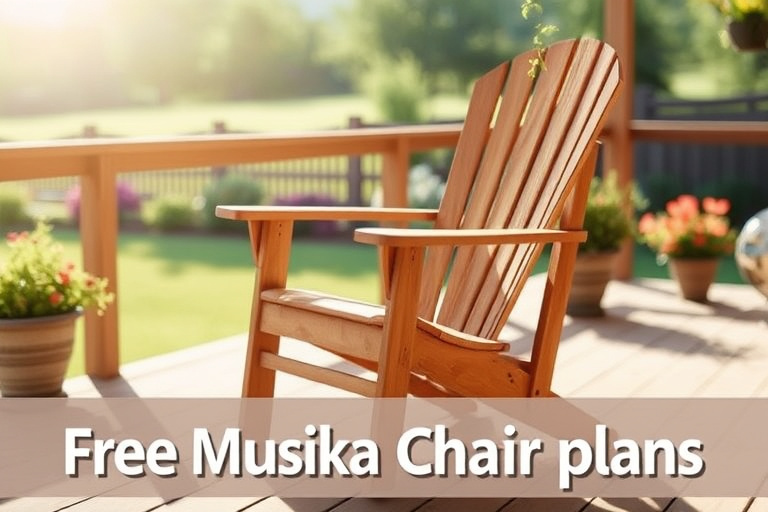
The featured image should immediately communicate the article’s focus on outdoor woodworking and the classic Muskoka chair. A professional, lifestyle-oriented photo with warm natural light can evoke a sense of welcome and craftsmanship. Consider elements such as a wooden Muskoka chair in a sunny backyard or cottage setting, with soft shadows and a shallow depth of field that keeps the chair in sharp focus. A subtle, unobtrusive background—perhaps a deck, Adirondack plantings, or a neatly trimmed lawn—helps the chair stand out. Color palette ideas include natural wood tones (honey to amber), with greens and blues in the surrounding environment to convey outdoor living. A clean, readable font for any overlay text, such as a simple label like “Free Muskoka Chair Plans,” should be used sparingly to avoid clutter. The image should feel aspirational but achievable, inviting readers to start their own build today.
In case you’re curious about broader learning frameworks, this article benefits from linking to practical guides that support the main topic. The two internal resources—in addition to the primary plan you’re using—offer readers an easy way to expand their skill set. For example, the beginner project guide can help someone who is just starting out, while the precision-drawing guide can empower a reader who wants to refine future builds. The combination of hands-on steps and structured learning paths creates a cohesive, value-forward piece that readers are likely to share and revisit.
Ready to start building? Gather your stock, locate a reliable plan that matches your space, and embark on a rewarding woodworking journey. If you ever want to broaden your toolbox after completing your first outdoor chair, you can explore Ted’s Woodworking through the affiliate link above to see how a larger plan library could support future projects.