{
“title”: “Free Wood Working Plans: The Ultimate Guide to Mastery, Speed, and Profit with Ted’s Woodworking”,
“outline”: ”
Introduction
Why free wood working plans matter for beginners and seasoned hobbyists
Understanding the Value of Free Wood Working Plans
Free vs paid resources: what you gain and what you give up
What Makes a Plan Truly Good
Clarity, measurements, and cut lists
Safety guidelines and material considerations
Finding and Using Free Wood Working Plans Effectively
Starting with beginner-friendly projects
Assessing plans for realism and scalability
Monetizing Your Weekend Builds
Two practical articles for quick cash with smart plans
Ted’s Woodworking: A Comprehensive Resource
Why serious woodworkers explore Ted’s Woodworking
Maximizing Value from Ted’s Woodworking
Strategic use for weekend projects and longer-term goals
Project Ideas That Sell (and How to Build Them Fast)
Ideas, plans, and time-management tips
Tools, Workspace, and Time Management for Weekend Woodworkers
How to optimize a small shop for efficiency
Conclusion and Next Steps
“,
“content”: “
Introduction: Why free wood working plans matter for beginners and seasoned hobbyists
\n
Woodworking is as much about problem-solving as it is about cutting and sanding. For beginners, free wood working plans provide a structured path from idea to finished piece, helping you learn essential skills without crashing your budget. For seasoned hobbyists, free plans can spark new project ideas, expand your repertoire, and save time when you’re itching to start a weekend build. The keyword you’ll often hear in this space is free wood working plans, and it’s worth repeating: good plans save you time, reduce waste, and help you produce repeatable results.
\n
Of course, not every free plan is created equal. A well-designed plan includes clear diagrams, a concise cut list, material and finish recommendations, and safety notes. In contrast, a sketch on a napkin may lead to gaps that result in wasted wood, mis-measured cuts, or safety hazards. The goal is to balance accessibility with reliability, so you can start projects confidently and finish them with a sense of accomplishment.
\n\n
Understanding the Value of Free Wood Working Plans
\n
Free plans are a fantastic gateway to hands-on learning. They give you the chance to test layout ideas, practice joints, and experiment with different finishes before committing to a larger investment. That being said, there are two realities to acknowledge: free plans aren’t guaranteed to be comprehensive, and some sources may require you to sift through low-quality drawings or vague instructions. The key is learning how to evaluate a plan’s quality before you pick up a tool.
\n
When exploring free wood working plans, it’s helpful to distinguish between those that serve as a learning scaffold and those that function as full project blueprints. A good starter project (think a simple stool, a small bookshelf, or a wooden box) teaches essential skills and yields a satisfying result. More ambitious plans may exist as paid bundles that provide more extensive cut lists, material lists, and assembly diagrams. If you’re new to this, use free plans to practice, then consider more comprehensive resources as your confidence grows.
\n\n
Free vs Paid Resources: What You Gain and What You May Trade Off
\n
Free wood working plans are invaluable for learning and experimentation. They enable you to practice measuring, marking, cutting, and assembly without a large upfront cost. Paid resources, on the other hand, often bundle hundreds of plans, more precise cut lists, optimized material usage, and additional tips on finishing and maintenance. A respected paid option in the woodworking community is Ted’s Woodworking, a comprehensive library that many crafters turn to when they’re ready to expand their collection and tackle a wider variety of projects. While it’s an investment, many woodworkers find the breadth and depth of plans justify the cost over time.
\n
If you’re exploring paid and free resources side-by-side, a practical approach is to use free plans for experimentation and skill-building, then gradually add paid plans to your toolkit as your ambitions grow. This balanced strategy keeps your shop’s budget in check while expanding your creative and technical possibilities.
\n\n
What Makes a Plan Truly Good
\n
A solid plan is more than a single page of sketches. It should guide you from start to finish with minimal guesswork. Here are the essentials to look for:
\n
- \n
- Clear dimensions and scale: Each part should be labeled with exact thicknesses, widths, heights, and lengths. If a plan omits critical dimensions, you’ll spend more time recalculating than building.
- A complete materials list: The plan should specify the type of wood, grade, and estimated board feet. It’s frustrating to realize you’re short on a key board after you’ve cut several pieces.
- Cut lists and diagrams: A well-laid cut list minimizes waste and keeps your project on track. Clear diagrams help you visualize joints and assembly steps.
- Joinery and hardware details: Plans that note the joinery method (mortise and tenon, pocket screws, dowels) save you trial-and-error time and improve strength.
- Finish and hardware recommendations: Suggestions for staining, sealing, or painting, plus hardware placement, prevent finish-saturation missteps.
- Safety notes: Any sharp tools or hazardous steps should be clearly flagged to prevent accidents.
\n
\n
\n
\n
\n
\n
\n
When you encounter a plan that ticks these boxes, you’ll be much more likely to complete a quality project without the usual head-scratching that happens with vague instructions.
\n\n
Free Wood Working Plans: Starting smart with beginner-friendly projects
\n
If you’re just starting out, select starter projects that reinforce basic skills, such as measuring, marking, squaring, and understanding grain direction. A small shelf, a picture frame, or a simple stool can teach you how to read a plan, tackle basic joints, and finish with a professional look. Free plans often feature step-by-step photos or annotated diagrams that demystify each stage of the build.
\n
As you gain confidence, you’ll notice how your workflow becomes more efficient. You’ll learn to estimate material needs more accurately, choose appropriate finishes, and refine your technique so you can handle more ambitious pieces on weekends or after work.
\n\n
Two practical guides to boost your weekend projects
\n
For a deeper dive into monetizing weekend builds and turning them into cash, check out two related resources that discuss practical, cash-friendly strategies:
\n
woodworking projects that sell fast: how to turn weekend builds into quick cash with smart plans
\n
\n
These guides offer actionable ideas for projects that attract buyers, price reasonably, and maximize your time. They complement the free plans you may already be using by showing how to structure projects so they’re both enjoyable to build and appealing to customers or benefactors.
\n\n
Ted’s Woodworking: A Comprehensive Resource
\n
As your library of plans grows, you may seek a more extensive, curated collection. Ted’s Woodworking is one of the most widely referenced paid resources in the woodworking community. It bundles hundreds of detailed, ready-to-build projects, each with diagrams, cut lists, material suggestions, and finish guidance. For many woodworkers, Ted’s Woodworking serves as a trusted hub that expands options beyond what free plans typically provide. If you’re evaluating a comprehensive set of plans that covers furniture, small home decor, outdoor items, and practical storage solutions, it’s worth considering.
\n
When you’re ready to explore, you can access Ted’s Woodworking through the affiliate link below. It’s a convenient way to compare plan types, estimate wood usage, and plan your weekend projects with a broader toolkit:
\n
\n
Even if you begin with free wood working plans, having a robust paid library can help you push beyond basics and tackle projects that demand more elaborate joinery, precise tolerances, and more varied finish options. The key is to use paid resources strategically—expand your capabilities gradually, not all at once. This approach keeps your shop budget in check while steadily increasing the complexity and value of your projects.
\n\n
Maximizing Value from Ted’s Woodworking
\n
If you decide to explore Ted’s Woodworking, here are practical tips to maximize value without overwhelming your schedule:
\n
- \n
- Start with complementary smaller sets: Choose a handful of projects that fit your existing shop setup and material availability. This reduces waste and keeps momentum going on weekends.
- Use a conversion plan: When you pick a project, create a quick map of material quantities, tool requirements, and time estimates. This helps you decide whether a plan is a good fit for a single weekend or a longer build.
- Integrate safety steps into your workflow: Ted’s plans often include clear build sequences; pair them with your own safety checklist to minimize mishaps.
- Document your results: Photograph your builds and note any adjustments you made. This record helps you refine future projects and can inspire repeat customers if you’re selling items online or locally.
\n
\n
\n
\n
\n
Remember, the aim is to build a steady cadence of weekend projects that improve your skill set while delivering satisfying results. Ted’s Woodworking can be a valuable resource on that journey, especially when combined with the wisdom you gain from free plans and curated guides.
\n\n
Project Ideas That Sell (and How to Build Them Fast)
\n
Not every project will be a best-seller, but with a thoughtful approach, you can maximize the odds. Consider projects that are both practical and attractive—things that people need or want, and that can be completed with relatively modest materials in a weekend. Examples include:
\n
- \n
- Compact wall shelves with hidden mounting hardware for a clean, modern look.
- Simple coffee tables with an attractive grain pattern and durable finish.
- Outdoor birdhouses or plant stands that tolerate weather and require minimal maintenance.
- Seasonal decor pieces that align with local tastes and can be produced in batches.
\n
\n
\n
\n
\n
To keep your workflow efficient, start by selecting a project that matches your current shop size, toolset, and finishing capabilities. Use free plans to test the concept, then consider expanding your library with higher-volume or more complex designs from paid resources as your schedule and budget allow.
\n
For more inspiration on how to structure weekend builds for profit, revisit the free-to-paid content ecosystem described earlier. These resources reinforce the idea that smart planning—coupled with a reliable plan library—is the key to turning weekend woodworking into a sustainable hobby or side hustle.
\n\n
Tools, Workspace, and Time Management for Weekend Woodworkers
\n
One of the biggest bottlenecks in weekend woodworking is time. The more you optimize your workflow, the more projects you can complete without sacrificing quality. Practical strategies include:
\n
- \n
- Pre-pick projects on a single workbench: Decide a week ahead which plan you’ll tackle, ensuring your materials are pre-cut and ready to go.
- Batch similar steps: Plan steps that reuse the same tools or jigs in sequence to minimize setup time.
- Keep a memory of learnings: Note any miscuts or material changes you make so you don’t repeat the same mistakes.
- Maintain an efficient shop layout: Put frequently used tools within arm’s reach and store hardware in labeled bins for quick access.
\n
\n
\n
\n
\n
When you pair efficient workflow with solid plans—whether free or paid—you’ll find weekend builds become not just achievable but enjoyable. And as your portfolio grows, you can revisit the two practical guides mentioned earlier for additional strategies on monetizing your efforts and selecting the right projects for your market.
\n\n
Conclusion: Start with Free Wood Working Plans, Then Grow with Confidence
\n
Free wood working plans are an excellent starting point for learning, testing ideas, and building confidence. They help you develop essential skills, understand materials, and refine your finishing techniques. As your skills advance, you’ll want a broader library of plans, and that’s where Ted’s Woodworking can come in as a valuable resource. Whether you’re aiming to complete weekend projects for personal satisfaction or to cultivate a small side business, a well-balanced mix of free and thoughtfully chosen paid plans positions you for success over time.
\n
If you’re curious to explore Ted’s Woodworking and see how it could complement the free plans you already use, check out the affiliate link provided. It’s a convenient way to compare the vast collection of projects and decide what best fits your goals:
\n
\n
By combining free resources, practical monetization ideas, and a trusted paid library, you can craft a path that grows with you—weekend by weekend—while staying mindful of safety, quality, and profitability.
\n”,
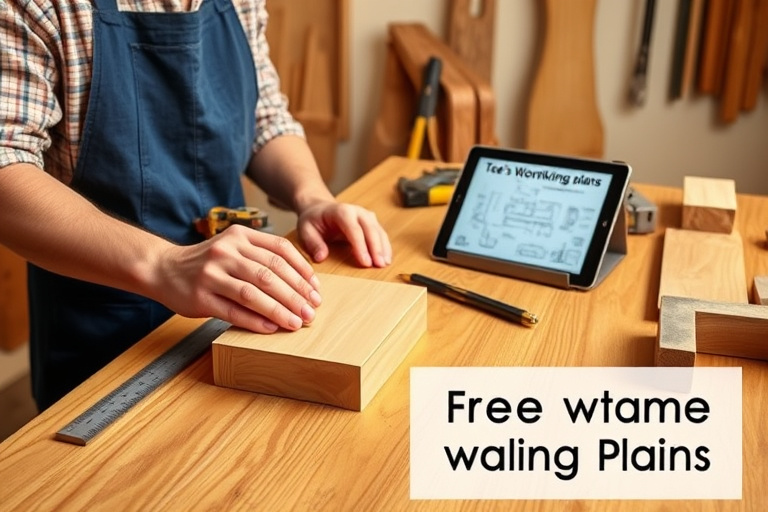
“image_prompt”: “Create a high-resolution hero image for a woodworking blog post. Scene set in a warm, well-organized woodshop with natural wood tones. A pair of hands holds a wooden piece on a sturdy workbench, with a measuring ruler and a pencil nearby. In the background, a tablet displays a blueprint labeled ‘Ted’s Woodworking plans’ or ‘free wood working plans’ on its screen. Tools such as a hand saw, chisel, hammer, square, clamps, and sanding blocks are neatly arranged. Lighting is soft and natural, casting gentle shadows across polished pine and oak surfaces. Color palette includes honey-brown woods, cream walls, and a hint of blue from a shop apron. The overall mood is productive, inviting, and professional, with a subtle overlay text in the corner: ‘Free Wood Working Plans’.”
}