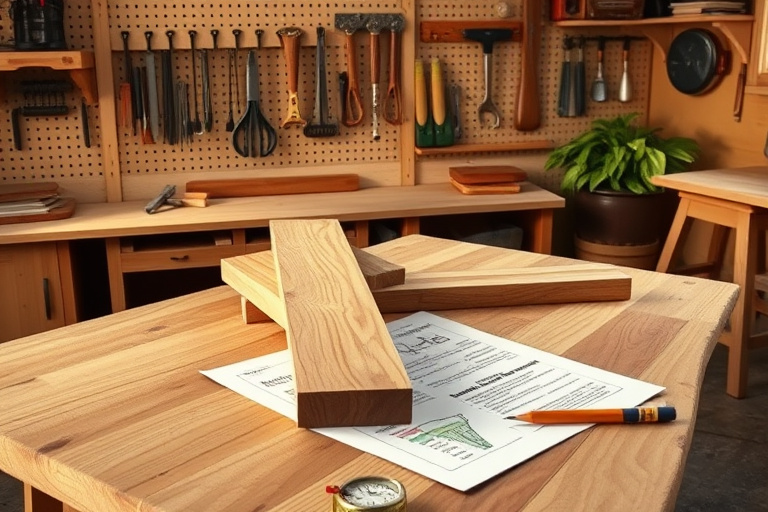
free woodshop plans: Kickstart Your Projects with Ted’s Woodworking and Smart Prep
Whether you’re a weekend woodworker or building a toolkit for a full home shop, the right plan can make or break a project. free woodshop plans are a great way to explore ideas, learn layout strategies, and practice fundamental techniques without a heavy upfront investment. In this guide, you’ll discover how to assess free woodshop plans, how to combine them with a robust library like Ted’s Woodworking, and how to turn scattered ideas into a well-organized, satisfying build.
Why free woodshop plans matter in woodworking
Free woodshop plans serve several important roles. They offer a no-cost starting point to learn about project scope, joinery, and overall workflow. They also help you determine whether a project matches your skill level and the space you’ve set aside in your shop. The best free plans provide clear measurements, material lists, and step-by-step instructions that reduce guesswork and waste—key factors when you’re working with real wood, real tools, and real deadlines.
The concept of free plans isn’t about quick shortcuts. It’s about access. When you can study a complete plan—even if it’s digital and freely shared—you gain insight into shop organization, stock preparation, and joinery thinking. But to move beyond practice projects, you’ll want a more comprehensive library to deepen your knowledge and broaden your project options. That’s where Ted’s Woodworking can play a constructive role as a trusted resource.
Types of free woodshop plans you’ll encounter
Not all free plans are created equal. Some come as brief sketches with rough cut lists, while others are fully detailed with diagrams, cut lists, and material specifications. It helps to categorize them by project type and scale:
- Small projects: spice racks, phone stands, a cutting board, or a simple wall shelf. These are ideal for practicing joints and finishing techniques without a large material commitment.
- Workbench and shop storage: plans for a sturdy base, a vise installation, or pegboard storage provide practical value for ongoing projects and future builds.
- Furniture components: table legs, chair backs, or a small coffee table; these pieces let you explore more refined joinery and finish work.
When browsing free woodshop plans, look for clear cut lists, a sensible project timeline, and any notes about material hardness, humidity, or finish types. Plans that include exploded diagrams and recommended tool setups help you imagine the workflow long before you pick up a saw.
How to evaluate free woodshop plans for your space
The best plans for your shop are the ones that respect your space and your current skill level. Here are a few practical checks:
Measuring your shop and tools
Start by outlining your available floor space and ceiling height. Measure doorways and any awkward corners that could affect project layout. Then inventory your essential tools and access to power. If a plan assumes a large workshop with a wide bench, you’ll need to adapt it for a smaller setup or a portable work surface.
Compatibility with your skill level
Free plans often target a broad audience. Be mindful of plans that require advanced joinery or specialized jigs. It’s perfectly fine to start with simpler projects and gradually tackle more complex builds as confidence and shop organization grow.
Ted’s Woodworking as a complementary resource (affiliate)
If you’re ready to expand beyond free offerings, a structured library like Ted’s Woodworking can be a logical next step. While you continue to practice with free woodshop plans, a paid library provides deeper project coverage, printable plans, and clear, step-by-step tutorials that help you scale your projects and improve accuracy. This is particularly valuable when your goal is to add a few furniture pieces or refine a workshop cabinet system.
For those who want a curated, deep-dive collection of projects and technique guides, Ted’s Woodworking presents a comprehensive pathway. It’s important to approach any paid resource with a plan in mind—define a few target projects, confirm the required tools, and map out a realistic timeline that aligns with your shop’s capacity. If you’re curious about how Ted’s Woodworking aligns with practical, real-world planning, you can explore a practical guide here: Practical guide to Ted’s Woodworking.
If you’re a beginner and want an essential primer that also mentions Ted’s Woodworking, check this beginner-focused resource: Beginner guide to start projects, tools, and Ted’s Woodworking.
To explore Ted’s Woodworking directly, many crafters find value in the official library and community features. If you’re curious about the program from a marketing and purchase perspective, you can learn more here: Ted’s Woodworking (ClickBank).
Using free plans effectively: a practical, step-by-step approach
Free woodshop plans are most powerful when you use them as part of a deliberate workflow. Start with a clear project goal, such as building a sturdy workbench, a wall-mounted shelf, or a small cabinet. Then, follow these steps:
Step 1: Select a plan that matches your space
Compare your shop dimensions with the plan’s footprint and required material widths. If a plan calls for a longer bench than you can accommodate, consider shortening the length or using modular components that can be extended later. The idea is to avoid over-committing your shop space before you’ve proven the workflow.
Step 2: Create a clean cut list and material checklist
A well-detailed plan lists the exact boards and quantities. Translate this into a cut list that you can bring to the board supplier or use with pre-cut stock to minimize waste. When you master accurate cutting, you set yourself up for less material waste and better-fitting joints.
If you decide to augment your free plans with a paid library, use Ted’s Woodworking as a way to cross-check joints and joinery methods. The combination often yields more precise results and a faster workflow if you’re balancing multiple projects.
Step 3: Plan your tool setup and safety measures
Review the plan for required tools and safety considerations. If you notice a particular technique demands a specialized jig or router setup, plan ahead. A well-organized shop with accessible power outlets, proper dust collection, and clear bench space will help you stay efficient and safe.
Step 4: Calibrate time and milestones
Break the project into stages with realistic timeframes. A typical small project might span a weekend or two, while a larger cabinet build could stretch over several weeks. Schedule buffer time for unexpected snags and finish touches. The payoff is a steady, enjoyable process rather than a rushed sprint that compromises quality.
Real-world project ideas to get started
If you’re unsure where to begin, here are approachable projects that align with common free woodshop plans and help you build competence:
- A compact wall shelf system with integrated brackets to practice precise measurements and finishing techniques.
- A sturdy workbench extension or small utility cabinet to practice joinery such as dadoes and rabbets.
- A coffee table or end table that emphasizes square edges, finishing clarity, and a simple, elegant leg design.
These projects typically appear in various free plans and can be excellent bridges to more ambitious builds when you’re ready to upgrade to a broader library like Ted’s Woodworking.
Maximizing value: from free plans to finished projects
The key to turning free woodshop plans into tangible results is systematizing your approach. Start with a clean, labeled workspace. Gather all materials using a single material list, and create a simple project notebook documenting what worked well and what didn’t. This habit is particularly valuable for first-time builds, where learning from small mistakes saves time on larger tasks later.
When you’re ready for a broader scope, Ted’s Woodworking can complement your ongoing learning by offering a wide range of plan types, включая detailed cut lists and step-by-step instructions. While not every hobbyist needs a paid library, many find that a curated set of projects accelerates growth and improves consistency across builds. If you’re curious, you can explore the guidance and examples available through the link above.
Learn more with the provided resources
For readers who want to dig deeper into Ted’s Woodworking while continuing to leverage free woodshop plans, two helpful resources from WhatIsUPP explain how to get started and how to progress from beginner to more advanced projects:
A practical guide to start and master craft with Ted’s Woodworking: https://whatisupp.com/wood-working-projects-a-practical-guide-to-start-and-master-craft-with-teds-woodworking/
Beginner guide to start projects, tools, and Ted’s Woodworking: https://whatisupp.com/beginner-wood-working-the-essential-guide-to-start-projects-tools-and-teds-woodworking/
To purchase or explore Ted’s Woodworking library directly, you can visit this affiliate link: Ted’s Woodworking – ClickBank. This is an affiliate link, and I may earn commissions on qualifying purchases, which supports the creation of more practical woodworking content.
Conclusion
Free woodshop plans are an excellent way to begin, refine, and validate your woodworking ideas without upfront investment. By selecting plans that fit your space and skill level, you set a foundation for steady progress. When you combine the accessibility of free plans with the depth of Ted’s Woodworking, you gain a powerful toolkit for turning simple scraps of wood into durable, well-crafted pieces. Remember to keep safety at the center of every project, maintain an organized workflow, and treat each finished piece as a stepping stone to your next project.
If you’re ready to expand your horizons, take a look at the resources linked above and consider adding Ted’s Woodworking to your library. The combination of free plans and curated, paid content can help you build more confidently and with greater consistency.