Fun beginner woodworking projects are where curiosity meets craft. If you’re just starting out, a thoughtful selection of simple, engaging projects can build confidence, teach core techniques, and turn a spare weekend into a satisfying accomplishment. This guide dives into easy, enjoyable projects that keep the momentum going while gradually expanding your toolkit, safety habits, and design sense. Whether you’re building a small shelf for spices, a rustic tray for coffee, or a decorative frame for a favorite photo, these fun beginner woodworking projects offer tangible wins and a sense of progress that fuels more ambitious work later on.
At its heart, woodworking is about problem-solving, patience, and practice. The keyword that anchors this journey is fun beginner woodworking projects. It’s not just about the end result; it’s about the process—measuring twice, cutting once, testing fits, and refining finishes. By starting with approachable tasks and layering on technique, you’ll quickly notice how much you’ve learned in a short time. As you gain experience, you’ll naturally branch into more complex builds, then come back to these foundational exercises when you want to rekindle your enthusiasm.
Why woodworking is perfect for beginners
Woodworking combines creativity with a practical, tactile learning curve. You’ll see immediate feedback from your tools and materials, which makes progress highly satisfying. For many beginners, the first success is a turning point that confirms the value of practice. The projects below are designed to be forgiving: they require basic cuts, simple joinery, and straightforward finishes, yet they still deliver a sense of accomplishment that motivates further exploration.
To keep the momentum, it helps to set a small, repeatable routine. Pick one project each week, gather the necessary materials, and follow a short checklist: safety gear in place, tools sharpened, measuring and marking done, then the cut, assemble, and finish. With each completed piece, your skill set expands—without feeling overwhelmed. It’s a classic example of how fun beginner woodworking projects can become a foundational habit, not a one-off experiment.
Essential tools and safety basics for beginners
Before you dive into projects, assemble a modest starter toolkit and learn a few safety principles. Building confidence starts with controlling your environment and tools. A typical beginner’s kit includes a tape measure, combination square, handsaw or beginner power saw, clamps, sandpaper, wood glue, and a finish such as polyurethane or Danish oil. A sharp blade makes a world of difference, as it produces cleaner cuts with less tear-out. Safety gear matters too: safety glasses, hearing protection if you’re using noisy tools, and a dust mask when sanding or cutting dusty woods.
In terms of technique, practice accurate measuring and layout. Marking lines should be clear and visible, and you’ll learn to cut along the waste side of the line (slightly inside the line) to ensure pieces fit. When joining parts, consider beginner-friendly methods such as butt joints reinforced with wood screws or dowels, rather than complex joinery. These choices keep projects approachable while still delivering durable results. For readers who want a curated set of plans and guidance, Ted’s Woodworking offers a broad library of projects and diagrams that can accelerate the learning curve. You can explore a comprehensive collection through trusted resources and, if you’d like a PDF download of projects, there’s a helpful option available here: woodworking plans PDF free download.
Top fun beginner woodworking projects to start this weekend
The following list emphasizes quick wins that teach core skills while giving you tangible, usable items. For each project, I’ve included a simple materials list, step-by-step steps, and a tip or two to help you get clean results. If you want to see a detailed, expert-backed project as a longer build, you can check a timeless wooden chair project for in-depth techniques here: homemade wooden chair guide.
1) Simple Wall Shelf
A wall shelf is the quintessential starter project: it’s compact, functional, and teaches mounting, edge finishing, and spacing. Materials: a small board (1×4 or similar), two cleats for mounting, screws, and optional decorative trim. Steps: cut the board to length, sand edges, attach back cleats to the wall, then mount the shelf to the cleats. Finishing: a light coat of stain or clear finish to protect the wood and highlight its grain. This project translates nicely into other shelf ideas as you gain confidence.
- Measure twice, cut once for precise fit.
- Use painter’s tape to protect edges during staining to avoid bleed.
- Pre-drill holes to prevent splitting when you attach screws.
2) Rustic Coffee Table Tray
Turn an otherwise ordinary board into a sturdy tray for coffee or keys. Materials: a thick plank, handles, wood glue, screws, and a finish of choice. Steps: cut to size, route a gentle rounded edge, attach handles, glue and clamp, then finish. This project teaches you about consistent edge work and how a simple tray can elevate daily routines.
- Consider a light chamfer on the outer edge to avoid sharp corners.
- Use a waterproof finish if you expect moisture from beverages.
3) Lightweight Wooden Stool
A small stool is a practical, confidence-building project. Materials: four legs, a seat board, wood glue, screws or pocket-hole fasteners, and a finish. Steps: cut legs to equal length, attach the seat with corner joints or simple dowels, then sand and finish. Stability comes from careful leg alignment and square cuts. This is a fantastic project to practice measuring, cutting at right angles, and basic assembly techniques.
- Clamping is your best friend here—keep pieces square while glue dries.
- Pop-in dowels or screws provide extra strength without complicated joinery.
4) Mini Planter Box
The planter box is a forgiving project that introduces you to box joints or butt joints with glue and nails. Materials: four boards for sides, a bottom panel, and exterior finish. Steps: cut four sides to length, join with a simple butt joint or box joint, insert bottom panel, then finish. Add decorative nails or corner trim to personalize it. This project is a wonderful way to practice precise cross-cuts and edge finishing, especially if you plan to display it outdoors.
- Seal the interior with a food-safe sealant if you plan to place herbs or edible plants inside.
5) Felted Tool Tote
A compact tote helps you stay organized while learning to size up a project. Materials: a single sheet of plywood or thin boards, glue, small handles, and a robust finish. Steps: cut to create a box with a divider, glue and clamp, install handles, then sand and finish. This project introduces you to roomier internal spaces and how to align edges for a clean, professional look.
- Use a straight edge and a square to ensure all corners are true.
- Apply a thin, even coat of finish to avoid blotchy results on lighter woods.
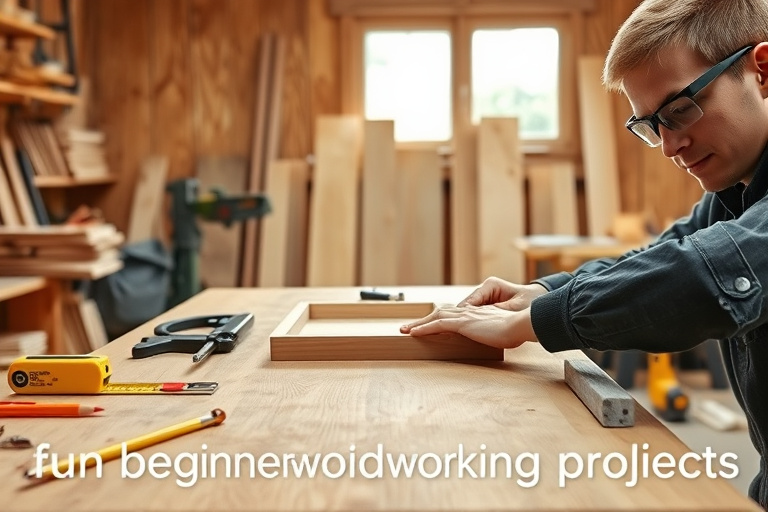
6) Picture Frame
A frame is a classic, low-risk project that teaches miter joints and precision. Materials: four thin boards, backing board, glass or acrylic, and finish. Steps: cut four 45-degree miter joints, join with lightweight wood glue and small nails or staples, insert backing and glass, sand lightly, and apply a protective finish. A picture frame builds accuracy in measuring, mitering, and finishing—skills that transfer to bigger projects later.
- Use a miter box or a miter gauge for clean 45-degree cuts.
- Test-fit before applying finish to avoid sticky edges.
How to choose the right project and grow your skills
When you’re just starting, pick projects that are small in size and simple in joinery. The goal is to build a habit of plan, measure, cut, assemble, finish, and reflect on what worked and what didn’t. A good rule of thumb is to begin with projects that require only straight cuts and rectangular shapes. As you complete each project, you’ll gain confidence to try slightly more complex variations, such as introducing dowels, pocket holes, or a curved edge. This steady progression is essential for sustaining motivation and mastering the craft.
To expand your library without feeling overwhelmed, consider using curated plans that align with your current skill level. For readers who want more structure, Ted’s Woodworking offers a well-known catalog of plans and tutorials that can accelerate progress and broaden your scope. Whether you’re looking for a handful of clearly illustrated projects or a robust library of plans, there are resources designed to meet different learning styles. If you’d like to explore a collection that often includes downloadable formats and structured steps, you can browse the free PDF download resource here: free woodworking plans PDF download.
Ted’s Woodworking: a practical resource for ongoing growth (affiliate)
Many hobbyists reach a point where they want a broader, organized library of projects to pick from during weekends or quiet evenings. Ted’s Woodworking is a popular option for those who want a comprehensive, step-by-step approach to building a variety of items—from small organizers to larger furniture pieces. While the exact experience may vary, users often cite the value of having consistent templates, material lists, and cut diagrams that reduce guesswork and help you stay on track with your fun beginner woodworking projects. If you’re curious, you can access the resource here: Ted’s Woodworking and explore plans that suit your pace and space.
In addition, one of the practical ways to deepen your plan library is to explore the compound resources and user-friendly formats included in Ted’s catalog. If you’re after a more guided experience, the two internal pages above offer both inspiration and formal plan collections to support your practice. For example, a timeless chair project demonstrates how detailed plans break a complex task into manageable steps, reinforcing the habit of precision and patience. You can read about this kind of project here: timeless wooden chair guide.
Finishing touches: sanding, staining, and sealing
Finishing is the final, transformative phase of the project and one of the most satisfying parts of the process. Sanding smooths the surface and reveals the wood’s natural character. Start with a rough grit (around 120) and progress to finer grits (up to 220) for a polished feel. The finish you choose can dramatically affect both appearance and durability. Clear finishes such as polyurethane, shellac, or Danish oil bring out wood grain and provide protection against moisture and wear. If you’re working outdoors or in a humid environment, consider a sealant appropriate for exterior use and a UV-resistant topcoat to prevent fading. For beginners, a simple, even coat that builds gradually often yields the most consistent results.
Tips for success: keep a steady hand and apply finishes in thin, even coats, allowing proper drying time between layers. Wipe away excess finish to avoid streaks, and sand lightly between coats if you’re aiming for a glassy surface. Each finished piece is a reminder of how far you’ve come—from a handful of rough boards to a polished product that can be used and admired.
Practical tips for ongoing practice and consistency
Consistency is more important than cramming a long list of projects into a single weekend. Set a modest, repeatable goal—for example, one new project every two weeks. Keep a simple journal or photo log of your builds, noting what went right and what could be improved. This practice creates a narrative of progress you can revisit whenever you feel stuck or need motivation. Also consider restoring or reusing scrap wood; repurposing materials is a budget-friendly way to practice cuts, joinery, and finishes while keeping the workflow sustainable.
As your confidence grows, you’ll discover that your best ideas often come from adapting a simple project. A shelf might become a small wall-mounted organizer for tools; a planters box could be adapted into a decorative storage crate. The key is to maintain momentum by choosing projects that are aligned with your current skill level while also nudging you just beyond your comfort zone to learn a new technique or two. And when you’re ready for a broader range of options, Ted’s Woodworking can be a valuable companion, offering a structured path through hundreds of project ideas with diagrams, material lists, and finish recommendations. Remember, the journey is about fun beginner woodworking projects at each step, not just the final piece.
Real-world success stories and motivation
Many beginners report a strong sense of accomplishment after completing even small projects. A simple shelf or a framed photo display can transform a space while proving that consistent practice yields better results. The feeling of finishing a project that you can actually use reinforces the habit of showing up for the next one. If you’re ever in doubt, revisit your first project and compare it to your latest work. The improvements in measuring, cuts, and finishes are tangible proof that fun beginner woodworking projects compound over time.
For readers who want to accelerate progress and access a wide array of project plans, the resource pool behind Ted’s Woodworking has helped many hobbyists expand their repertoire without sacrificing quality or clarity. The goal is to support your learning path with structured plans, so you can keep the excitement alive as your projects become more sophisticated and satisfying. If you’d like to explore a broader collection, you can find more inspiration and downloadable resources via the links above.
Conclusion: start today and build your woodworking confidence
Woodworking is a journey of curiosity, practice, and steady improvements. By focusing on fun beginner woodworking projects, you set a realistic pace, learn essential techniques, and continuously prove to yourself that you can create functional, attractive pieces from simple materials. The projects outlined here are designed to be approachable, repeatable, and adaptable to your space and skill level. As you gain experience, you’ll naturally seek more complex joinery, finishes, and designs. Whether you’re drafting a new shelf, a sturdy stool, or a decorative frame, the key is to begin with a plan, gather the right tools, and enjoy the process. And if you want a curated library of additional plans to explore, consider Ted’s Woodworking as a practical resource, keeping your motivation high and your workflow streamlined.
Ready to dive in? Start with any of the projects above, document your progress, and come back to share what you learned. The joy of woodworking lies not only in the finished piece but also in every measurement, cut, and finish you master along the way. And remember: fun beginner woodworking projects are not a one-time effort—they’re the foundation of a lifelong craft that grows with you.