
Introduction to intricate woodworking projects
Intricate woodworking projects sit at the intersection of craft and art. They push you to master precise measurements, flawless joints, and carefully executed finishes. Whether you’re carving a delicate jewelry box, crafting a lacquered tray with inlay work, or building a small cabinet with fine details, these endeavors are less about brute force and more about deliberate planning, patience, and technique. If you’ve ever stared at a pile of boards and imagined transforming them into something that’s both useful and beautiful, you’ve encountered the world of intricate woodworking projects.
The beauty of intricate woodworking projects lies in their layers. It starts with a solid design, but the real magic happens in the details: the way a half-blind dovetail locks a drawer, the precision of a cross-grain mitre, the symmetry of inlaid patterns, and the evenness of a hand-applied finish. As you push your skills, you’ll notice improvements in layout planning, tool control, light dust management, and quality control. The result is not just a product but a demonstration of your growing mastery as a craftsman.
Why intricate woodworking projects demand planning and precision
Every successful project begins with a plan. For intricate woodworking projects, the plan isn’t simply a shopping list; it’s a blueprint for how each piece will interact with the others. A well-thought-out plan reduces waste, saves time, and helps you visualize potential issues before you cut a single piece of wood. Precision, meanwhile, is the currency of good joinery and clean aesthetics. A misaligned line here or an imperfect cut there can cascade into bigger problems down the line.
Tools and safety
Precision requires the right tools. Essential items include a sharp marking gauge, a reliable square, a high-quality dovetail saw, chisels of varying widths, a router with clean bits, clamps that hold securely, and a properly aligned table saw or combo machine. Sanding blocks or a sanding cart, fine-grit paper, and finishing supplies are also crucial because surface quality often defines the perception of intricacy. Always wear appropriate safety gear: eye protection, hearing protection, and a dust mask. A clean, well-organized workspace reduces the likelihood of mistakes and accidents, which is especially important when working with fine joinery or delicate veneers.
Skill-building steps
Developing the skills behind intricate woodworking projects takes practice and structured learning. Begin with foundational joints—dowels, mortise and tenon, and simple dadoes—to build confidence. Then advance to more challenging joints like half-blind dovetails or through dovetails for drawers. Practicing on scrap stock helps you refine cut accuracy without wasting premium lumber. As you gain comfort, you can layer in decorative techniques like inlay, marquetry, or hand-cut veneer work. The payoff is not just the finished piece but the repertoire of techniques you accumulate, which makes each new project faster and more precise.
Ted’s Woodworking: A trusted resource for ambitious craftsmen
For woodworkers who want a broad library of tested plans, tutorials, and project galleries, Ted’s Woodworking provides a substantial resource that many builders rely on to inspire intricate woodworking projects. The platform curates step-by-step instructions, cut lists, and diagrams that translate design ideas into actionable steps. While you may already have your favorite local sources, a comprehensive plan library can save time and spark ideas when you’re facing a blank bench. If you’re curious about expanding your plan options, this resource is worth a look, and you can explore it here: Ted’s Woodworking.
In addition to the practical diagrams and cut lists, Ted’s Woodworking encourages a mindset of careful measurement and anticipation—habits that are essential for intricate woodworking projects. The right plan set can help you anticipate material needs, determine the correct joinery approaches, and visualize the final finish before you screw the first piece together. Think of Ted’s Woodworking as a curated toolbox for the serious hobbyist and professional alike, offering a structured path through more complex builds while you maintain your personal style and precision standards.
Practical project ideas that exemplify intricate woodworking projects
If you’re looking for concrete projects that illustrate the patience and finesse involved in intricate woodworking projects, consider options that require careful layout, precise joinery, and refined finishes. The following ideas are intentionally chosen to demonstrate the spectrum—from small functional items to decorative accents—that test your skills while delivering impressive results. For further inspiration on related seating and furniture ideas, you can explore a related guide to cozy seating projects in this chair-focused resource: diy wooden chair ideas.
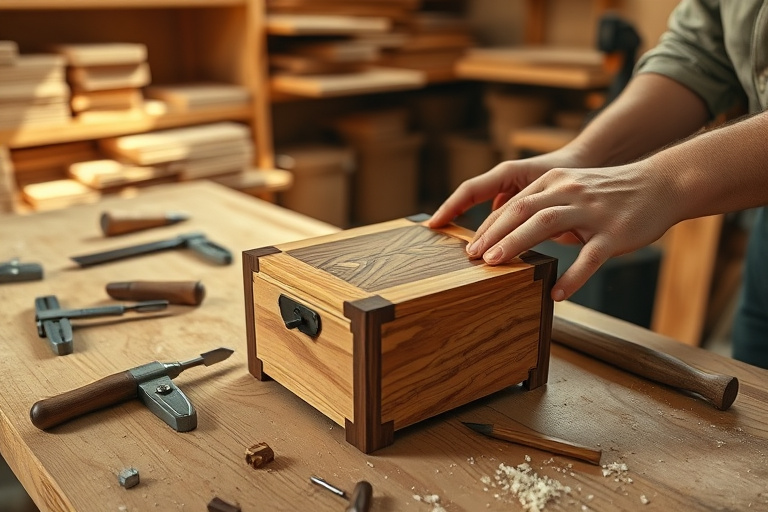
Jewelry box with dovetail joints
A classic test case for your intricate woodworking projects is a jewelry box with dovetail drawers. The appeal lies in the visible precision of the joinery and the smooth movement of the drawers. Start with a solid box shell that uses through dovetails on the corners for a robust yet elegant look. Inside, create shallow compartments with profile dividers and a soft-lined lid for a refined touch. The key challenges are layout accuracy for the space between the joints, achieving tight, unobtrusive seams, and selecting a finish that highlights the wood grain while protecting the veneer inner surfaces. If you’d like to see a broader set of ideas and approaches to similar projects, this internal article can be a useful companion: the generated article.
Patterned inlay tray and marquetry accents
Inlay work steps up the ante for intricate woodworking projects by introducing contrasting woods, veneers, or even bark to create a decorative surface that reads as a narrative of light and texture. A tray with a simple geometric inlay or a more elaborate marquetry design invites careful planning: you’ll need precise patterns, a sharp knife or laser-cut templates, and a careful approach to gluing and leveling the veneer. The result is a functional object that serves as a demonstration piece and a talking point in your workshop. When you’re ready to expand into more complex inlays, a good plan library can provide reference patterns, thickness tolerances, and finishing guidelines that maintain the integrity of the design across the entire piece.
Step-by-step example project: a classic jewelry box
Let’s walk through a complete example that demonstrates many skills associated with intricate woodworking projects. We’ll outline design considerations, materials, a cut list, joinery choices, assembly steps, and finishing techniques. This example is intentionally practical, allowing you to apply what you’ve learned about planning, precision, and finish to a meaningful, marketable item.
Design, materials, and cut list
Design goal: a compact jewelry box with a hinged lid, a shallow bottom drawer for rings, and a secure, decorative top panel. Materials: 1/4- to 1/2-inch stock for sides and lid; a slightly thicker top panel for strength; contrasting veneer for the lid or inlay; quality felt for the interior lining. Cut list (example):
– Sides: 2 pieces at 6 in x 4 in
– Front/back: 2 pieces at 6 in x 4 in
– Bottom: 6 in x 4 in, 1/4 in thick
– Top panel: 6 in x 4 in, with inlay
– Drawer components: 2 sides 6 in x 2 in, bottom 6 in x 2 in, front/back 2 in height
– Dividers: 3 pieces at 6 in x 1 in
– Hinge: 1 pair sized for a small box
Always add a small margin to allow for finishing and sanding. The exact dimensions depend on your material thickness and desired box size, but the technique remains the same: careful measurement, clean cuts, and precise gluing to achieve a tight, durable structure.
Joinery, assembly, and finishing
Joinery focus: mortise and tenon for the main corners or half-blind dovetails for a refined drawer connection. For the lid, a shallow lid joint with a tiny tongue-and-groove detail can provide a snug fit while still allowing easy opening. Assembly should be done with even pressure across joints using a flat caul or a set of clamps that won’t leave marks. Interior compartments can be built separately and then glued into the box to preserve alignment. Finishing steps: sand progressively from 180 to 320 grit, wipe clean, and apply a protective finish such as oil or shellac followed by a satin polyurethane layer for durability. The overall effect should be a warm, hand-crafted look that highlights the natural beauty of the wood without obscuring the intricate joints.
Finishing touches and maintenance for longevity
Finishes do more than protect; they define the look of intricate woodworking projects. For works with fine joinery, a finish that penetrates the wood while enhancing grain is ideal. Oil finishes—such as tung or Danish oil—offer a natural look with easy maintenance. For a harder-wearing surface, a thin coat of polyurethane in satin or low-gloss can be applied, with attention to edge glow and brush marks. A shellac wash can add warmth and depth, while protecting the wood from later wear. Remember to wipe away excess finish and allow ample cure time between coats. Proper sanding between coats (a light 320-grit) is critical to a smooth final surface that will stand up to daily use.
Additional resources and internal reads for deeper learning
If you’re exploring more ideas to fuel your repertoire of intricate woodworking projects, consider revisiting curated guides and templates. For inspiration on seating and complementary furniture that can tie into your workshop projects, see this chair ideas guide: diy wooden chair ideas. To study how other pieces are framed and described in a detailed article, you can consult the generated article for a template-like reference: the generated article. If you’re ready to broaden your plan library and tackle more ambitious builds, consider exploring Ted’s Woodworking for an extensive collection of plans and guides that can accelerate your progress and expand your design horizons: Ted’s Woodworking.
Putting it all together: your next steps for mastering intricate woodworking projects
Intricate woodworking projects reward disciplined practice. Start with a small jewelry box or a modest inlay tray to hone layout accuracy, marking, and cut control. Build your confidence by completing a complete project—from design to finish—and then expand to more ambitious pieces with more complex joinery and veneer work. As you broaden your toolkit, remember to document your process: take photos at key stages, keep notes about yield and waste, and assess your finish quality under different lighting. These habits will help you refine your craft and maintain a consistent standard across all your intricate woodworking projects.
Finally, don’t hesitate to tap into a broad range of resources when you’re ready to scale up. While you continue to refine your technique, a well-curated plan library can offer fresh design angles, precise cut lists, and reliable step-by-step instructions that keep you from reinventing the wheel. And if you’re looking for a structured, comprehensive set of plans to accelerate your learning, Ted’s Woodworking is worth exploring for the breadth of projects and the clarity of its instructions. Explore Ted’s Woodworking to see how others are turning their ambitions into tangible results, and then bring your own ideas to life with confidence and precision.


