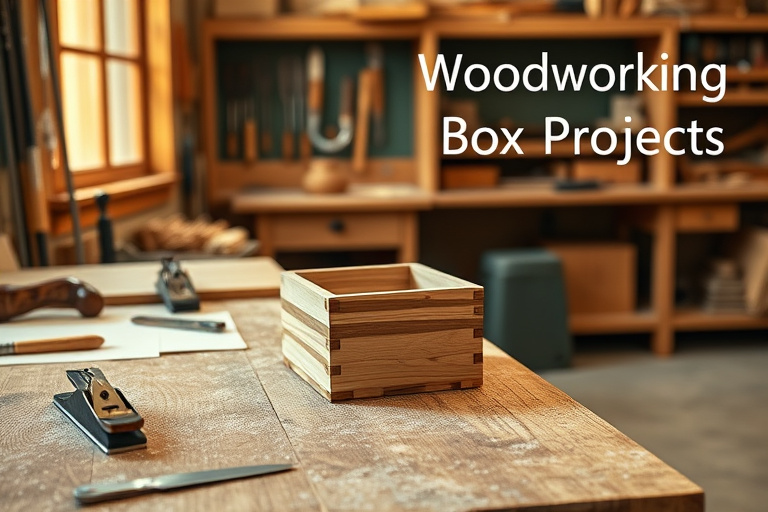
If you’ve ever wanted to start a woodworking journey that yields tangible, keepsake-worthy results, exploring woodworking box projects is a fantastic entry point. These projects blend practical skills with creative design, giving you near-immediate gratification as you turn a block of wood into a functional, decorative item. For many hobbyists, box projects are the gateway to broader furniture-making and cabinetry skills.
When you’re just starting out, the goal is to build confidence, not overwhelm yourself. Woodworking box projects strike the right balance: they’re compact enough to complete in a weekend, yet they offer enough challenge to keep you engaged. The term woodworking box projects covers a broad range—from simple jewelry boxes to secure keepsake chests with secret compartments. No matter the scale, these projects teach essential techniques: measuring accurately, cutting clean corners, joining panels, sanding to a smooth finish, and applying a durable protective coating.
As you begin, you’ll likely wonder where to find reliable patterns and plans. That’s where curated resources can make a big difference. For a curated collection of box-design ideas and proven patterns, you can explore a dedicated guide focused on Ted’s Woodworking projects: Ted’s Woodworking projects master guide. This resource compiles a variety of box patterns and step-by-step instructions, helping you map out your projects with confidence. It’s a great way to see how seasoned woodworkers approach box-making and understand which joints, grain selections, and finishes work best for different box styles.
Another valuable resource for broadening your woodworking knowledge is a comprehensive guide that dives into patterns and plans. The article The Ultimate Guide to Mastering Projects with Ted’s Woodworking offers ideas on how to interpret plans, select suitable lumber, and adapt projects to your workshop space. When you’re focused on woodworking box projects, these resources can help you build a solid foundation and avoid common early mistakes.
If you’re ready to expand beyond the basics, you might also consider an affiliate option that provides broad access to patterns and design ideas. The resource linked here offers a comprehensive suite of instructions you can explore to deepen your knowledge and practice. Access Ted’s Woodworking library to unlock patterns, tips, and guides that align with your box-making ambitions. While this affiliate link is a helpful shortcut to more patterns, the real value comes from applying what you learn in your own shop—measuring twice, cutting once, and refining your finish with care.
Why woodworking box projects are beginner-friendly
Box projects are particularly forgiving for beginners because they often rely on straight cuts, simple joinery, and predictable finishes. You’ll gain confidence with every panel you cut and every edge you sand smooth. The process reinforces good habits: accurate layout, careful milling, and precise assembly. As you progress, you can introduce more complex joinery, like box joints or dovetails, but starting with a basic keepsake box allows you to experience a complete build from start to finish without getting overwhelmed.
Beyond the technical skills, woodworking box projects help you develop design instincts. You’ll learn how to choose woods with contrasting grain for visual interest, how to size a lid so it fits perfectly, and how hardware like hinges and catches influence both usability and durability. The beauty of box-making is that you can tailor patterns to your interests—whether you’re crafting a jewelry box, a herb garden keepsake tin, or a small medicine-chest style container.
Tools, setup, and safety for box-making
Before you start carving intricate grooves or delicate dovetails, assemble a reliable toolkit. You don’t need a professional shop to begin, but a few essential tools will make a world of difference when you’re working on woodworking box projects:
- Measuring tools: a steel square, tape measure, marking gauge
- Saws: a back saw for clean joints, a crosscut saw or a fine-tooth hand saw
- Planes and chisels: bench plane, set of bevel-edge chisels
- Clamp assortment: quick-action and pipe clamps for assembly pressure
- Sanding tools: sanding block, random-orbit sander, abrasive papers in grits from 120 to 220
- Finishing supplies: wood oil, polyurethane, varnish, or wax for a protective finish
Safety matters just as much as accuracy. Protect your eyes with safety glasses, keep your fingers clear of blades, and always clamp pieces firmly when cutting or shaping. Work in a well-ventilated area when applying finishes, and wear a respirator if you’re using finishing products that emit fumes. A clean, well-organized workspace reduces mistakes and keeps the focus on the details that elevate woodworking box projects from hobby to craft.
Step-by-step beginner project: Simple Keepsake Box
Planning and materials
A simple keepsake or jewelry box is an ideal starting point for woodworking box projects. Start with a small, straight-grain hardwood like maple or walnut for durability and a clean finished look. Decide on dimensions that fit your needs—let’s say a compact box measuring around 6 inches long, 4 inches wide, and 3 inches tall. This gives you a manageable paneling area to practice accuracy while still producing something useful.
Sketch a quick plan: lid dimensions equal to the top, a base panel, two side panels, and a back with a front lip that can accept a simple catch or hinge later. If you want a single-compartment design with a removable lid, you’ll need to cut five pieces: two sides, a front, a back, and a base. The simplest joints—half-lap or butt joints reinforced with small dowels—are great for beginners. The goal is clean, square corners and neat fit rather than decorative complexity.
Cutting, joinery, and assembly
Layout your pieces with careful attention to grain direction and the thickness you want the box to be. Cut the panels with a consistent thickness, then plane or sand edges flat. For beginners, butt joints reinforced with wood glue and small pins or dowels provide reliability without requiring intricate woodworking skills. Dry-fit the pieces first to confirm alignment and measure the lid’s clearance so it sits neatly on top without binding.
Assembly should proceed in stages. Glue up the base and two side panels first, then add the back and front. If you’re planning a hinged lid, install the hinge after you’ve established the box’s final dimensions and the lid’s fit. Sand the entire assembly smoothly to remove any glue squeeze-out or rough edges. A light pass with 220-grit paper yields a pristine surface ready for finish.
Finishing touches and hardware
Finishes not only protect the wood but also bring out its natural beauty. A simple oil finish (like a Danish oil) can enhance the grain without adding excessive gloss, which suits the understated elegance of a keepsake box. If you prefer more durability or a glassy surface, a clear polyurethane or varnish works well, though it’s wise to apply thin, multiple coats with light sanding between coats. Hardware such as a small brass hinge or a magnetic catch adds a functional, polished look without complicating the build.
As you complete the project, you’ll notice how the discipline learned in this basic box-building exercise translates to more ambitious woodworking box projects—whether you tackle a jewelry box with a secret compartment or a larger gift box with precision dovetails. For further inspiration, revisit the curated Ted’s Woodworking projects and related resources to see how pros approach the planning and execution of box designs. The master guide linked earlier provides direct access to a range of styles and sizes that you can adapt to your own space and skill level.
Advancing to more complex woodworking box projects
Once you’re comfortable with a simple keepsake box, you can graduate to more advanced woodworking box projects that challenge your precision and design sensibility. These projects expand on the fundamentals: more complex joinery, hidden compartments, and decorative inlays add layers of skill and satisfaction.
Hidden-compartment boxes and inlays
Hidden compartments add a delightful surprise factor to box-making. Plan small cavities behind false fronts or inside double-wall constructions that require careful measurement and precise cutting. Inlays—whether simple wood accents in contrasting species or more complex patterns using marquetry techniques—offer a chance to practice careful alignment and edge-work. Working with multiple woods also helps you understand how different species respond to planing, sanding, and finishing, which is a valuable skill for any woodworker pursuing woodworking box projects at a higher level.
Advanced joinery and precision
As you progress, you’ll want to introduce box joints, finger joints, or sliding-lid mechanisms. Box joints require accurate cutting and consistent width across all fingers, but modern jigs make these joints accessible to hobbyists. Sliding lids, compartments, and integrated hinges demand precise tolerances and careful layout. The more you practice, the more your box projects begin to reflect professional-level workmanship.
How to find trusted plans and inspiration
Planning is a critical phase for woodworking box projects. The right plans give you clear cut lists, precise dimensions, and a visual guide to the project’s final look. In addition to your own sketches, you can explore curated collections that focus specifically on box designs and box-making techniques. For instance, you can explore the master guide to Ted’s Woodworking projects, which consolidates a wide range of patterns and instructions that align with box-building goals. The resource is accessible here: Ted’s Woodworking projects master guide.
Another valuable resource is the broader guide to woodworking books with plans, which helps you understand how to interpret plans, select the best reference materials, and adapt designs to your workshop. This is particularly helpful when you’re compiling ideas for woodworking box projects and want to ensure you have reliable, well-documented instructions. See the guide here: The Ultimate Guide to Mastering Projects with Ted’s Woodworking.
Maximizing learning with a curated library
Beyond a single project, a well-curated library of patterns and plans accelerates your learning curve. The approach is to select a handful of projects at a time—starting with simpler box designs and gradually increasing complexity as your comfort grows. This method keeps you engaged and continually improving your technique, from layout and measurement to assembly and finishing.
When you’re ready to broaden your access to patterns and step-by-step instructions, you can explore an affiliate resource that provides a broad catalog of plans and tutorials. This can be a practical way to supplement your hands-on practice when you’re between projects. For example, you might consider the Ted’s Woodworking library as an additional reference to discover a wide array of box designs, joinery ideas, and finishing strategies that align with woodworking box projects.
Integrating affiliate resources into your project journey
Affiliate resources can be a helpful bridge to more ideas and inspiration, especially when you’re building a habit of working on woodworking box projects weekly. The key is to integrate these resources thoughtfully—use them to source plans that fit your current skill level, then apply your own measurements, material choices, and finish preferences. It’s this combination of vetted patterns and personal workmanship that yields the most satisfying results in box-making and beyond.
When you’re selecting projects, keep a simple plan: pick a box you know you can complete with steady focus within a weekend, gather the right stock, cut accurately, assemble cleanly, and finish with care. This disciplined approach reduces waste and frustration while building your confidence as a woodworker. And as you gain momentum, you can branch into more intricate woodworking box projects and explore deeper techniques, knowing you have reliable guides to lean on when needed.
Conclusion: start creating today
Woodworking box projects offer a practical, accessible path into woodworking that yields immediate, tactile results. With a solid plan, the right tools, and a steady practice routine, you’ll find yourself turning simple boards into cherished keepsakes in no time. Remember to start with a simple box design to learn fundamentals, then gradually expand your repertoire with more complex styles. The process will reinforce precision, patience, and pride in your craft.
To deepen your knowledge and access a broader catalog of box designs and plans, explore the Ted’s Woodworking resources linked above. The curated guides and patterns you’ll find can help you grow from first sparking interest to confidently tackling a diverse range of woodworking box projects. Whether you’re working in a small hobby space or a professional shop, the journey from rough lumber to a polished keepsake is endlessly rewarding.
Ready to dive deeper into box-making? Start with a simple keepsake box to build fundamentals, then consult the Ted’s Woodworking resources for more project ideas and patterns. And if you want a broader selection of designs, consider the included affiliate resource to access an expansive library of woodworking plans. Your future self will thank you for the patience you invest today, as the skills you develop with woodworking box projects open doors to more ambitious builds tomorrow.