Introduction: Why woodworking plans for outdoor chairs matter
Outdoor spaces deserve furniture that not only looks inviting but also endures the elements. When you work from thoughtful woodworking plans for outdoor chairs, you’re setting up a clear path from raw wood to comfortable, weather-ready seating. These plans provide accurate cut lists, precise dimensions, and tested joints that minimize guesswork. Whether you’re rebuilding a tired backyard or filling a new deck, reliable plans ensure that your chairs are sturdy, ergonomic, and long-lasting. As a practical hobbyist, you’ll appreciate how a well-chosen plan can save time, reduce waste, and help you achieve professional results faster.
The challenges and opportunities of outdoor seating
Outdoor chairs face sun, rain, humidity, and temperature swings. A great woodworking plan for outdoor chairs addresses these realities—offering design features like slatted backs for drainage, thicker rails for durability, and hardware choices that resist corrosion. The right plan also introduces variations to suit different climates and spaces, from a compact balcony chair to a lounge-style piece for a larger patio. By starting with robust plans, you set clear expectations for materials, assembly order, and finishing steps that will pay dividends once the chairs are out in the open.
Understanding options: prefab plans vs custom designs
Materials and weather considerations
Choosing the right materials is a cornerstone of any successful outdoor seating project. Common timber choices include cedar, redwood, teak, and pressure-treated pine—woods renowned for weather resistance and workability. Your woodworking plans for outdoor chairs will typically specify board thickness, slat spacing, and the type of fasteners that hold up under sun and rain. When you pick materials, plan for moisture movement and UV exposure. A high-quality plan will also guide you toward finishes that protect the wood without peeling or cracking in harsh conditions. If you’re new to material selection, a pair of starter guides can build your confidence in recognizing what works best in your climate. See the two beginner resources linked in this article for foundational tool use and basic carpentry concepts.
Plan libraries and how to choose your design
There are two practical paths: working from a single, well-drawn plan or leveraging a library of designs to mix and match components. A plan library can be especially helpful if you want to experiment with different chair silhouettes without reinventing the wheel. If you’re exploring options, you might consider a well-known plan library like Ted’s Woodworking to access a broad range of woodworking plans for outdoor chairs and related outdoor furniture. You can explore the concept here Ted’s Woodworking and gauge how a curated collection can streamline your project selection. To support your learning curve, you’ll also benefit from foundational resources that teach you basic tool use and carpentry skills. For those references, take a look at these two beginner guides: basic tools for beginner woodworker and basic carpentry projects: a practical beginner’s guide.
Step-by-step guide to using woodworking plans for outdoor chairs
Setting up your workspace and safety best practices
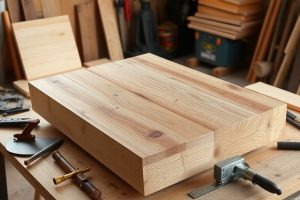
Before you touch a piece of wood, set up a clean, well-lit workspace with stable workbenches or sawhorses, clamps, and a dust collection plan. Safety should guide every cut: wear eye protection, use push sticks for narrow pieces, and ensure guards and blades are in good condition. A solid plan reduces on-the-fly decision-making, letting you focus on accuracy and consistency. Clean planning also minimizes material waste and makes it easier to reproduce the chair design in more than one unit.
Selecting the right plan and adapting it to your space
Not every outdoor space is the same, so adaptability is key. A good woodworking plan for outdoor chairs gives you a dependable framework—dimensions for seat height, width, and backrest angle—while letting you tweak the scale to fit your deck or garden. If you’re using a reputable plan library, you’ll often find modular components that can be swapped between chairs, so you can design a matching set with consistent joinery and hardware. As you adjust the plan, re-check clearances around arms, legs, and slats to ensure comfortable seating and safe foot clearance. If you want to explore more variations beyond a single chair design, a broader plan library can be a productive next step, which you can explore through the affiliate link mentioned above.
Tools and skills you need
Essential beginner tools
A solid starter toolkit makes woodworking plans for outdoor chairs feasible for beginners and efficient for seasoned woodworkers. At minimum, assemble a handsaw or miter saw, a drill/driver, a set of chisels, clamps, a square, measuring tape, and a basic random-orbit sander. A well-chosen assortment of bits, a speed square, and a sacrificial “zero-clearance” work surface will speed up assembly and improve accuracy. If you’re still building your toolbox, refer to the starter guide linked earlier for a structured path to the tools that deliver reliable results on every project.
Core carpentry skills to master before cutting
Even with precise plans, a few carpentry fundamentals keep the project moving smoothly. Practice accurate measuring, square ends, and consistent sawing. Learn to establish a safe, repeatable clamping plan so pieces stay flat while joints dry-fit. Dovetail, dowel, or pocket-hole joinery can be appropriate depending on your design, but the key is consistency and clean assembly. Before committing to the actual chair components, perform test fits on scrap stock to confirm alignment and comfort. If you’d like to build confidence with basic skills, revisit the beginner guides linked earlier; they’re designed to reinforce technique while you work through your woodworking plans for outdoor chairs.
From plan to patio: Building and finishing
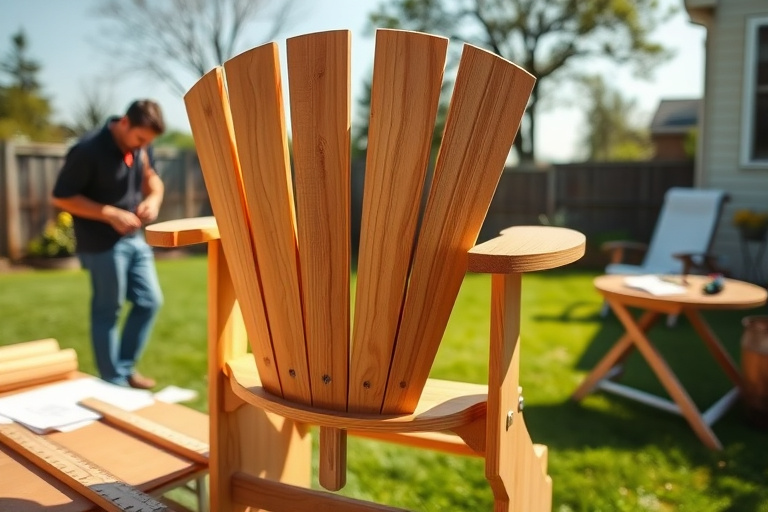
Cut, assemble, and test for comfort
Following the plan’s sequence, cut each piece with care, label components, and dry-fit before final assembly. Comfort is a crucial criterion: seat height, back support angle, armrest width, and leg stability all contribute to long-term satisfaction. If a test sit reveals a discrepancy, consult the plan’s dimensions and adjust the affected parts in small increments. The beauty of a well-documented plan is that it reduces guesswork and helps you verify tolerance throughout the build. Don’t skip dry-fit sessions; they save you from costly rework after glue dries.
Finishes that endure weather and UV exposure
Finish quality decides how long your chairs look new and how well they resist the elements. Start with a clean, dust-free surface, then apply a penetrating sealer or a stain with UV protection, followed by a durable exterior topcoat. Two or three light coats typically outperform a single heavy coat for exterior furniture, and be sure to follow the product’s re-coating schedule for best results. If you live in a climate with pronounced sun or moisture, consider a finish with enhanced UV blockers and water beading properties. The right finishing regime keeps the wood’s color uniform, slows graying, and reduces surface checking. If you’re curious about specific finishes, the two basic guides linked earlier provide a solid starting point for understanding how to protect wood outdoors.
Maintenance, repairs, and long-term care
Outdoor chairs aren’t immune to wear. Regular maintenance—cleaning with a mild soap, inspecting joints, and tightening hardware—extends life span significantly. Weather-driven issues such as wood swelling, loose slats, or corroded hardware should be addressed promptly. When you notice a slat loosening or a seam splitting, you can refer back to the original plans to confirm proper dimensions and re-assemble with the recommended hardware. The strategy of maintaining one design with reliable joinery will pay off across future projects beyond outdoor chairs, reinforcing your confidence with every build.
Practical tips to accelerate projects
- Choose plans with a clear, organized cut list to minimize material waste.
- Prepare boards upfront: edge rip, square edges, and deburr corners before you start cutting.
- Pre-drill screw holes to prevent splitting in edge boards and slats.
- Label pieces as you cut so assembly proceeds smoothly on the bench.
- Keep a scrap bin for testing joints and fitting practices without risking the final pieces.
Adapting plans to climate and space: practical considerations
Climate and space shape the final design. In areas with high humidity or significant freeze-thaw cycles, select rot-resistant woods, apply extra coats of sealant, and consider thicker rails or a more robust frame to resist warping. For small decks, choose compact chair profiles and lighter components that still provide comfort. In coastal environments, stainless steel or polymer-coated screws help prevent corrosion. The core idea is that your woodworking plans for outdoor chairs should be adaptable, with notes on material choices and finishing strategies that reflect local weather realities. When you choose a plan library or a particular chair design, look for variants that maintain structural integrity while offering space-friendly dimensions.
Common mistakes to avoid and troubleshooting
Even with great plans, several pitfalls can derail a project. Overcomplicating the design, skipping dry-fit sessions, and neglecting surface prep before finishing are common culprits. Don’t rush through glue-ups or skip clamping guards; uneven pressure can cause small gaps or misaligned joints. Always recheck seat height and back support angles after assembly, and test the chair in its intended location—sometimes the best adjustments come from seeing how it sits in the real world. If a particular step seems unclear in your plan, consult the referenced beginner resources to reinforce technique, then proceed with a careful, measured adjustment.
Conclusion: Elevate your garden with timeless outdoor seating
Woodworking plans for outdoor chairs provide a sturdy blueprint for transforming weather-exposed wood into functional, beautiful seating. With the right materials, joinery, and finishing approach, you’ll enjoy outdoor chairs that resist the elements and remain comfortable for years to come. If you’re ready to explore more chair designs and related furniture, a broader plan library like Ted’s Woodworking can broaden your options and spark new projects. You can access these resources through the affiliate link mentioned earlier, which helps support this content while giving you practical, ready-to-build plans. And remember the two beginner guides cited in this article—they’re excellent companions as you grow from building one chair to expanding your outdoor furniture collection.