one day wood projects are the sweet spot for woodworkers who want fast results without sacrificing quality. Whether you’re a total beginner or you’ve been toying with a few weekend projects, the aim is the same: plan well, work efficiently, and finish with something you’re proud to use or gift. This guide walks you through the mindset, tools, and steps that make 1-day builds possible while still delivering durable, attractive results. By focusing on small, well-defined tasks, you can accumulate momentum and expand your repertoire over time.
To get started, remember that one day wood projects aren’t about creating elaborate furniture in a single burst. They’re about choosing simple designs, using ready-made materials when possible, and leveraging clean joinery and fast finishes. A few hours of precise planning can save you an entire day’s worth of rework. And if you’re hungry for even more ideas and proven plans, consider exploring a broad library of projects like those offered in Ted’s Woodworking. You can learn more about how these plans organize projects and streamline decision-making by visiting Ted’s Woodworking (internal link) for practical context and plan details.
Why one day wood projects fit busy lives
Life gets busy fast, but woodworking remains a fantastic outlet for hands-on creativity. The appeal of one day wood projects lies in the quick turnaround and visible progress. When a project lands on your workbench and you can see it taking shape by the end of the day, your motivation shoots up. You also reduce the risk of scope creep—the tendency to overcomplicate a build when you keep adding features. A well-chosen one-day project focuses on essential skills, clean lines, and solid construction that you can reuse in future builds.
Quick wins to build confidence
Here are a handful of reliable, beginner-friendly options that frequently finish in a day:
- Shelf or wall-mounted rack
- Simple planter box or window box
- Cozy, durable footstools or small benches
- Picture frames or serving trays
- Bird feeders or lantern stands
Each of these projects emphasizes straightforward joints, minimal hardware, and finishing that protects the piece without taking all day. With the right plan, you’ll see progress from start to finish in a single session.
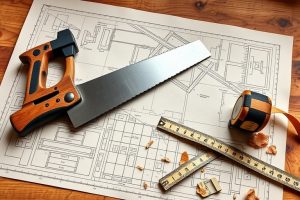
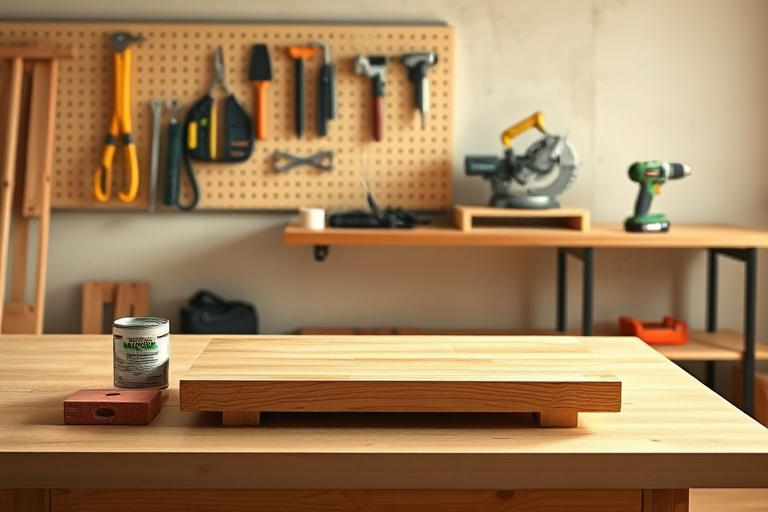
Core tools and safety for fast builds
Having the right toolkit helps keep one day wood projects efficient. Start with a solid, sharp set of basic tools and a few essentials that speed up common tasks:
- Measuring and layout: tape measure, combination square, pencil, marking knife
- Cutting: miter box or a miter saw, handsaw for quick cuts, and a sharp utility knife for trimming materials
- Shaping and finishing: random-orbit sander, speaking of finishes—a small brush or wipe-on poly
- Joinery: wood glue, clamps, and optional pocket-hole jig for fast, strong joints
Above all, prioritize safety. Wear eye protection, keep your workspace clean, and secure workpieces firmly before cutting or sanding. If you’re unsure about a technique, practice on scrap stock first or consult a project-specific guide. When you’re ready to expand your toolkit, a broader project library can be a great way to learn new techniques in a structured way—for example, a dedicated plan library that walks you through the process step by step. See the resource linked above for deeper insights into shop setup and plan selection.
Planning for a successful one-day project
Efficient planning is the backbone of any one day wood projects. A small amount of upfront organization saves hours later. Here’s a practical approach to planning that many hobbyists use successfully:
- Define the scope: pick a design with a clear, small footprint and simple joinery.
- Choose materials carefully: softwoods like pine or poplar are forgiving for beginners and finish nicely with a clear coat.
- Prepare a cut list before you touch wood: measure twice, cut once, and batch similar cuts to minimize setup changes.
- Allocate time blocks: 30–45 minutes for layout and rip cuts, 60–90 minutes for assembly, and 30–60 minutes for finishing depending on the finish used.
- Keep a clean workspace: organize fasteners and hardware beforehand to avoid hunting mid-build.
With a clear plan, the day begins with confident progress and ends with a completed project. For those who enjoy structured guidance, there are plan libraries that provide project-by-project workflows. You can explore a robust resource that covers a wide range of one day wood projects by visiting Ted’s Woodworking (internal link) for more context and plan options.
A step-by-step example: wall-mounted floating shelf
Let’s walk through a practical, single-day project: a compact wall-mounted floating shelf. It’s a versatile addition to any room, takes only a few hours, and teaches essential skills like measuring, drilling, gluing, and mounting hardware. This example uses simple stock, standard joinery, and a minimal finish to keep the pace brisk.
Materials and measurements
Materials you’ll typically need:
- 1 × 8 pine board, 6–8 feet long (cut into a 18–24 inch shelf length)
- 2 pieces of scrap lumber for the cleat (for wall mounting)
- Wood screws, wood glue, and small brackets or mounting cleats
- Sandpaper (120–180 grit) and a wipe-on finish or polyurethane
Cut list (example):
- Shelf face: 1 piece, 18–24 inches long
- Cleat pieces: 2 pieces, 3–4 inches deep and length matching the shelf depth
- Optional finishing trim: small dados or edge banding if you want a polished look
Cutting, assembling, and finishing in a single session
- Lay out the shelf and cleat positions on the wall so the shelf sits level when mounted. Mark stud locations if possible for extra strength.
- Cut the shelf and cleat pieces to size. Sand edges smooth to remove rough spots.
- Glue and clamp the cleat pieces to the back edge of the shelf or to the wall cleat that attaches to studs, depending on your design. If you’re using a pocket-hole jig, create a few holes on the back side where they won’t show.
- Attach the shelf to the wall cleat or directly to the wall using screws. Ensure it sits flush and level.
- Finish with a light coat of your chosen finish. A wipe-on poly goes on quickly and cleans up with a cloth. Allow to dry and apply a second coat if desired.
In practice, you’ll find the key is to keep the project compact and the joints simple. A clean desk, a fast finish, and a quick mount make this a true one day wood project. If you want a deeper dive into similar, well-documented builds, check out the Ted’s Woodworking resource for additional design ideas and plan structure. See the internal link for more context on how these projects are organized and executed.
Expanding your library of one day wood projects
Once you’ve completed a few quick wins, you’ll naturally want to expand your repertoire. A strong plan library can help you scale from one-day projects to a broader mix of sizes and styles without losing your rhythm. A popular path is to explore a curated collection of woodworking plans that covers everything from small organizers to compact furniture ideas. One way to access a broad, structured library is through a trusted program that many woodworkers value for its clear diagrams, cut lists, and step-by-step instructions. You can learn more about how these plans are organized and applied by visiting the Ted’s Woodworking page linked earlier (internal link).
Ted’s Woodworking as a practical resource (internal link)
For builders who want repeatable success with one day wood projects, Ted’s Woodworking offers extensive plan libraries, including detailed cut lists, material recommendations, and assembly sequences. Having access to well-structured plans shortens the prep time and reduces decision fatigue, which is especially helpful when you’re trying to wrap up a project in a single day. If you’re curious about how a comprehensive plan set can support fast builds, explore the internal link for context and examples.
Space-saving ideas: loft bed plans for small rooms (internal link)
Another effective direction for one day wood projects is space-saving furniture, such as loft bed designs. Building a full-size loft bed can seem like a multi-day challenge, but with a clear plan and straightforward joinery, you can complete a basic model in fewer hours than you expect. If you’re decorating a compact room or apartment, a loft bed can free up valuable floor space for a desk, seating area, or storage. To see how a well-structured loft bed plan can guide your build, visit the second internal link. It highlights free plans and confidence-building steps that align with the one day project mindset.
Finishes that pop without adding hours
Finish is often the difference between a piece that looks handmade and a piece that looks polished. For one day wood projects, consider finishes that are fast, durable, and forgiving. Water-based polyurethanes dry quickly and are easy to clean up, while wiping stains or clear coats can achieve a professional look without long wait times. Sand lightly between coats, and wipe away any dust before applying the next layer. If you’re aiming for a more natural look, a simple oil finish or wax can be applied in a single session and buffed to a soft luster. The key is to pick a finish that suits the wood you’re working with and the intended environment of the finished piece.
Tips, tricks, and common pitfalls to avoid
To stay on track with one day wood projects, keep these tips in mind:
- Start with scrap stock to refine your techniques before committing to good wood.
- Measure twice, cut once, and check for square at every stage.
- Pre-drill holes for screws to prevent splitting, especially in softwoods.
- Label all pieces during rough cutting to prevent mix-ups during assembly.
- Choose joinery that doesn’t require specialized tools or long cure times.
Avoid the common trap of over-planning. While it’s tempting to perfect every detail, one day wood projects get their momentum from steady progress and clean finishes—not endless refinements.
Where to learn more and exclusive offers (affiliate link)
If you’re looking for a deeper dive into woodworking plans that align with a one-day project mindset, consider an option that bundles hundreds of plans, diagrams, and tutorials. This can be a strong next step after you’ve built confidence with quick wins. For a practical path and exclusive deals, you can explore the affiliate opportunity here: premium woodworking plan library (affiliate link). It complements the hands-on experience you gain from small builds and can accelerate your learning curve as you tackle more ambitious one day wood projects.
Conclusion and next steps
one day wood projects offer a rewarding route to enjoy woodworking when time is limited. By choosing simple designs, preparing a clear plan, and sticking to efficient workflows, you can create functional, attractive pieces in a single sitting. As you gain confidence, you’ll be ready to tackle a broader set of projects—from wall shelves to compact storage solutions and beyond. If you’re hungry for more structured guidance, the Ted’s Woodworking resource (internal link) provides a curated library of plans, and the loft bed ideas (internal link) highlight how smart planning unlocks space in small rooms. For those who want to explore a comprehensive set of step-by-step plans and exclusive offers, consider the affiliate option linked above. Your next one day wood project could be a shelf, a stool, or a small organizer—ready to enjoy today.