Plans for a rocking chair: Your path to a comfortable, built-to-last centerpiece
Whether you’re a seasoned woodworker or a weekend hobbyist, plans for a rocking chair unlock a timeless project that adds both comfort and character to any living space. A well-designed rocking chair blends ergonomics, aesthetics, and durable construction, giving you a seat that invites lingering conversations, thoughtful reading, and those peaceful afternoon naps. In this guide, we’ll explore how to choose, adapt, and follow solid plans for a rocking chair, with practical tips, resource links, and options to expand your toolkit with trusted sources like Ted’s Woodworking.
Why plans matter when building a rocking chair
Plans for a rocking chair are more than a shopping list of cuts; they’re a blueprint for comfort. The best plans account for the chair’s curvature, weight distribution, and the smoothness of the rock. Without a coherent plan, you risk misjudging rocker radius, seat height, or back support, leading to wobble, discomfort, or premature wear. A good plan also streamlines your workflow, helping you estimate materials, costs, and time so you can set realistic milestones and stay motivated from start to finish.
When you start with plans for a rocking chair, you can tailor the design to your space. If you have a cozy reading nook, a gently curved back and a slender footprint may be ideal. If you’re outfitting a sunroom or porch, a sturdier frame and weather-resistant finish become more important. The right plan respects your space, your body, and your preferred woodworking techniques, so you can enjoy the project without compromising comfort or safety.
Choosing a style and materials for plans for a rocking chair
Traditional vs modern silhouettes
Rocking chairs come in a wide range of silhouettes. Traditional Windsor or slat-back styles emphasize curved rockers and an open, breathable back. Modern versions may use solid, clean lines, integrated armrests, and minimal ornamentation. When reviewing plans for a rocking chair, consider how the silhouette will fit your decor and how the proportions feel when you sit. A design with a slightly deeper seat and a supportive back can drastically improve comfort for long reading sessions.
Wood choices and joinery considerations
Common hardwoods like oak, maple, ash, and cherry offer durability and stability, while softwoods such as pine are budget-friendly and easier for beginners. The wood choice influences how you finish the piece and how it handles daily use. Equally important are the joinery details—dowel, mortise-and-tenon, or stress-relieved screws—that ensure the chair can handle repeated rocking without loosening. A well-documented plan will specify the recommended joinery, along with a cut list and assembly sequence so you’re never guessing about critical connections.
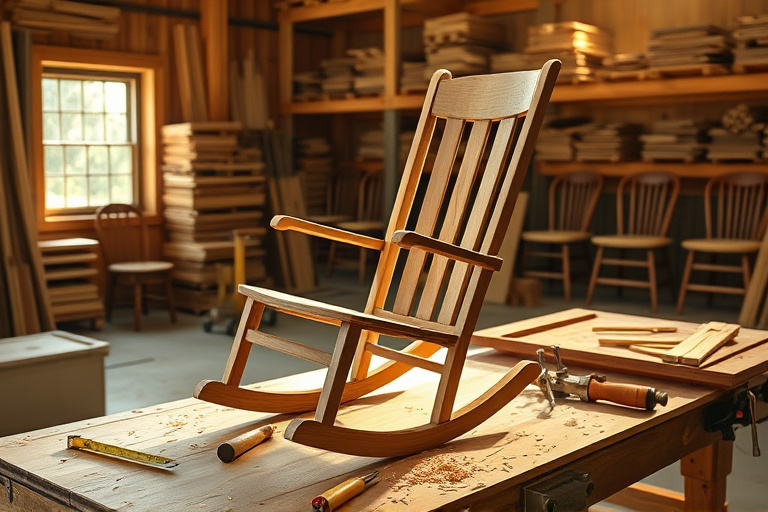
Essential components of rocking chair plans
Rockers, seat, backrest, and armrests
Every rocking chair plan centers on four main components: rockers, the seat frame, the backrest, and the armrests. The rocker radius determines the smoothness of the glide; if the curve is too aggressive or too flat, the chair can feel unstable. The seat should place your hips at a comfortable height above the floor, with a slight tilt that encourages proper posture. The backrest support angle is crucial for lumbar comfort, and the armrests should align with your reach without forcing you to perch on the edge of the seat.
Ergonomics: height, curve, and rock stability
Ergonomics in plans for a rocking chair means paying attention to knee clearance, armrest height, and the seat depth. A chair that fits the sitter well reduces fatigue and makes the rocking motion more enjoyable. The rockers themselves must be symmetrical, securely attached, and sturdy enough to handle daily use. A good plan includes a test-fit or a checklist to verify rock stability before finishing, ensuring safe operation for people of varying weights and heights.
Step-by-step project flow: from plans to finished chair
Prep work: measuring space and creating a cut list
Start by measuring the space where the chair will live. Note the distance to walls, entryways, and natural light sources to ensure the chair complements the room rather than crowding it. Next, translate the plan into a precise cut list. Accurate measurements at this stage save time and prevent material waste later. If you’re following a published set of plans, compare your cut list with the plan’s recommended dimensions, then adjust only when you’re confident in your design goals.
Cutting and joining: rockers, leg frames, and seat support
With your material chosen and cut list in hand, begin with the rockers. The rocker shape can define the chair’s character and comfort, so take care to center your curves and smooth the surfaces. Move on to the leg frames and seat support. Use the joinery recommended by the plan—mortise-and-tenon for durability or dowels for ease—keeping everything square and true. Clamps are invaluable here for maintaining alignment during glue-up. If you’re new to a specific joinery method, practice on scrap wood before committing to the final pieces.
Assembly sequence: securing rockers, back, and arms
Assemble in logical steps: attach rockers to the seat frame first, then connect the side rails and backrest, followed by the armrests. This sequence minimizes the risk of misalignment and helps you verify the chair’s balance as you go. Throughout assembly, periodically check for gaps and ensure screws or joints sit flush without binding the rocking motion. A well-followed plan includes torque recommendations and dry-fit checks to catch problems early.
Finishing touches: sanding, stains, and protective finish
The finish is not cosmetic only—it protects the chair from daily wear and enhances its longevity. Sand progressively from coarse to fine grits, removing tool marks and preparing the wood for stain or sealant. Choose a finish that suits your climate and lifestyle: water-based polyurethanes for easy clean-up and low odor, or oil-based finishes for a richer depth of color. If the wood is outdoors or in a sunlit area, consider UV-resistant finishes or clear sealants with a touch more durability. Always follow the manufacturer’s recommendations for drying times between coats.
How to source reliable plans for a rocking chair
Evaluating plans for comfort, scale, and adaptability
When evaluating different plans, look for clear drawings, measured dimensions, and a detailed bill of materials. The most reliable plans provide measurement tolerances, suggested wood species, and a finishing guide. If you plan to adapt a design for children or taller adults, ensure the plan notes how to adjust seat height, backrest angle, and armrest positioning without compromising stability or comfort. A well-documented plan also includes a troubleshooting section for common issues like rocking stiffness, squeaks, or misalignment that can occur after glue-up and finishing.
Budgeting time and materials
Plan for both good days and those that don’t go as smoothly. A typical rocking chair project can take a few days to a couple of weeks, depending on your experience, the finish you choose, and how many steps you are tackling in one session. Create a realistic schedule with milestones for cutting, assembly, sanding, and finishing. Don’t forget to budget for hardware, clamps, and safety gear if you’re expanding your toolkit. The right plan helps you anticipate these needs, keep your project on track, and reduce the risk of mid-project shopping frustrations.
Leveraging affiliate resources and related projects
For woodworkers who want to explore a broader range of patterns and project ideas, a comprehensive plan library can be a valuable resource. One option you might consider is Ted’s Woodworking. It’s a well-known resource that aggregates a wide variety of woodworking plans, including seating and furniture projects that can complement a rocking chair build. If you’re curious about expanding your plans beyond rocking chairs, you can explore the affiliate collection here: Ted’s Woodworking. This link goes to a trusted partner and provides access to a broad library of patterns that can inspire your next project.
In addition to exploring a broader library, you might want to see related seating projects that pair nicely with a rocking chair. For example, if you’re considering outdoor seating or a similar woodworking challenge, you can check out these resources for inspiration:
Adirondack chair plans guide — a complete guide to comfortable outdoor seating, which can help you compare rocker comfort with other casual seating styles.
Another complementary option is 2×4 chair plans, which demonstrates how compact, straightforward joinery and project planning can be applied to smaller chair designs. Both internal links provide a sense of scale, joinery choices, and finishing tips that you can apply to your rocking chair project as you refine your approach.
Practical tips for finishing and long-term durability
Durability comes from thoughtful finishing and proactive maintenance. Regular dusting and periodic reapplication of a protective finish based on your environment can extend the life of your rocking chair. If the chair lives indoors, you may opt for a tinted stain followed by a clear polyurethane coat to balance color with protection. Outdoor or near-damp spaces benefit from a marine-grade varnish or a spar urethane that offers better moisture resistance. Keep an eye on the rockers’ contact points as wear progresses; sanding and re-sealing the contact areas can prevent squeaks and looseness. A well-constructed, properly finished rocker remains comfortable and stable for many years, making the planning stage worth the investment of time and effort.
Conclusion and next steps
Plans for a rocking chair unlock a rewarding woodworking journey—combining skill-building with a functional, beautiful piece of furniture. By choosing a style that matches your space, learning the proper joinery, and following a clear set of steps from prep to finish, you can create a chair that offers years of comfort and pride. If you’re exploring broader woodworking plans to augment your toolkit, consider the Ted’s Woodworking option linked above. And as you grow more confident, you can expand into related seating projects—using the Adirondack chair plans guide and the 2×4 chair plans as helpful references to refine your technique and design instincts. Remember, the key to success with plans for a rocking chair is a balanced blend of careful planning, precise execution, and a finish that protects your hard work for decades to come.
Frequently asked questions
- How long does it typically take to complete plans for a rocking chair? Expect a range from a few days to a couple of weeks, depending on your experience and the complexity of the design.
- What wood is best for a rocking chair? Hardwoods like oak, maple, and ash offer durability; pine is a budget-friendly alternative for beginners. Your choice should balance aesthetics, weight, and environment.
- Do rocking chairs require special tools? Basic woodworking tools plus clamps, a chisel set, a hand plane, and a power drill are commonly sufficient for most plans. A router or saws may speed up work on complex curves.