If you’ve ever wondered how to turn a simple chair into a comfortable, heirloom-worthy piece, the starting point is always a solid set of rocking chair blueprints. These plans act as a master guide, detailing everything from the curvature of the rockers to the exact dimensions of the arms and backrest. When you begin with accurate rocking chair blueprints, you’re not guessing your way through a project—you’re following a proven path that translates a vision into a sturdy, ergonomic chair that can be passed down for generations.
What rocking chair blueprints include
Rocking chair blueprints are more than a rough sketch. They typically include a complete parts list, precise cut lines, wood species recommendations, joinery details, and a finishing plan. A well-made blueprint will tell you how to shape each rocker, how thick the seat needs to be for comfort, and how the backrest angles should align with the user’s posture. In many cases, you’ll see different views: exploded diagrams that show how pieces fit together, isometric views for perspective, and a side elevation to communicate the rockers’ curvature—and the important balance between leg length and rocker radius.
Core components and measurements
The anatomy of a rocking chair hinges on several key elements. First, the rockers themselves: the radius and length determine motion quality and stability. Next are the legs and supports, which must be square to the seat for clean joints and long-term durability. The seat depth, width, and height affect comfort, while the backrest tilt and the armrest height support natural posture during long rests. A good blueprint also includes a materials list with thicknesses appropriate for each piece and a cut list that minimizes waste during the build.
Reading and interpreting the plan
Reading rocking chair blueprints is less about decoding a mysterious language and more about understanding how a plan translates into real-world cuts. Start by checking the scale—many plans use 1:1 for simplicity, while some hobbyist-friendly blueprints might present dimensions in inches or millimeters depending on your region. Pay attention to grain direction, which affects both strength and appearance. Look for notes on joint types—mortise and tenon, dowels, or snug tenons—and any recommendations for reinforcing the rocker-to-leg connection. Finally, verify the finish schedule: stain colors, clear coats, and whether hardware (like screws or decorative bolts) is included or should be replaced with traditional joinery for authenticity.
Styles, materials, and space considerations
Traditional vs modern designs
Rocking chair blueprints come in a spectrum of styles, from classic Windsor and Shaker-inspired chairs to modern, minimalistic profiles. Traditional designs often emphasize graceful curves, use larger dimensions for a stately presence, and benefit from time-tested joinery. Modern designs may favor lighter-weight frames, simpler lines, and eco-friendly materials. Regardless of style, a well-chosen plan keeps ergonomics in focus. The best blueprints include measurements tailored to an average adult’s seating angle, allowing for comfortable lounging with minimal strain on the back and shoulders.
Room placement and ergonomics
Choosing the right plan also depends on where you’ll place the chair. If you have a sunlit reading nook, you might opt for a slightly taller back with a generous seat depth. If space is tight, a compact rocker with a shorter armrest span can be crafted from the same family of blueprints but scaled down with careful proportioning. A good rocking chair blueprint will provide guidance on achieving a stable balance between seat height, rocker radius, and backrest support to ensure the chair remains comfortable during extended use.
How to use rocking chair blueprints to build a chair
Tools, safety, and workspace setup
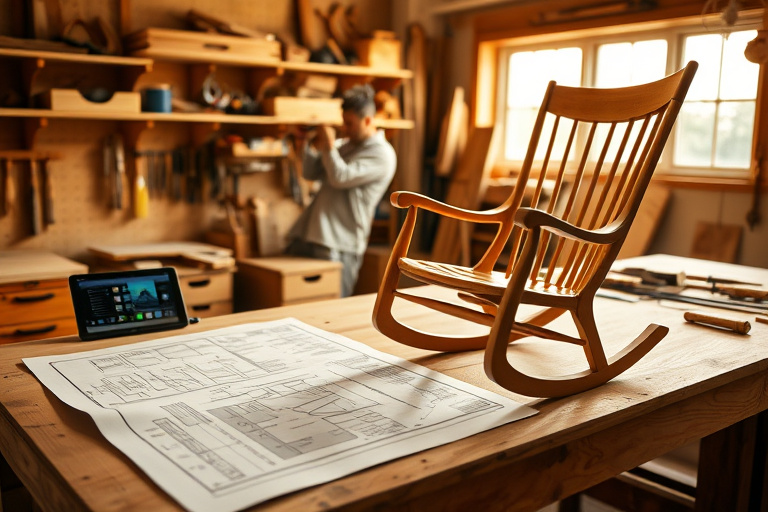
Before you start cutting, prepare a well-lit workspace with a solid workbench, clamps, a saw (hand or power), a drill, chisels, sanding equipment, and a square for right angles. Safety is essential: wear eye protection, hearing protection if using powered tools, and a dust mask when sanding. Dust collection helps keep the shop clean and reduces inhalation of fine particles. A good blueprint will help you plan each step so you can sequence cuts efficiently and minimize errors that could compromise fit or finish.
Step-by-step workflow from lumber to finish
Begin by selecting appropriate lumber that matches the blueprint’s specifications. Common choices include hardwoods like maple, cherry, or oak for strength and a warm aesthetic, or softwoods like pine for an easier build and lighter weight. Follow the cut list precisely: rough-cut the stock, then dimension it to final sizes. Assemble dry-fit joints to check alignment before glue-up. For rockers, verify symmetry and smoothness along the curved surface to prevent snagging or uneven motion. Once assembled, meticulously sand all surfaces to a uniform finish before applying your chosen stain or sealant. A final protective coat will help resist scratches and moisture, preserving the chair for years to come.
Throughout this process, you’ll benefit from keeping notes alongside the blueprint, marking any deviations you make for future reference. If you’re exploring more furniture projects in addition to rocking chairs, a comprehensive plan resource can streamline your learning curve and provide inspiration for variations that fit your space and style.
Ted’s Woodworking and rocking chair projects
If you’re looking for a go-to source for reliable woodworking plans, Ted’s Woodworking is a well-known option in the hobbyist community. It offers a broad collection of furniture projects, which can include detailed rocking chair designs alongside other seating and storage solutions. While exploring plans, you’ll likely encounter a mix of traditional and contemporary approaches, helping you compare different rocker styles and joinery methods. This can be particularly helpful if you want to adapt an existing blueprint to suit your workshop setup or available materials.
To explore the full library and access a curated selection of plans and tutorials, you can visit the recommended resource below. It’s easy to browse, compare, and download the plans you need to bring your rocking chair blueprints to life:
Ted’s Woodworking – Access the full library here
For additional context and practical guidance aligned with the Ted’s Woodworking ecosystem, you can also check these helpful resources:
Woodworking projects in the UK — The ultimate DIY guide to craftsmanship with Ted’s Woodworking
Small woodworking tools: A practical guide to mastering DIY with Ted’s Woodworking
Practical tips to optimize your build
Common mistakes and how to avoid them
One of the most common missteps when working with rocking chair blueprints is rushing the initial layout. Take your time with dimensions and verify every measurement against the plan. It’s also easy to underestimate the importance of grain direction; choosing the right orientation for the seat, back, and rockers will influence both strength and appearance. Another frequent error is skipping the dry-fit stage. Glue can often hide small misalignments, but a dry-fit reveals gaps or misaligned joints that would otherwise become headaches after assembly. Finally, finish with a consistent technique across all parts to avoid blotching or uneven color depth that can highlight minor flaws in the wood or plan interpretation.
Finishing touches for comfort and durability
Finishing is where the blueprint truly comes to life. After sanding, apply a protective finish that suits your environment—polyurethane for a durable, glossy look, or penetrating oil for a more natural feel and easier maintenance. If you plan to use the rocker in a sunlit room, consider UV-resistant finishes that prevent color fade. A padded seat and back cushion can dramatically improve comfort, and the quilting of upholstery or a fabric insert should be coordinated with the chair’s overall line so the texture complements the wood’s grain. Keep a few spare days after finishing to allow the finish to cure fully; patience here pays off in a durable, long-lasting piece.
Additional learning resources and internal references
Learning from a curated set of plans helps you build confidence as you tackle more complex projects. If you’re new to woodworking or returning after a pause, the included internal guides can broaden your toolkit and deepen your understanding of how rocking chair blueprints translate into real-world builds.
UK-focused guidance and broader project ideas: Woodworking projects in the UK — The ultimate DIY guide to craftsmanship with Ted’s Woodworking
Tools and practical know-how: Small woodworking tools: A practical guide to mastering DIY with Ted’s Woodworking
Final thoughts and next steps
Rocking chair blueprints are more than just a set of measurements; they are your pathway to crafting a piece that marries function with form. By understanding the components, choosing a style that fits your space, and following a proven plan, you’ll reduce waste, save time, and enjoy the satisfaction of building something truly personal. Whether you stick to a traditional rocker or experiment with a modern silhouette, your workshop skills will grow as you reference detailed blueprints and practice the sequences that bring a design to life. If you’re ready to broaden your catalog of plans and start a new project, exploring a trusted plan library can be a smart, time-efficient move—and the resources linked above offer a practical starting point.
Remember, the journey from blueprint to chair is as rewarding as the finished product. With the right rocking chair blueprints and a thoughtful approach to joinery and finishing, you’ll create a reliable, beautiful seat that comforts generations to come.