There’s something deeply satisfying about building something with your own hands. For beginners and DIY enthusiasts, simple diy wood projects offer an approachable doorway into the world of woodworking. These projects prove that you don’t need a big workshop or years of experience to create useful, attractive pieces. With a little planning, the right basic tools, and a calm, steady pace, you can complete beautiful results that you’ll be proud to show off to family and friends.
In this guide, you’ll learn how to choose beginner-friendly projects, assemble a practical toolkit, and tackle a handful of classic builds that demonstrate the core skills of measuring, cutting, joining, and finishing. We’ll also explore how premium plans and expert insights—such as those found in resources like Ted’s Woodworking—can help you grow faster while keeping the process simple and enjoyable. And if you’d like a broader set of expert tips, you can explore practical strategies from a trusted woodworking article that covers pro tips and craftsmanship with Ted’s Woodworking: wood-working tricks master craftsmanship with pro tips and Ted’s Woodworking.
What makes a project beginner-friendly
Beginner-friendly projects share a few key traits: minimal material costs, straightforward joinery, only a handful of parts, and a design that doesn’t demand perfect technique. When you choose a project that matches your space and your tools, you’ll find that simple diy wood projects can be finished in a weekend, not a month. It’s also helpful to select projects that you can repurpose or reuse in future builds, creating a small but valuable collection in your workshop.
Safety basics and planning tips
Woodworking is a rewarding hobby, but it’s important to prioritize safety from the start. Always wear eye protection, use hearing protection when running loud tools, and secure your workpiece with clamps before you cut or sand. Plan out your cuts and layout on paper or a quick sketch before you touch the wood. This reduces waste and minimizes rework. If you’re unsure about a joint, start with a simple butt joint or a corner bracket—these options teach the fundamentals without requiring advanced carpentry techniques.
Tools and setup for starting with simple diy wood projects
Having a reliable, compact toolkit makes a world of difference when you’re learning. You don’t need an entire professional shop to begin; just the essentials. A well-chosen set of tools will carry you through a dozen beginner projects and many future builds as your skills grow.
Essential tools every beginner should own
- Measuring tools: tape measure, square, level
- Cutting tools: handsaw or a beginner-friendly miter saw
- Fastening tools: hammer, cordless drill/driver, assortment of drivers
- Joining and finishing: wood glue, clamps, sandpaper or a small orbital sander
- Work surface: sturdy workbench or thick plywood on a stable table
As you gain confidence, you can expand your toolkit with a few power tools like a jigsaw or a brad nailer. But for simple diy wood projects, the essentials above will cover the majority of beginner builds.
Easy project ideas that deliver big results
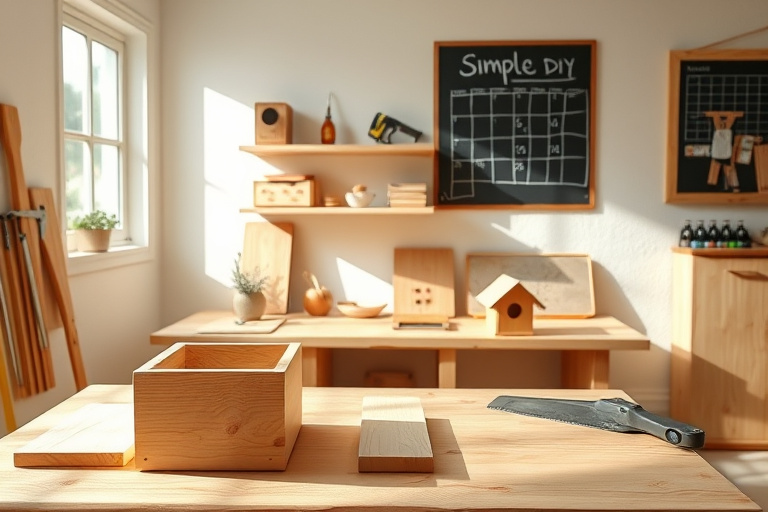
Let’s dive into a few beginner-friendly projects that check the boxes for simplicity, usefulness, and aesthetic appeal. Each project offers a solid learning path and can be completed with common materials such as pine, plywood, and basic finishes.
Planter boxes from common pine
A planter box is a timeless first project that teaches accurate measuring, square joints, and weather-safe finishing. Start with simple rectangular plans: two end pieces, two side pieces, and a bottom. The cutting list is short, so you can minimize waste by optimizing your layout on a single board. Assemble with wood glue and a few screws, then sand smooth and seal with a water-based exterior finish. The result is a durable planter that can be used year after year, and it’s a great way to experiment with staining or painting to match your outdoor decor.
Floating wall shelves for stylish storage
Floating shelves are a popular home upgrade that looks far more complex than it is. A shallow routed design with hidden brackets gives the illusion of weightless, modern storage. You’ll learn how to calculate supports, how to drill clean pilot holes, and how to mount the shelf flush against the wall for a seamless finish. Start with a single 24-inch shelf and progress to longer lengths as your confidence grows. Once installed, these shelves become a versatile space for books, plants, and mementos.
Birdhouse or feeder to attract wildlife
Building a birdhouse or feeder is a gratifying project that reconnects you with nature. It’s forgiving of minor mistakes and lets you practice precise cutting on a small scale. Choose an easy, straightforward design, pre-cut components if you’re unsure about joints, and finish with a non-toxic stain or paint. The end result is a charming addition to your garden and a wonderful demonstration piece for friends and family who want to learn woodwork themselves.
A small coffee table with hidden storage
For those ready to tackle a slightly larger piece, a compact coffee table with a hidden storage compartment can be a perfect next step. You’ll refine your measuring accuracy, practice clean edge joints, and learn to install a simple lid that slides or lifts. This project combines form and function, giving you a useful room centerpiece while reinforcing the fundamentals of planning, cutting, and finishing.
If you’re curious about more advanced variations or want to explore a larger library of plans, Ted’s Woodworking can provide comprehensive resources and inspiration. Some builders prefer to start by following ready-made plans to understand the flow of a project before adapting it to their own needs. You can explore options and see different plan layouts by visiting the affiliate link: Ted’s Woodworking.
Step-by-step approach: from plan to finished piece
Turning an idea into a finished product becomes easier when you follow a simple, repeatable process. Here’s a straightforward workflow you can apply to any of the beginner projects above:
Measuring, cutting, and assembly basics
Begin with a precise cutting plan. Mark your measurements on the wood, double-check with a square, and cut slowly to avoid mistakes. Dry-fit the pieces before applying glue, then clamp and let the glue cure according to the product instructions. Start with loose joints and complete assembly once you’re confident your pieces align perfectly. This approach minimizes waste and reduces the chance of error, which is crucial when you’re learning.
Finishing touches: sanding, staining, and sealing
Finishing is what makes a project look polished and professionally finished. Start with a medium-grit sandpaper to smooth rough edges, followed by a fine grit for a silky surface. Choose a finish that matches the project’s use: water-based finishes for indoor pieces and exterior-rated sealants for outdoor items like planter boxes. A thin coat applied evenly will reduce brush marks and highlight the natural grain of the wood, while multiple light coats will yield better durability and a richer color.
Leveraging Ted’s Woodworking and pro tips
For woodworkers who want to accelerate learning and expand their repertoire, premium plans and guidance can be a game changer. Ted’s Woodworking offers a library of plans and strategies that help you understand layout, joinery, and finishing techniques used by hobbyists and pros alike. While you don’t need to invest right away, exploring a trusted resource can give you a clearer path from simple diy wood projects to more ambitious builds. And if you want to read about practical pro-tip approaches, another helpful resource is the article on wood-working tricks master craftsmanship with pro tips and Ted’s Woodworking: wood-working tricks master craftsmanship with pro tips and Ted’s Woodworking.
How Ted’s Woodworking can accelerate your learning curve
A well-structured plan set helps you understand standard cut sizes, common joinery, and efficient layout, which translates into less waste and faster builds. It’s particularly valuable for beginners who want to see a finished result quickly, reinforcing the satisfaction of completing a project and building confidence for future challenges. As you progress, you’ll discover how to adjust plans to fit your space, your available materials, and your own design preferences.
Using reliable resources to level up
Alongside hands-on practice, tapping into quality resources can accelerate your growth. The two internal references below provide practical insights for different aspects of woodworking, from pro-level tips to outdoor seating projects. They’re great for expanding your knowledge without overwhelming you with complexity:
- What you’ll learn about pro tips and craftsmanship with Ted’s Woodworking: wood-working tricks master craftsmanship with pro tips and Ted’s Woodworking
- A beginner-friendly outdoor seating project: DIY patio chair plans – build your own outdoor seating with confidence
Maintenance, safety, and future projects
Once you’ve completed a few projects, cultivate a simple maintenance routine. Regularly inspect joints, tighten hardware, and reapply protective finishes as needed—especially for outdoor pieces subjected to weather. The skills you learned on simple diy wood projects—measuring accurately, preparing pieces, and choosing appropriate finishes—will carry over to larger woodworking endeavors in the future. As your toolkit grows, you’ll find yourself naturally moving toward more complex joinery, different species of wood, and more elaborate designs.
Frequently asked questions
- Do I need a lot of space to start with simple diy wood projects? Not at all. A small garage or balcony with a sturdy workbench is enough to begin.
- What type of wood should I buy for beginners? Start with softwoods like pine or poplar; they’re affordable, easy to cut, and take finishes well.
- Can I complete multiple projects in a weekend? Yes. Choose small plans and focus on one step at a time to stay organized and motivated.
Conclusion: next steps to build confidence with simple diy wood projects
Starting with simple diy wood projects is a proven path to building hands-on skills, saving money, and enjoying a rewarding hobby. By selecting beginner-friendly plans, assembling a practical toolkit, and following a steady workflow, you’ll experience continual progress and a growing sense of accomplishment. If you’re curious about taking your woodworking further, exploring curated resources like Ted’s Woodworking can be a helpful next step, offering a structured library of plans and guidance that complements hands-on practice. And remember, you can always start with the two internal resources for pro tips and outdoor seating ideas:
wood-working tricks master craftsmanship with pro tips and Ted’s Woodworking and DIY patio chair plans – build your own outdoor seating with confidence.