Introduction: Why small wood working projects spark confidence and skill
When you’re learning carpentry or simply enjoy creating with your hands, there’s a powerful payoff in pursuing small wood working projects. These bite-sized builds, from a compact wall shelf to a sturdy birdhouse, offer tangible results in a single weekend and teach essential techniques—measuring, cutting, joinery, sanding, and finishing—without overwhelming you with complexity. The phrase small wood working projects captures this idea perfectly: you can complete meaningful, satisfying builds in tight time frames, reinforcing good habits and sharpening your toolkit for bigger challenges down the road.
If you’ve ever faced a blank bench and felt unsure where to start, the right plan can make all the difference. It isn’t about rushing to finish; it’s about learning the language of wood, understanding grain, and mastering a safe, repeatable process. And yes, you’ll be creating items you can actually use around the house, gift to a friend, or sell at a local craft fair—a great boost to motivation and momentum for future, larger projects.
Why small wood working projects matter for skill growth
Small projects are the ideal stepping stones to mastery for beginners and a reliable practice ground for seasoned hobbyists. Here’s why they’re so valuable:
- Rapid feedback loop: You design, cut, assemble, sand, finish, and evaluate within days or even hours, so you learn quickly what works and what doesn’t.
- Controlled budgets: Short projects use modest amounts of materials, keeping costs predictable while you test different finishes, joinery, and hardware choices.
- Tool proficiency: Regular exposure to common tools (saw, drill, sander, chisel) builds muscle memory without needing specialized equipment for every build.
- Space-friendly practice: Small builds fit in compact workspaces, apartments, or garages, which is ideal for city dwellers or hobbyists with limited space.
For readers who want a well-rounded foundation, a good plan library can be a game changer. It helps you pick projects that align with your space, budget, and skill level, rather than chasing random ideas. A solid starting point is to explore curated guides that walk you through selecting projects and mastering the best DIY plans. You can check an essential guide to mastering the best DIY plans for more context on choosing projects and reading plans effectively.
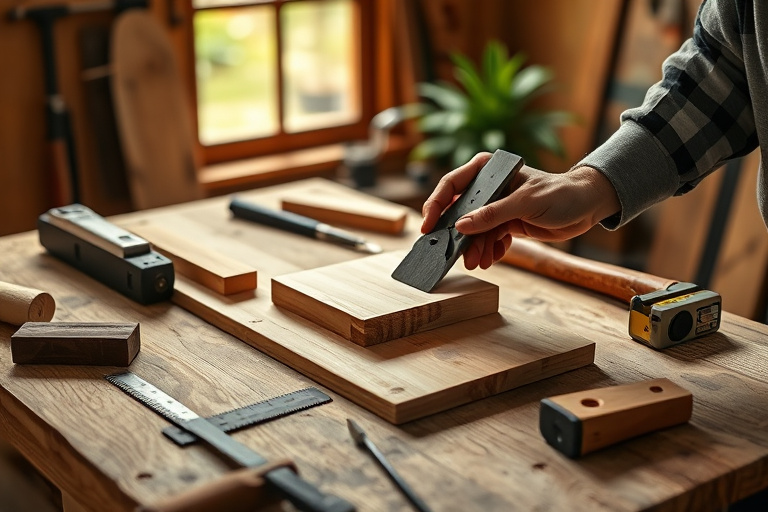
Tools, materials, and setup for efficient small wood working projects
Building small wood working projects smoothly requires the right toolkit and a practical workspace. Here are essential components to keep your bench productive and safe:
hammer, feeler gauge, combination square, marking knife, tape measure, carpenter’s pencil. a sharp backsaw or crosscut saw, a small handsaw, and a reliable utility knife for clean trimming. a compact drill/driver, a finish sander or random-orbit sander, and a cordless screwdriver. wood glue, clamps (various sizes), nails or screws, wood filler, and sandpaper grits from rough to fine. clean rags, tack cloths, polyurethane or water-based finish, and safe ventilation.
If you’re looking for a broader plan library that helps you pick projects that match your skill, space, and timeline, consider a curated resource that provides step-by-step instructions and tested plans. For example, a comprehensive woodworking library can offer thousands of downloadable plans—great for expanding your small wood working projects portfolio while you learn new techniques. You can explore a trusted library that offers a wide variety of plans here: Ted’s Woodworking.
A beginner-friendly project blueprint you can actually finish
The beauty of small wood working projects is that you can complete them with a clear, repeatable process. Below is a blueprint for a classic beginner project: a compact wall shelf. It’s small, practical, and teaches essential joints, surface preparation, and finishing techniques that apply to many future builds.
Define the scope and choose a plan
Start by selecting a plan that matches your space and skill level. A simple wall shelf with two supports and a back rail is perfect for practicing accurate measurements, 90-degree corners, and consistent finish. If you’d rather dive into something decorative, a small floating shelf with a hidden mounting method offers a similar learning curve with a touch more sophistication. For a broader sense of how to pick projects and master DIY plans, see the above essential guide to DIY plans. And if you want a deeper dive into outdoor seating projects, you can read the Adirondack chair 2×4 guide linked below.
Step-by-step build guide (shelf or plant stand)
- Cut list and layout: Measure your chosen dimensions on a scrap piece of paper, mark the boards, and cut to size with a handsaw or miter saw. Always double-check your measurements before cutting.
- Prepare edges: Use a planer or hand plane to create smooth edges; deburr with sandpaper to prevent splinters during handling.
- Make joints: For a simple shelf, you can use butt joints with wood glue and clamps or try a basic dado for added strength if you’re comfortable with a saw.
- Assemble: Glue joints, clamp tightly, and let dry according to the glue’s instructions. Once dry, reinforce with screws or finishing nails if desired.
- Finish preparation: Lightly sand the entire piece, guiding with the grain. Remove dust with a tack cloth.
- Apply finish: Apply a protective finish (oil, stain, or polyurethane) in thin coats, allowing full curing time between layers for a durable surface.
By following these steps, you’ll achieve a clean, sturdy result without getting bogged down in complicated joinery. If you’re curious about more advanced, yet still beginner-friendly plans, consider exploring a broader library that offers detailed, tested projects. For a resource that many hobbyists use to access vetted plans, you might want to explore Ted’s Woodworking through this affiliate link: Ted’s Woodworking.
Finishing touches and inspection
Finishing is where small wood working projects come to life. Sand from rough to fine grits, remove all dust, and apply your chosen finish in thin, even coats. For a clean, professional look, always wipe off excess product and allow adequate drying time. Inspect for gaps, misaligned edges, or rough surfaces, and address them with light sanding and touch-up finishes. The result should be a sturdy, attractive piece that you’re proud to display or use daily.
Quick project ideas that fit tight spaces
If your shop space is modest or you’re working in an apartment, these small wood working projects embrace constraints while delivering value:
Minimal hardware, modern look, and easy installation on a single stud. It’s a great one-weekend project that demonstrates precise leveling and sturdy mounting. A compact, functional build that helps you reclaim messy entryways and keep small items tidy. A decorative piece that elevates greenery and provides practical seating near windows or desks. Small, high-impact keepsakes that teach lid fitting, routing, and finishing with a polished result.
For inspiration on a wider range of projects, the essential guide mentioned earlier is a good starting point, and you can also explore the Adirondack chair 2×4 guide if you plan outdoor projects in a spaced-out area. Read more here: Adirondack chair 2×4 guide.
One of the biggest hurdles in small wood working projects is picking plans that aren’t just appealing but also practical and well-tested. A good plan library will help you avoid common missteps, such as underestimating material needs, selecting the wrong joinery for a given load, or finishing with a finish that doesn’t adhere well to the wood you’re using. By starting with a trusted plan set, you’ll reduce waste, save money, and accelerate your learning curve.
The value of curated plans and libraries
Curated libraries provide more than just a cut list. They include step-by-step instructions, material suggestions, recommended tools, and tips that reflect real-world testing. With a reliable library, you’ll be able to compare similar projects, understand different construction methods, and select designs that best fit your space and goals. For a broader catalog of high-quality plans, consider a premium option like Ted’s Woodworking, which compiles a comprehensive set of designs and tutorials you can reference as you grow your portfolio of small wood working projects. Access the library here: Ted’s Woodworking.
How to leverage the two recommended resources (internal links)
To broaden your understanding of project planning and to discover more beginner-friendly ideas, start with the essential guide to mastering the best DIY plans. It’s a solid primer on evaluating plans, identifying suitable projects, and building a rhythm that keeps you motivated. If you’re curious about weather-resistant outdoor seating and want a detailed, actionable guide, check the Adirondack chair 2×4 guide linked above. Both resources keep you focused on practical, real-world projects you can complete in a reasonable timeframe while growing your capabilities.
The smart way to expand your library: premium plans
As you gain confidence with small wood working projects, expanding to a broader range of designs can accelerate your progress. A premium plans library aggregates thousands of tested, user-friendly designs that cover everything from basic furniture to special-purpose boxes and decorative pieces. While there are many reputable options, Ted’s Woodworking is one of the most prominent names in this space. It provides extensive collections of plans, step-by-step instructions, and material lists that save you time and reduce guesswork. If you’d like to explore a comprehensive library with a broad scope of projects, visit the affiliate resource here: Ted’s Woodworking.
Outdoor craft: a weather-ready project spotlight with a linked guide
Outdoor projects bring unique challenges—weather exposure, moisture, and durable finishing. The Adirondack chair 2×4 guide is a great example of a robust outdoor build that fits a smaller workspace or balcony. If you’re interested in this type of project, you can read the detailed guide here: Adirondack chair 2×4 guide. This is a practical way to apply your growing skills to something that will endure rain, sun, and seasonal wear while delivering a comfortable, classic outdoor seating solution.
Conclusion: Start small, think big, and build better
Small wood working projects aren’t just about creating pretty items; they are an essential training ground for developing precision, patience, and problem-solving. By choosing appropriate plans, maintaining a tidy workspace, and following a clear build sequence, you’ll steadily expand your capabilities. Remember to practice with care, select projects that fit your space, and embrace the learning curve as you progress toward more ambitious builds. If you’re ready to broaden your library of plans and access a wide range of designs, consider exploring Ted’s Woodworking through the affiliate link above, and use the two internal resources to deepen your understanding of project selection and execution. The journey from simple projects to more complex ones starts with a single, well-planned build—and a commitment to showing up at the bench consistently.