{
“title”: “Small woodworking project ideas: 25 easy DIY projects to boost skills and confidence”,
“outline”: “H2 Introduction\nH2 Why small woodworking project ideas matter\n H3 Benefits for beginners\n H3 How they fit busy schedules\nH2 Get started: essential tools and workspace\n H3 Safety first\n H3 Setting up a compact workshop\nH2 Step-by-step workflow for any small project\n H3 Planning and design\n H3 Cutting, joinery, and assembly\n H3 Finishing and protection\nH2 12 practical small project ideas\n H3 1. Raised planter box\n H3 2. Wall shelf with integrated lip\n H3 3. Simple coat rack with hooks\n H3 4. Jewelry or keepsake box\n H3 5. Small serving tray with handles\n H3 6. Bird feeder or feeder stand\n H3 7. Phone or tablet stand\n H3 8. Desktop organizer or tool caddy\n H3 9. Outdoor bench or stool\n H3 10. Picture frame or photo mat\n H3 11. Bookshelf end cap or corner shelf\n H3 12. Weatherproof planter walls for balcony gardens\nH2 Finding the best plans and resources\n H3 Exploring a large plan library\n H3 Ted’s Woodworking and practical resources\n H3 Outdoor-friendly projects and references\nH2 How to customize and scale projects\nH2 Conclusion and next steps\nH2 FAQ”,
“content”: “
Introduction
\n
If you’re hunting for fresh small woodworking project ideas that fit a busy schedule, you’re in the right place. You don’t need a full-scale shop or weeks of vacation to build something you can be proud of. The beauty of small woodworking projects lies in their bite-sized scope: you can complete them in a weekend, use just a few hand tools, and still learn techniques that apply to bigger builds. Whether you’re a beginner learning how to read a tape measure or an intermediate hobbyist aiming to add a few useful pieces to your home, these ideas will help you practice precision, plan efficiently, and finish with professional results.
\n\n
Why small woodworking project ideas matter
\n
Benefits for beginners
\n
Starting with small woodworking project ideas gives new woodworkers a confidence boost. You’re less likely to encounter overwhelming planning or complex joinery, which lowers frustration and increases the chances you’ll complete the project. Small builds are perfect for mastering essential skills—measure twice, cut once, sand smooth, finish with protection—before taking on larger commissions. As you progress, those small wins compound into speed, accuracy, and a clearer sense of what tools and jigs truly improve your work.
\n
How they fit busy schedules
\n
Life is busy, and a full weekend might not always be realistic. The beauty of compact projects is that you can chip away at them in short sessions. A calm evening here, a quick morning session there, and you’ve still achieved tangible results. You’ll gradually accumulate a set of finished items for your home, gifts for friends and family, or even simple products you can sell as a side hustle. This approach keeps motivation high while you learn, because you can see progress week after week.
\n\n
Get started: essential tools and workspace
\n
Safety first
\n
Before you pick a project, establish some basic safety habits. Wear eye protection and hearing protection when using power tools, secure your workpiece to a stable bench, and keep your workspace tidy to prevent accidents. For small woodworking project ideas, it’s smart to start with a compact setup that focuses on accuracy and repeatability rather than brute force. A simple miter box, a block plane, a measuring square, and a reliable ruler can deliver excellent results for most beginner-friendly pieces.
\n
Setting up a compact workshop
\n
You don’t need a dedicated garage to craft. A small corner of a room or a well-organized balcony workshop can work well for many projects. Prioritize a sturdy work surface, good lighting, and easy access to your most-used tools. A bench with a vise makes all the difference for precise cutting and assembly. By keeping tools within arm’s reach, you reduce setup time and increase focus on the task at hand. If you’re looking for broader inspiration, you’ll find a deep dive into furniture builds and finishes in this guide: the ultimate guide to wood work furniture build finish and enjoy diy masterpieces, which covers planning, measuring, and finishing in detail. For outdoor seating ideas and free plans, see this resource: patio chair plans free build beautiful outdoor seating with free plans pro tips and smart tooling.
\n\n
Step-by-step workflow for any small project
\n
Planning and design
\n
Every small project starts with a clear plan. Start by defining the function of the piece, the space it will occupy, and the materials you’ll use. Sketch a simple diagram or print a plan you found online, then translate it into a shopping list. For small woodworking project ideas, choosing straightforward joinery—such as butt joints reinforced with nails or screws, or biscuit joints for alignment—keeps the build approachable while teaching you critical skills. If you want a broader library of reliable plans, you can explore Ted’s Woodworking, a resource many hobbyists find useful for expanding their repertoire. You’ll want to review a wide range of designs to see what resonates with your skill level and your home’s style. Ted’s Woodworking has a large catalog that can spark ideas and provide detailed step-by-step instructions.
\n
Cutting, joinery, and assembly
\n
Precision matters in small projects. Start with accurate measurements and a clean cut line. Use a back-stopped square to ensure right angles and consider practice pieces before committing to the final parts. For many small woodworking project ideas, simple joinery will suffice: nails or screws for simplicity, pocket holes for clean faces, or dowel joints for alignment. Edge finishing is just as important as the assembly. A small chamfer on edges reduces chipping and creates a more intentional look. If you want to try more advanced joinery later, this is a good chance to practice a precise cut quality and a careful sanding routine before finishing.
\n
Finishing and protection
\n
Finishes can transform the look of a project, protect the wood, and extend its life. For most small woodworking project ideas, a simple finish of sanding with fine grit, followed by a protective sealant such as polyurethane, varnish, or penetrating oil, is enough. Always wipe with the grain and apply thin coats, allowing sufficient curing time between layers. If you’re aiming for weather resistance—especially for outdoor projects—choose exterior-grade finishes and consider a barrier coat to resist moisture and sun damage. This is a good time to reflect on exterior projects you might have seen in outdoor plan articles; for guidance on outdoor-friendly builds, refer to the patio chair plans article linked earlier.
\n\n
12 practical small project ideas
\n
- \n
- \n
Raised planter box
\n
A compact planter box is an ideal starter project. It teaches you measuring accuracy, square joints, and exterior finishing. Use exterior-grade plywood or cedar for durability. Add simple corner joints and optional wheels for easy mobility. This project keeps the scope small while delivering a clean, attractive result that brightens any entryway or balcony.
\n
- \n
Wall shelf with integrated lip
\n
A wall-mounted shelf with a shallow lip is practical and fast. It reinforces precise cutting and mindful finishing, and it’s a straightforward place to practice how to mount hardware securely. Choose a size that fits your wall space and decor, then finish with a clear coat to showcase the wood grain.
\n
- \n
Simple coat rack with hooks
\n
Turn a small block of wood into a functional entryway piece. Drill evenly spaced holes for hooks or attach metal hooks with decorative screws. A simple coat rack teaches spacing, hardware installation, and the value of a strong backboard for mounting load.
\n
- \n
Jewelry or keepsake box
\n
Small boxes are perfect practice for precise cuts, miters, and a clean lid. Consider a soft lining or a simple divider to maximize use. This project couples aesthetics with practical storage—plus it’s a thoughtful handmade gift.
\n
- \n
Small serving tray with handles
\n
A shallow tray demonstrates edge routing and handle shaping. It’s practical for daily use and a manageable test of finishing on larger surfaces. A contrasting wood inlay on the lip can introduce color and texture without complicating the build.
\n
- \n
Bird feeder or feeder stand
\n
Outdoor small projects like a bird feeder teach weathered finishes, easy assembly, and how to weather-seal joints. It’s a satisfying way to connect with nature and your local birds without requiring a large workspace.
\n
- \n
Phone or tablet stand
\n
A compact stand is a quick win for desk or kitchen workspaces. It introduces angled supports, simple bevels, and careful sanding for a smooth touch. This is also a great way to learn about maintaining even thickness across pieces.
\n
- \n
Desktop organizer or tool caddy
\n
Keep tiny tools and pencils organized with a multi-compartment organizer. It’s a practical way to practice layout planning, precise cuts, and clean, tight joints that won’t snap under everyday use.
\n
- \n
Outdoor bench or stool
\n
For a slightly larger outdoor piece, a compact bench or stool can be a functional addition. It requires careful leg alignment and sturdy fasteners. It’s a natural next step after a few smaller pieces, giving you confidence to plan more complex outdoor projects.
\n
- \n
Picture frame or photo mat
\n
Frames teach precise measuring and edge finishing. You’ll learn how to miter corners cleanly and how to mount a photograph or artwork without warping the frame.
\n
- \n
Weatherproof planter walls for balcony gardens
\n
Scale up a modular planter idea into balcony-friendly wall panels. This project blends simple construction with decorative components and a finishing routine that holds up in sun and rain. It’s a perfect way to practice alignment and modular design.
\n
\n
\n
\n
\n
\n
\n
\n
\n
\n
\n
\n
\n\n
Finding the best plans and resources
\n
When you’re gathering small woodworking project ideas, a few reliable resources can accelerate learning and keep motivation high. For a broad library of project plans, consider exploring curated plans and tutorials that cover everything from basic boxes to more ambitious builds. This can help you compare different approaches to similar tasks, letting you pick the method that best suits your tools and workspace. If you want a deeper dive into the craft of furniture-building, finishing, and more advanced techniques, you might consult this comprehensive guide to wood work furniture build finish and enjoy diy masterpieces, which serves as a valuable reference as you expand your repertoire: the ultimate guide to wood work furniture build finish and enjoy diy masterpieces. For outdoor seating projects that pair well with smaller pieces, there is also a detailed resource on patio chair plans with free plans and pro tips: patio chair plans free build beautiful outdoor seating with free plans pro tips and smart tooling.
\n
If you’re looking for a broader, plug-and-play library of woodworking plans, you can explore Ted’s Woodworking via this affiliate resource: Ted’s Woodworking. This collection can provide inspiration, step-by-step instructions, and measured plans that you can adapt to your own small woodworking project ideas.
\n\n
How to customize and scale projects
\n
One of the best things about small woodworking project ideas is how easily you can tailor them to your space, tools, and skill level. Start with a standard plan and adjust dimensions to fit a specific wall, window, or cabinet height. If a plan calls for a particular board width that’s not available, substitute with a similar species or a different thickness, keeping the volume and weight balance consistent. You can also scale a project up or down to create a family of products—for example, a single wall shelf can be transformed into a three-tier unit by adding extra cleats and short vertical supports. This kind of customization helps you learn how changes in footprint or load affect stability, joint viability, and finish application. As you gain experience, you’ll be able to mix-and-match ideas from different resources to craft unique, personalized pieces that perfectly suit your home environment.
\n\n
Conclusion and next steps
\n
Whether you’re starting with small woodworking project ideas to build confidence or expanding your repertoire with more ambitious constructs, the key is to practice consistently, measure carefully, and finish thoughtfully. A steady sequence—plan, cut, assemble, sand, finish—will serve you well as you approach bigger projects in the future. Use the available guides and curated plans to broaden your options, and don’t hesitate to explore a broad library of designs such as Ted’s Woodworking to spark new small woodworking project ideas that align with your space and skills. Remember, every finished piece starts with a simple, well-executed cut and a plan you can trust.
\n\n
FAQ
\n
Q: Do I need expensive tools to start with small woodworking project ideas? A: Not at all. Begin with a few essential tools, such as a measuring square, a handsaw or combination square, a hammer, a corded or cordless drill, and a sanding block. As you grow, you can add a small miter saw or a handheld router to expand your capabilities. Q: How long does a typical small project take? A: That depends on the complexity, but most beginner-friendly ideas can be completed within a weekend or two evenings if you stay organized. Q: What finishes are best for indoor projects? A: A water-based polyurethane or a quality oil finish provides durability and a natural wood look without strong odors during application.
\n\n
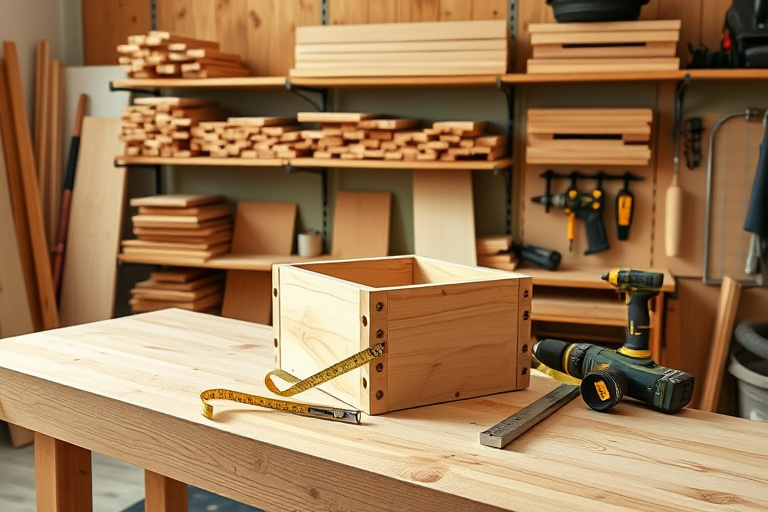
Image prompt
\n
Image prompt for featured image: A high-resolution, photo-style rendering of a sunlit home workshop. In the foreground, a sturdy wooden workbench holds a partially completed small project, such as a planter box or wall shelf, with a tape measure, pencil, and square neatly arranged. The background features organized shelves with boards of pine, oak, and maple, plus a clamp rack and a cordless drill. Warm wood tones dominate (honey, chestnut, maple), with accents of soft green and blue. Natural daylight streams from a window on the left, creating gentle shadows and depth. The mood is calm and inviting, signaling approachable DIY for beginners while hinting at potential for more advanced work. Optional text overlays: “Small woodworking project ideas” in a clean sans-serif font.
\n”
“image_prompt”: “A high-resolution photo-style image of a well-organized wood shop. Foreground shows a sturdy workbench with a partially assembled small project (like a planter box), a tape measure, pencil, and square. Background includes shelves with pine, oak, and maple boards, a clamp rack, and a cordless drill. Colors are warm natural wood tones (honey, chestnut, oak) with subtle accents of sage green and navy blue. Lighting is soft natural daylight from the left, creating gentle shadows and depth. Style: realistic photography suitable for a DIY blog. Composition centers on the bench while keeping the workspace readable and inviting. Include no text overlay or a subtle, unobtrusive caption if used.”
}