Specialty carpentry tools are the backbone of projects that require precision, beautiful joints, and durable finishes. Whether you are restoring an heirloom chair, building a custom cabinet, or crafting intricate moldings, these dedicated tools help you achieve professional results with less guesswork. In this guide, you’ll learn how to think about specialty carpentry tools, what categories you should consider, and how to integrate them into a practical woodworking plan. If you’re new to this, you can start with foundational guidance in the Starter Carpentry Tools resource and progressively explore more complex furniture plans as you gain confidence. For an extensive library of plan-based learning, consider a resource like Ted’s Woodworking, which provides structured guidance you can reference as you grow your toolkit Ted’s Woodworking.
What counts as specialty carpentry tools?
When people think of specialty carpentry tools, they often picture items built for precision rather than broad, general use. These tools are designed to improve accuracy, reduce guesswork, and speed up tasks that would take longer with a basic toolset. In practice, specialty tools may include specialized marking gauges, router templates, dovetail jigs, bespoke plane irons, and unique clamps or clamps with unusual clamping ranges. The goal is not to own every gadget under the sun but to have the right tool for the job so you can reproduce high-quality results consistently.
Why these tools matter for precision and efficiency
Specialty carpentry tools shine in two core areas: precision and efficiency. Precision reduces material waste and misalignment, which is crucial for joinery, panel levelling, and fitting doors. Efficiency translates to faster setup, repeatable results, and cleaner transitions between parts. For beginner projects, a focused set of core tools can dramatically raise the success rate of your builds, while more advanced builders appreciate the time saved on complex joints and curved profiles. As you invest in specialty tools, you’ll notice how each piece complements the others, creating a cohesive workflow rather than a scattered collection of gadgets.
Core categories of specialty carpentry tools
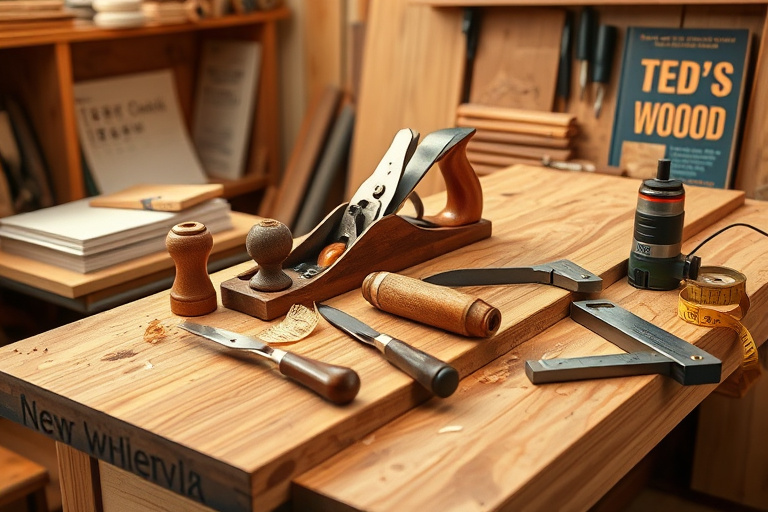
Hand planes, scrapers, and measuring tools
Hand planes and scrapers are the artists of wood removal, allowing you to level surfaces, define tidy edges, and create perfectly flat workpieces. A quality marking gauge, combination square, and calipers ensure your measurements are exact. These tools form the foundation of accurate milling and layout, setting the stage for flawless joints and clean finishes.
Saws, chisels, and joinery essentials
Beyond general saws, many specialists rely on backsaws, dovetail saws, and card scrapers to achieve crisp cuts and refined joins. Chisels of varying widths and bevel angles unlock intricate joinery tasks—from mortises and tenons to sliding dovetails. The right combination of saws and chisels makes hand-cut joints both repeatable and strong, a hallmark of well-crafted carpentry.
Power tools, routers, bits, and templates
Power tools expand capabilities and speed, especially when paired with routers and templates. A router with a set of carbide-tipped bits enables decorative profiles, dadoes, and grooves, while templates and guides improve repeatability on curved or complex profiles. The blend of power and precision is what elevates professional results in cabinet making, custom shelving, and curved panel work.
Clamps, vises, and workholding
Good workholding is the unsung hero of any serious project. Specialty clamps, parallel guides, and vises provide stable, repeatable setups that keep pieces aligned during assembly, glue-up, and sanding. Dedicated workholding systems help you approach tasks with confidence and can dramatically improve the quality of your final piece.
How to choose the right set for your projects
Tools for beginners vs advanced builders
Beginners should start by prioritizing accuracy and safety. A solid marking gauge, combination square, a few reliable chisels, a set of hand saws, a good plane, and a modest router setup can unlock a lot of learning without overwhelming you with options. As you tackle more complex pieces, you’ll identify gaps in your toolkit—perhaps you need a dovetail jig for precise joinery or a dedicated template system for curved components.
Budgeting and prioritizing investments
Investing in specialty carpentry tools should be a planned progression. Rather than chasing every shiny accessory, allocate budget to a few high-quality essentials first. Over time you can expand with specialized jigs, templates, and router bits that align with your most-used projects. Look for tools with good ergonomics, durable materials, and proven accuracy. Maintenance costs, such as quality sharpening stones for edges and blades, should also be part of your plan to keep the tools performing at their best.
Integrating specialty tools into real-world projects
Starter projects and building confidence
When you’re just starting to assemble a toolkit of specialty carpentry tools, focus on small, achievable projects. A simple coffee table, a sturdy bookshelf, or a set of drawer boxes can teach you essential joinery, edge treatment, and finishing skills. Each project is an opportunity to practice precise cutting, layout, and assembly, reinforcing what you learn in theory. For guidance on practical first projects, the Starter Carpentry Tools guide can be a great companion as you begin to apply your growing toolset Starter Carpentry Tools.
Furniture projects and mastering curves and joinery
As confidence grows, you’ll tackle furniture pieces that demand more sophisticated joinery and profiles. Drawer front alignment, frame-and-panel doors, mortise-and-tenon cases, and decorative routing all benefit from specialized tools. For woodworkers seeking curated plans and guided build-alongs, exploring furniture-specific resources can be incredibly helpful Furniture Plans Mastery. And if you’re considering a consolidated library of project plans and technique tutorials, you may want to explore less general guidance and more structured plans through a trusted resource that compiles techniques and measurements, available here Ted’s Woodworking.
Ted’s Woodworking and value for woodworkers
What it offers for specialty carpentry tools enthusiasts
Ted’s Woodworking is known for its extensive collection of project plans, guides, and step-by-step instructions. While the catalog covers many general woodworking topics, the value for specialty carpentry tools enthusiasts lies in the detailed joinery plans, profile templates, and cut lists that help you put your precise tools to work. The plans can help you understand typical material allowances, recommended blade types, and the specific router bit profiles that suit particular joints. Rather than a one-size-fits-all approach, this resource supports a methodical, project-based learning path that complements the hands-on practice of using specialty carpentry tools.
How to access plans and guides (internal resources)
For a progressive learning path, pair your tool purchases with guided plans that reinforce technique. The Starter Carpentry Tools guide offers an accessible entry point to begin applying your tools to real projects, while Furniture Plans Mastery helps you grow into more complex builds with a clear, structured plan set. These internal resources can help you connect tool use with project outcomes as you sharpen your skills Starter Carpentry Tools and Furniture Plans Mastery.
Maintenance, safety, and best practices
Sharpening, calibration, and storage
Keeping specialty carpentry tools sharp and properly calibrated is key to maintaining accuracy. Regularly tune plane blades, chisel edges, and router bits; a quality honing stone or sharpening system will pay for itself in better cuts and longer tool life. Store tools in a dry, organized rack or cabinet so edges don’t get damaged and the blades stay accessible when you need them.
Safety guidelines for power and hand tools
Safe woodworking is essential. Wear eye protection and hearing protection when using power tools, clamp workpieces securely, and unplug machines during adjustments. Familiarize yourself with each tool’s intended use and read manufacturer instructions for safe operation. A disciplined approach to safety protects you and extends the life of your specialty carpentry tools.
Getting started today: practical steps and resources
Step-by-step starter path with linked guides
Ready to begin? Start with a compact core set: a marking gauge, a combination square, a small set of chisels, a handsaw or two, a smoothing plane, and a basic router setup. Practice layout on scrap stock, then build a simple project such as a small shelf or box to practice squareness, edge treatment, and joinery alignment. As you complete projects, reference the Starter Carpentry Tools guide to reinforce fundamentals and gradually add specialized items as needed Starter Carpentry Tools and explore more advanced projects through the Furniture Plans Mastery resource Furniture Plans Mastery.
For those who prefer a combined library of projects and plans with a curated approach to tool usage, consider exploring a comprehensive resource like Ted’s Woodworking. It can be a valuable complement to hands-on practice, especially when you’re trying to translate technique into repeatable results. If you’re curious, you can explore this option here Ted’s Woodworking.
Conclusion and next steps
Specialty carpentry tools empower you to achieve high-quality results with less trial and error. By understanding the core categories, prioritizing essential investments, and weaving high-quality plans into your workflow, you can grow from basic projects into sophisticated furniture and built-ins. Use the internal guides to structure your learning journey, and consider a resource like Ted’s Woodworking to access the project plans that align with your interests. Remember, the goal is steady progression: start with fundamentals, refine your techniques, and gradually expand your toolkit as your projects demand more advanced capabilities. With the right tools and plans in hand, you’ll transform your workspace into a studio where precision and craftsmanship flourish, all while enjoying the process of making something with your own hands.