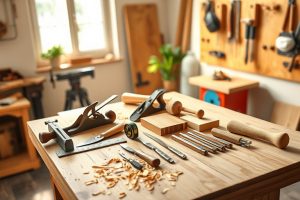
Introduction to diy wood bunk beds
Creating a space-saving sleeping solution at home often starts with a smart, sturdy project like diy wood bunk beds. Whether you’re furnishing a shared kids’ room, a guest suite in a tiny home, or a dorm-like setup, bunk beds made from solid wood offer durability, safety, and timeless appeal. This guide walks you through planning, building, and finishing a pair of bunk beds that are not only functional and comfortable but also a joy to craft. Along the way, you’ll see practical tips for sourcing materials, selecting the right tools, and verifying safety—because strong joints and secure guardrails are non-negotiable when working with diy wood bunk beds.
Why DIY bunk beds make sense
There are many reasons homeowners love the idea of building their own bunk beds. First, you control the design, materials, and finish, tailoring the bed to the exact room dimensions and mattress thickness you have on hand. Second, a well-built wooden bunk bed can outlive cheaper, mass-produced frames, saving money in the long run. Third, DIY projects like this are an opportunity to develop woodworking skills, learn joinery, and enjoy the satisfaction of a finished project you can be proud of. When properly planned, diy wood bunk beds combine form and function, transforming vertical space into a practical sleep solution without sacrificing style.
Planning and safety considerations
Plan before you saw: measure twice, cut once. The planning phase for diy wood bunk beds involves choosing dimensions, selecting wood types, and outlining a cut list. Safety steps should come first: consider weight limits, guardrail height, ladder stability, and smooth finishes to minimize splinters. A well-thought-out plan reduces rework and ensures your bunk beds stay sturdy for years.
Choosing dimensions and mattress sizes
- Single over single or twin-over-twin configurations are the most common. The standard twin mattress is 38 inches wide by 75 inches long, but your room may demand shorter lengths or wider rails for added safety.
- Allow for at least 2 feet of clearance around the beds for safe passage and night-time access to the ladder.
- Factor in the bed height. A lower bunk is easier for younger children, while a higher top bunk increases storage space beneath but requires sturdier posts and cross-bracing.
Safety standards and guardrails
Guardrails are essential for top bunks. They should extend at least 4 inches above the mattress top, with slats spaced to prevent entrapment. Ensure there are no sharp edges, and all screws are countersunk to avoid snagging clothing or skin. The ladder should be securely attached, with slip-resistant rungs and a width that distributes weight evenly. These safety measures are crucial when you’re building diy wood bunk beds for kids or guests.
Materials, tools, and joinery
Choosing the right wood and hardware affects durability and ease of assembly. Softwoods like pine are common for DIY bunk beds, but hardwoods such as poplar or birch provide extra strength for longer life. When it comes to diy wood bunk beds, plan for a robust frame, a reliable ladder, and strong guardrails. Pick screws and hardware rated for high load, and consider using wood glue in conjunction with mechanical fasteners to maximize joint strength.
Recommended materials
- Wood: pine fast-growth boards, or poplar for a stronger frame
- Hardware: 3/4″ wood screws, pocket hole screws, wood glue, corner braces
- Finish: water-based polyurethane or an enamel paint for a kid-friendly finish
- Hardware for ladder and guardrails: sturdy hinges or solid brackets for stability
Tools to have on hand
- Measuring tape, carpenter square, and marking knife
- Table saw or circular saw with a guide, plus a miter gauge
- Drill/driver with multiple bits, and a countersink bit
- Orbital sander or sanding block with 120-220 grit papers
- Clamps, a level, and a stable work surface
Joinery and construction methods
For diy wood bunk beds, you can use simple joinery like butt joints reinforced with screws and wood glue or go for pocket-hole joinery for cleaner edges. Consider cross-bracing on the outer rails and a solid center support under the top bunk to prevent sagging. If you’re aiming for a seamless, professional look, you might prefer ready-made bed rail kits or dowel joinery combined with glue. Every choice influences durability, weight tolerance, and the final look of your bunk beds.
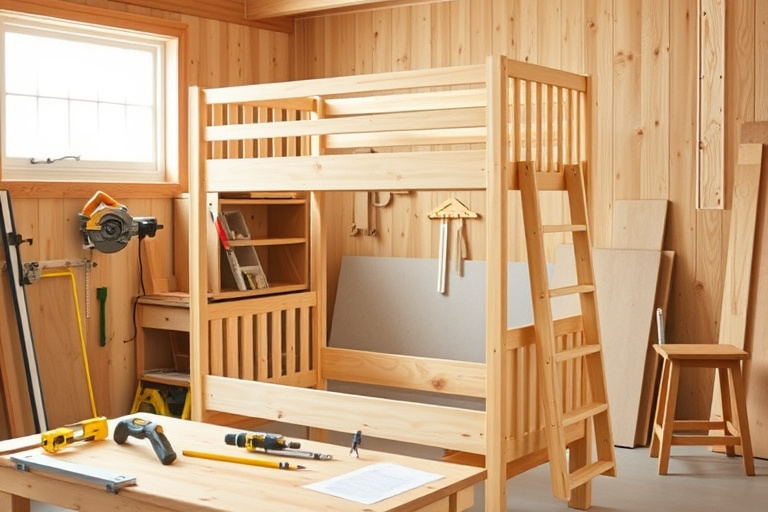
Step-by-step build guide for diy wood bunk beds
Below is a practical, safe workflow to build a solid twin-over-twin bunk bed. Adapt the measurements to your room and mattress size, but follow the same sequence to ensure structural integrity and a clean finish.
-
Step 1 – design and cut list
Sketch the frame and list all parts: headboards, footboards, side rails, ladder supports, top and bottom bunk end pieces, and cross braces. Create a cut list with precise lengths for each piece. This phase is where you ensure the overall height fits your ceiling and the ladder clears doorways. For a cohesive look, select a consistent thickness for most components (e.g., 1.5″ or 2″ boards).
-
Step 2 – build the frames
Cut the headboard and footboard pieces, then assemble the two side rails. Use pocket holes or dowels at the joints for a strong, clean appearance. Glue and clamp the joints, then drive screws through pre-drilled holes. Build each bunk frame on a flat surface to prevent twist. For extra rigidity, add a few horizontal braces between the legs at mid-height.
-
Step 3 – assemble top and bottom bunks
Attach vertical posts at each corner, joining the headboard to the top bunk and the footboard to the bottom bunk. Install cross-supports between the posts to prevent any wobble. If you’re using a ladder that mates with the frame, consider adding ladder side supports before the final assembly so you don’t have to maneuver around loose pieces.
-
Step 4 – add guardrails and ladder
Attach sturdy guardrails along the top bunk’s sides, ensuring a snug fit that won’t pinch or snag bedding. The ladder should be securely mounted and angled for easy climbing. Use wide, slip-resistant rungs and ensure all bolts are tight. A quick test by applying gentle force to each rail confirms the stability of your diy wood bunk beds before finishing.
-
Step 5 – finishing touches
Sand all surfaces smoothly, starting with 120 grit and moving up to 220 grit. Remove all dust before applying finish. Choose a kid-friendly finish such as a clear polyurethane or a low-VOC paint. Apply multiple thin coats, allowing adequate dry time between applications. Sand lightly between coats for a flawless finish. Finally, add anti-tip hardware to secure the bunk bed to the wall if your space demands extra stability.
Finishing touches, maintenance, and safety tips
Finish quality matters as much as frame strength. A durable, easy-to-clean surface helps keep diy wood bunk beds looking great for years. Here are a few practical tips:
- Use non-toxic, child-safe finishes if the beds are for kids.
- Inspect joints monthly for loosened screws and re-tighten as needed.
- Check guardrails for any gaps or sharp edges and sand them down if necessary.
- Periodically test ladder stability and replace worn rungs or hardware promptly.
Budgeting, ROI, and product resources
Building diy wood bunk beds is a balance between materials, hardware, and finishing supplies. A well-planned build can come in significantly under store-bought bunk beds, especially when you reuse parts or buy in bulk. If you’re exploring ways to speed up the process or you want a structured library of projects to reference, you may find value in woodworking resources that provide plan libraries and blueprints. For instance, some woodworkers use curated collections to access tested plans and time-saving tips. If you’re curious about monetizing woodworking skills or expanding your project repertoire, you can explore this overview on how Ted’s Woodworking can help you leverage plans and patterns to turn a hobby into a business.
Another great resource for expanding your DIY knowledge is a step-by-step guide for a different essential project. If you’re curious about building a dedicated wooden chair as part of your shop repertoire, check this detailed guide: how to build a homemade wooden chair. This kind of project helps you refine your joinery and finish techniques, which will also benefit large builds like bunk beds.
For those who want to access a curated set of woodworking plans and resources directly, consider the affiliate opportunity below. This ClickBank link might be of interest if you’re exploring a library of professional patterns and time-saving templates: Ted’s Woodworking offers a broad range of plans you can study and adapt for future projects.
How Ted’s Woodworking can help (affiliate)
Ted’s Woodworking provides a comprehensive collection of woodworking plans, tips, and projects that can complement your DIY journey, including bunk bed designs and related furniture. While building diy wood bunk beds in your own shop, you may find it helpful to browse the plan library and compare joinery techniques, material lists, and finishing recommendations. If you’re considering a broader venture into woodworking, a structured plan library can save time on design and measurement errors. You can explore this resource and related opportunities via the affiliate link provided: Ted’s Woodworking.
For related reading, you can also explore these practical articles:
- To learn how to monetize woodworking talent, see this overview on turning craft into cash with Ted’s Woodworking: woodwork-to-sell-turn craft into cash with Ted’s Woodworking.
- For another hands-on DIY project, check the chair-building guide: how to build a homemade wooden chair.
FAQs and troubleshooting
Q: How long does it take to build diy wood bunk beds for a typical room? A: Depending on your skill, shop equipment, and plan complexity, expect a weekend or two of work for a standard twin-over-twin design. Q: What is the best wood for bunk beds for kids? A: Harder woods like poplar or high-quality pine offer a good balance of strength, weight, and cost. Q: How can I prevent wobble? A: Use robust cross-bracing, ensure all joints are properly fastened, and add anti-tip hardware when securing the bed to the wall.
Conclusion and next steps
Crafting your own diy wood bunk beds is a rewarding project that blends precision, artistry, and practicality. With careful planning, proper materials, and a steady hand on the saw, you can build a durable bunk bed that stands up to daily use while enhancing room layout and safety. If you’re keen to expand your woodworking toolkit and explore more structured plans, consider resources like Ted’s Woodworking to broaden your project horizons. And if you’re looking for a related, practical DIY project, the wooden chair guide linked above offers a valuable opportunity to practice precise joinery and finish work before tackling larger builds.
Image credits and final note
Whether you’re drafting the initial design or applying the final coat of finish, remember that patience and accuracy matter. A well-executed bunk bed project will be a centerpiece of the room for years, and the skills you gain—measured marking, precise saw work, and careful sanding—will pay off in every future project you undertake.