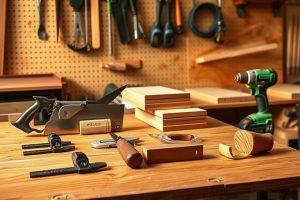
Every successful furniture project begins with the right set of tools. When you know the tools needed to make furniture, you can design, cut, assemble, and finish pieces with precision, efficiency, and less frustration. This guide walks you through essential categories, practical choices, and smart ways to build your toolkit without breaking the bank. Whether you’re starting from scratch or upgrading an existing shop, the goal is to create durable, beautiful pieces that age well and bring your space to life.
Understanding the basics: what tools are necessary
Before you buy your first tool, consider two broad categories: hand tools and power tools. Hand tools teach you control and feel, while power tools speed up repetitive tasks and unlock capabilities you couldn’t easily achieve with manual effort alone. A balanced approach—combining reliable hand tools with a few essential power tools—pays off in accuracy, finish quality, and safety.
Hand tools vs power tools
Hand tools establish your baseline: a measuring tape, a square, a sharp chisel, and a saw with clean kerfs will help you understand stock behavior and joints. Power tools, on the other hand, handle tasks that demand speed and repeatability: a circular saw for roughly cutting panels, a drill/driver for joinery, and a sander for smoothing surfaces. The key is to invest in quality that lasts, learn proper techniques, and expand the toolkit gradually as you take on more complex projects.
Safety considerations and personal protection
Safety should never be an afterthought. Always wear eye protection, use hearing protection when needed, and keep dust under control with a respirator or dust mask in poorly ventilated spaces. A sturdy workbench, stable clamps, and a clean shop layout reduce accidents and improve accuracy. As you add tools, plan for dust collection, organization, and safe storage of sharp items and chemicals. The best tool can become a hazard if it isn’t used in a prepared space.
The core list: tools needed to make furniture
Below is a practical, tiered list. Start with the basics and then layer in specialized tools as your projects grow in complexity and scale.
Measuring and marking tools
- Quality measuring tape (at least 16 feet) and a folding rule
- Combination square for accurate 90 and 45-degree angles
- Marking gauge and a sharp pencil or marking knife
- Marking knife and a marking gauge helps transfer precise lines to stock
- Calipers for precise thickness checks on boards
Accurate measuring and marking reduce guesswork and help ensure joints align perfectly. Consistency here translates into stronger, cleaner furniture pieces.
Cutting and shaping tools
- Handsaw (backsaw or a good Finnish saw) for controlled cuts
- Corded or cordless circular saw for long crosscuts and rough stock removal
- Miter saw for precise angle cuts on frames, legs, and moldings
- Jigsaw for curved cuts, openings, and interior cutouts
- Planer or jointer as needed for flattening boards and obtaining consistent thickness
- Sharpened chisels and a sharpening stone to keep blades true
When choosing cutting tools, prioritize blade quality, accuracy, and ease of maintenance. Dull blades cause tear-out and rough surfaces, undermining the overall finish of your furniture.
Joinery and assembly tools
- Clamps (bar clamps, F-clamps, quick-release clamps) in a variety of lengths
- Hammer or mallet for driving joints without damaging parts
- Drill/driver with a common set of bit sizes
- Doweling jig or pocket hole jig for strong, repeatable joinery
- Chisels of multiple widths for cleaning mortises and fitting joints
- Routers and router bits or a router table for decorative edges and joinery details
Quality clamps are often the unsung heroes of a good furniture project. They hold pieces securely while glue dries and ensure alignment during assembly.
Finishing tools
- Orbital sander or random-orbit sander for even surfaces
- Masking tape, high-quality sanding discs, and abrasive grits for a smooth transition between grits
- Brushing supplies or foam rollers for consistent finishes
- Rub-on finishes, varnishes, or shellac depending on the desired look and protection
- Cleaning supplies to prep the surface between coats
A well-chosen finish protects the wood and enhances its character. Practice on scrap pieces to dial in the exact look you want before applying it to your final piece.
Workholding and clamping
- Workbench with a sturdy face vise or tail vise
- Edge clamps and bench dogs for holding parts while working on edges or faces
- Non-marring pads and sacrificial boards to protect work surfaces
Effective workholding saves time and prevents mistakes. A dependable setup reduces movement during cutting and shaping, yielding cleaner joints and better overall quality.
Safety gear and PPE
- Safety glasses or goggles
- Hearing protection for loud tools
- Dust mask or respirator when sanding or shaping dusty materials
- Appropriate clothing and a tidy workspace to avoid accidents
Tools you might want as you advance
As your projects become more ambitious, you’ll likely add specialized equipment to broaden what you can build and how efficiently you work.
Specialized equipment to expand capabilities
- Thickness planer for consistent board thickness across large panels
- Planer surfacing or jointer for true, flat edges
- Router, bits, and a router table for advanced edge profiles and joinery
- Dust collection system to keep the shop clean and improve air quality
- Dedicated sanding station or sanders with dust-free connections
These additions are worth it when you’re consistently producing furniture and want top-tier finishes with fewer sanding and smoothing steps. Plan the order of addition to align with your current project load and budget.
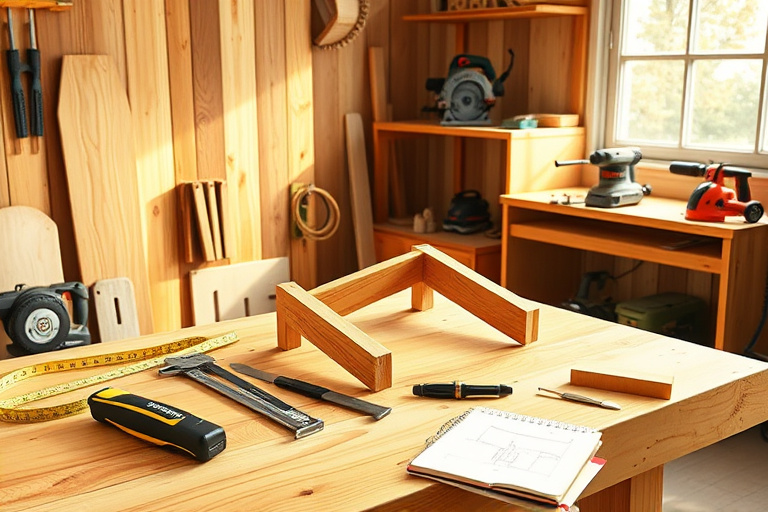
Workshop setup and organization tips
- Plan a logical workflow: cutting, joinery, assembly, finishing
- Store tools in labeled, accessible locations so you can reach what you need quickly
- Keep a separate area for glue-ups and finishing to reduce cross-contamination
- Invest in quality storage (shelves, bins, tool racks) to protect blades and bits
A tidy workshop isn’t just neat; it improves accuracy and reduces the likelihood of accidents or damaged pieces. As you expand, consider dedicated zones for different stages of the build and a simple color-coded system for quick identification of tools and bits.
How Ted’s Woodworking fits into your toolkit
Many woodworkers gradually build a library of reliable project plans to practice techniques, test new joints, and understand different construction methods. Ted’s Woodworking is a well-known resource that provides a broad collection of woodworking plans, tutorials, and reference materials. It can be a convenient way to access varied project ideas and safe, tested approaches for assembly, finishing, and detail work. If you’re looking to accelerate your learning and expand the types of furniture you can build, this kind of resource can complement the practical tools you’ve gathered.
When you’re evaluating a new resource, consider how it aligns with your current toolkit: does it emphasize joinery you’re practicing, or finishing techniques you want to master? A curated library can save you time by showing you tried-and-true sequences for complex components, helping you translate ideas into tangible pieces more quickly.
To explore a broad library of plans and projects, you can explore options like Ted’s Woodworking. If you’re interested in complementary reading and practice guides, the following resources can be helpful as you build toward more ambitious projects:
For foundational learning, consider the Master your craft with a woodworking PDF free download: The Complete Guide to Safe & Beautiful Projects and for confidence-building DIY plans, check out the DIY Wood Project Plans: Your Ultimate Guide to Crafting with Confidence. These two internal resources offer supportive insights while you’re building your own toolkit and repertoire of skills.
Learning resources and free guides (internal references)
Alongside the core toolkit, free guides and curated PDFs can help you understand best practices, safety norms, and project planning. The following internal resources are designed to supplement hands-on learning without requiring you to commit to a single paid program right away:
Master your craft with a woodworking PDF free download: The Complete Guide to Safe & Beautiful Projects helps you translate ideas into safe, repeatable projects that look polished. Master your craft with a woodworking PDF free download provides practical steps for planning, measurement, and finishing, so you can approach furniture projects with confidence.
DIY Wood Project Plans: Your Ultimate Guide to Crafting with Confidence helps you navigate plans and project choices while gradually building a toolkit aligned with your preferred styles. DIY Wood Project Plans walks you through selecting projects, understanding material options, and adapting plans to your space and skill level.
Buying, choosing, and maintaining furniture-making tools
When you’re shopping for tools, focus on a few core factors: build quality, ergonomic design, warranty, and availability of spare parts. Start with reliable, mid-range options for your initial purchases, and then upgrade as your projects scale in complexity. Look for tools that stay sharp, stay accurate, and stay safe with features like soft-start motors, blade guards, and clear alignment marks.
Maintenance is equally important. Keep blades sharp, check fasteners for tightness, and clean dust regularly. A routine: wipe down your tools after use, store blades safely, and resharpen edges as needed. Investing time in maintenance reduces downtime and extends the life of your equipment.
As you accumulate tools, organize your shop to maximize efficiency. A well-ordered space helps you keep track of consumables like screws, nails, glue, and sandpaper—things you’ll use repeatedly across multiple projects. The better you manage these details, the faster you’ll complete each piece with consistent quality.
Affiliates and opportunities: making smart purchases
If you’re exploring ways to access more patterns, plans, and tutorials, consider reputable sources that combine practical guidance with clear, safe methods. Ted’s Woodworking provides a broad library of project plans and instructional content that can inspire your next build and help you visualize how different joints and finishes come together in real pieces. You can explore this resource here: Ted’s Woodworking.
For ongoing education and project inspiration, pairing such resources with hands-on practice and a solid core toolkit is a proven path to improvement. Remember that every tool you add should support your current projects and future ambitions, not overwhelm you with unnecessary complexity or cost.
Conclusion: building confidence and skill over time
Developing a furniture-making toolkit is a journey. Start with the foundational tools needed to make furniture, master basic joints, and refine your finishing techniques. As you grow, you’ll reach a point where you naturally know which tools to reach for—each choice becoming more intuitive and aligned with the quality you want in your pieces. A thoughtful approach to tool selection, paired with curated learning resources and optional assets like Ted’s Woodworking, can accelerate your progress while keeping you grounded in safe, proven practices. The goal isn’t to own every gadget on the market, but to own the right tools that enable you to bring your designs to life with confidence, consistency, and joy.
And remember: the journey from planning to a finished piece hinges on your understanding of the tools needed to make furniture and how to use them effectively. Practice regularly, seek feedback from fellow makers, and let each project build on the successes of the last. Before you know it, you’ll be building furniture that not only fills a room but also tells your story as a maker.