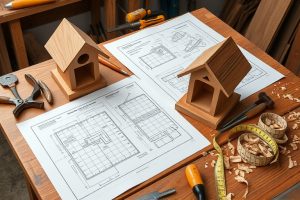
tools to start woodworking is a phrase many aspiring hobbyists search for when they begin a hands-on journey into creating tangible, lasting items from wood. If you’re here, you likely want to understand not only what tools to start woodworking with, but how to use them safely, efficiently, and with a plan. This guide blends practical gear recommendations with project ideas, budgeting tips, and curated resources to help you build competence and confidence as you transform raw boards into sturdy, beautiful pieces.
Why tools matter when you start woodworking
Woodworking is a craft that rewards precision, repetition, and patience. The right set of tools helps you translate ideas into accurate cuts, clean finishes, and durable joints. When you start with a thoughtful toolkit, you’ll spend less time fighting your equipment and more time focusing on design, layout, and technique. The phrase tools to start woodworking captures the concept of assembling the core gear you’ll rely on in the first 6–12 months of learning.
Before buying anything, define your space, budget, and the types of projects you want to tackle. Do you primarily want furniture, small decorative items, or practical items for the home? Your answers will shape your starter toolkit and help you prioritize tools you’ll actually use. In addition, it’s helpful to pair your hardware choices with reliable learning resources so you know how each tool is meant to perform in real projects.
Essential tools to start woodworking (starter toolkit)
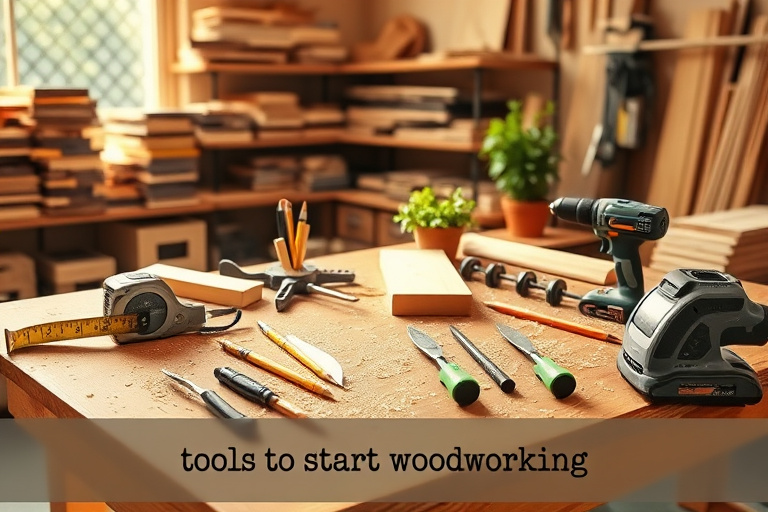
When people ask tools to start woodworking, they often envision an assortment of saws, measuring devices, and clamps. Here is a practical starter toolkit organized by function, with notes on why each tool matters and how to choose quality without overspending.
Measuring, marking, and layout tools
- Measuring tape (at least 16–25 feet) and a steel rule for accuracy
- Combination square and/or marking gauge to transfer precise lines
- Marking knife or sharp pencil for definite cut lines
- laid-out squares or a speed square to ensure 90-degree and angled joints
Accurate layout reduces waste and rework. A simple start might include a reliable carpenter’s square, a pencil, and a marking knife to ensure that your cut lines are crisp and easy to follow. Pro tip: keep your marking tools sharp for cleaner lines and better accuracy over time.
Cutting and shaping tools
- Handsaw or backsaw for precise, controlled cuts
- Circular saw for longer, straight cuts on larger pieces
- Jigsaw for curved cuts and interior profiles
- Chisels set (various widths) for cleaning out waste and fine-fitting joints
Starting with a good saw lineup allows you to encounter fewer frustrating moments and more satisfying outcomes as you learn. If you’re unsure about which saws to buy first, prioritize a high-quality handsaw and a circular saw with a basic blade set. You can always add specialty blades as your projects demand.
Joinery and fasteners
- Wood glue (PVA) for strong, clean joints
- Clamps (at least two bar or F-clamps; 2–4 smaller clamps help a lot too)
- Brad-point drill bits for clean pilot holes and easy screw starting
- Scratch awl or bradawl for marking and predrilling holes
Good clamps and reliable glue are often overlooked but essential. They allow you to assemble pieces securely while the glue cures, which is vital for durable joints in beginner projects.
Power tools for efficiency
- Drill/driver (cordless) with a basic set of driver bits
- Orbital random-sander or palm sander for smooth finishes
- Either a compact router or a small handheld router for edge profiles and joinery prep
Power tools speed up work and reduce fatigue, but they’re also where you should exercise caution. Start with one or two and add gradually as your confidence and project complexity grow. Always follow safety guidelines, wear eye and ear protection, and keep a clean, organized workspace.
Safety gear and workspace setup
- Safety glasses, hearing protection, and a dust mask
- Non-slip footwear and a clean workspace to prevent trips or slips
- Ventilation and a dust collection option to reduce airborne particles
Your workspace should be well-lit, stable, and free from clutter. A modest, organized bench with a vise or clamps makes layout and assembly much easier. If you’re tight on space, a compact workbench or a portable work surface can be a great entry point while you learn.
Budgeting your first toolkit: value without compromise
Quality tools don’t have to break the bank, but a few strategic investments yield better results than a dozen low-quality options. When you’re deciding tools to start woodworking, focus on a small set of reliable essentials and gradually expand as you complete projects and gain experience. A good approach is to identify two or three “core” items per category (measuring/marking, cutting, power tools) and seek mid-range options that balance durability with cost. Over time, you’ll learn which brands and tool families best fit your style and space.
Another practical strategy is to join a local makerspace or a community workshop where you can access better tools without purchasing them upfront. Community tool libraries and shared spaces offer hands-on experience with high-quality equipment before you decide what to own permanently.
Beginner projects to practice with your tools to start woodworking
Choosing projects that build fundamental skills is a great way to reinforce your toolkit. Start with small, rewarding builds that teach layout, cut accuracy, edge finishing, and assembly. Here are two project ideas that align well with a starter toolkit and give you tangible results you can use around the house.
Quick projects that build confidence
- Simple shelves or a wall-mounted peg rack to practice precise cutting and finish application
- Planter boxes to learn joinery basics and finishing without overcomplicating the build
- Tool organizers or a small workbench tray to refine layout and edge-work skills
These projects emphasize accuracy over complexity, which keeps motivation high as you improve your tool-handling and measurement discipline. Each build adds a sense of momentum that feeds further learning.
Projects that yield practical results and motivation
- A basic coffee table or end table with a simple panel or frame-and-panel design
- A raised garden bed or a simple storage unit, which helps you apply joinery and finishing across different forms
- A small wall cabinet with a few doors to exercise hardware installation and precise alignment
These longer-running projects teach you how to plan steps, adjust your approach when things don’t go as planned, and finish with a clean, durable result. As you complete each item, you’ll build a portfolio of practical pieces that you can be proud of—and that motivates you to tackle increasingly ambitious builds.
How to use internal project resources as you learn
Learning often accelerates when you study real-world examples and guided projects. If you like hands-on, project-focused inspiration, two practical resources can complement your toolkit and help you translate knowledge into action. For an approachable, hands-on project you can replicate, consider the elevated bed DIY build guide. It demonstrates how to plan, cut, assemble, and finish a raised bed with attention to comfort, storage, and style. It’s a great reference for applying layout and joinery concepts in a cohesive project.
Another valuable link that focuses on practical, marketable ideas is small woodworking ideas to sell. If you’re curious about turning your hobby into something that earns income, this resource covers product ideas, workflow considerations, and selling strategies that complement your growing woodworking toolkit.
Ted’s Woodworking: a resource you may consider
As you search for structured plans and a broad library of project ideas, a well-known option some hobbyists explore is Ted’s Woodworking. This resource offers a wide range of project plans, diagrams, and step-by-step instructions that can complement your hands-on practice. If you’re looking for a curated collection to spark new project ideas or to compare different approaches to common builds, exploring Ted’s Woodworking can be a helpful part of your learning toolkit. Remember, it’s one of many options, and you should choose tools to start woodworking plus an educational resource strategy that fits your goals and budget.
Practical tips to grow your skills and portfolio
Consistency is more valuable than fireworks. Set a realistic practice schedule (for instance, a small woodworking session two to three times per week) and commit to a single project from start to finish. These small, repeated sessions compound into real skill gains and a growing portfolio of completed pieces. Keep a simple project journal or photo log to document measurements, cuts, joint types, finishes, and lessons learned. Over time, you’ll notice a pattern: your accuracy improves, your finish quality becomes more even, and your project timelines shrink as your muscle memory develops.
As you gain confidence, expand your toolkit thoughtfully. Instead of chasing every new gadget, focus on tools that unlock new capabilities for your typical projects. For example, if you find you’re spending extra time shaping edges, a router might become a valuable addition. If layout mistakes are common on panels, consider a precise mitre gauge or a sliding bevel for consistent angles. The goal is steady, purposeful growth, not buying everything at once.
Next steps and resources
To further your journey, revisit your starter toolkit and compare what you have with the requirements of the projects you want to complete next. Use the internal resources linked above to explore practical applications and to see how layout, cutting, and finishing translate into real builds. If you’re ready to embark on a broader project slate or want guided plans, Ted’s Woodworking can be a useful companion, but always pair any paid resource with hands-on practice and ongoing learning from practical projects in your shop.
In the end, the most effective path to mastery with tools to start woodworking is a balanced mix of practice, project diversity, careful tool selection, and accessible educational content. Whether you’re starting with a simple shelf, a planter box, or a raised bed, the combination of precise layout, careful cutting, robust joinery, and a quality finish will set you on a rewarding path toward more ambitious woodworking goals.