Introduction to wood box plans free download
For hobbyists and seasoned woodworkers alike, the idea of a reliable wood box plans free download is incredibly appealing. Free plans can be a fantastic starting point for practicing dimensions, joints, and finishing techniques without breaking the bank. But to truly benefit from wood box plans free download, you need plans that are accurate, clearly explained, and adaptable to your shop setup. This guide will walk you through what to look for, how to evaluate options, and practical steps to turn a plan into a sturdy, attractive wooden box you’ll be proud to display or gift.
As you explore plans, keep in mind that the right plan is less about a perfect blueprint and more about a clear map that helps you execute the build with confidence. If you’re expanding your toolbox and workflow, you’ll also want to consider how to outfit your shop with the right resources. For a broader look at essential gear, you might find this guide on wood shop tools list helpful. And if you’re seeking quick practice ideas to build skills, check out small woodworking project ideas for low-risk, high-reward projects that reinforce fundamentals.
What to look for in quality wood box plans free download
Not all free plans are created equal. A good plan should provide more than rough dimensions and vague sketches. Look for clarity, complete cut lists, grain orientation guidance, and tolerances that account for typical wood movement. In addition, the plan should include clear instructions for assembly and finishing, plus tips on how to optimize material usage. Here are some features that distinguish solid wood box plans free download from the rest:
- precise pieces with widths, lengths, and grain direction.
- a logical sequence with suggested fasteners, joints, and alignment tips.
- sanding progression, stain or paint recommendations, and protective topcoats.
- hinges, latches, handles, or decorative elements that suit the box’s purpose.
- notes on how to resize for different box sizes or different wood species.
When you encounter a wood box plans free download, it’s also helpful to see a few finished photos or rendered diagrams. Photographs showing the box in use provide real-world context for scale, proportion, and how the chosen joinery holds up under regular handling. If any part of the plan feels ambiguous or missing crucial details, consider using it as a learning exercise rather than a final guide and search for supplementary explanations or tutorials.
How to choose reliable resources for wood box plans free download
Quality matters, even when a plan is labeled free. To maximize your success, evaluate sources for accuracy, material recommendations, and clear joinery instructions. Here are practical steps to vet wood box plans free download options:
Verifying plans for accuracy, materials, and joinery
Take a close look at the implied dimensions. Do they approximate standard sheet goods dimensions (for example, 1/2-inch or 3/4-inch stock) and common board widths? Plans that reference odd or nonstandard sizes may lead to material waste or misfit parts. Check the joinery details: are dowel joints, box joints, or rabbet joints described with precise measurements and cut angles? A solid plan will also specify compatible finish options and a recommended sequence of steps to minimize mistakes.
Where to find trustworthy free downloads and when to consider paid plans
Free plans can be a great way to practice for fun or to prototype a project, but they may vary in depth. If you’re looking for broader coverage of technique, layout strategies, and design variations, consider supplementing free downloads with curated paid collections. For example, many woodworkers turn to established plan libraries that bundle hundreds of projects in a single membership. If you want a comprehensive, well-organized library, you might explore a resource like Ted’s Woodworking for broad project inspiration and detailed plans that save time and reduce decision fatigue, especially when you’re expanding into new box sizes or styles.
Step-by-step: Building a wooden box from a plan
With a solid wood box plans free download or a trusted paid alternative in hand, you can approach the build with confidence. Here’s a practical, beginner-friendly workflow that translates plan ideas into a finished box you can be proud of.
Tools, materials, and workspace setup
Begin by gathering the essentials: a stable workbench, a basic set of hand tools (hammer, chisels, square, marking gauge), a table saw or track saw for straight cuts, a router or chisel for precise joints, and a sander for a smooth finish. Stock choices depend on the box’s intended use; choose hardwood for a durable keepsake box or plywood for a lightweight, functional container. The plan’s cut list will help you tally materials and hardware such as hinges, magnets, or a clasp. If you’re looking to brave new techniques, a well-equipped shop goes a long way toward completing the project efficiently and cleanly.
Reading a plan: sizes, cuts, and layout considerations
Begin by laying out the main box pieces on your stock according to the plan. Mark the waste areas, then cut to size with accuracy. Pay attention to grain direction, especially for decorative or visible faces. For a classic wooden box, edge joints are a forgiving starting point, while box joints or dovetails offer stronger, more refined results for keepsake boxes. Check the plan’s layout diagrams against your actual stock before you cut to avoid mistakes that can’t be fixed after assembly.
Assembly techniques and joinery tips for durable boxes
Dry-fit the box first to confirm alignment and gauge fit. Use clamps to hold pieces square during glue-up, then apply a consistent bead of wood glue along joints. If you’re using finger joints or box joints, ensure the pieces seat snugly without forcing alignment. For decorative or vintage-style boxes, consider mitered corners with splines for strength and visual appeal. A simple rabbet joint can be plenty sturdy for a small keepsake box, especially when reinforced with a solid bottom panel.
Finishing touches: sanding, staining, and hardware options
Progress through grits of sandpaper from coarse to fine to create a smooth surface. If you expect frequent handling, a protective topcoat—such as polyurethane, varnish, or a penetrating oil—will extend the box’s life. When choosing hardware, consider soft-close hinges for a refined feel, magnetic catches for clean lines, or small brass handles for a vintage touch. The finish choice can dramatically influence the final appearance, so test stains on scrap wood to ensure you achieve the hue you want before applying it to the actual box.
Expanding your skills and toolkit
Building a single wooden box is a great win, but wood box plans free download can serve as a gateway to broader projects. By practicing a few variations—different lid styles, decorative inlays, or compartment dividers—you’ll expand your skills and develop a more confident hand. A well-rounded approach also includes refining your shop setup, honing cut accuracy, and adopting a predictable workflow that minimizes waste and rework. If you’re curious about growing your project repertoire, revisiting the two internal resources can provide inspiration and practical tips: wood shop tools list for tool readiness and small woodworking project ideas for scalable practice ideas.
Is a paid plan library right for you? A look at Ted’s Woodworking
Free wood box plans free download are fantastic for learning, but a paid resource can accelerate your progress by offering a curated catalog of projects, reliable instructions, and time-saving layouts. This is where a comprehensive plan library can shine. Ted’s Woodworking, a popular option in the woodworking community, bundles thousands of plans across different styles and difficulty levels. If you’re aiming to tackle more complex boxes, unique lid mechanisms, or multi-compartment designs, a paid library can provide the breadth of ideas and the depth of instruction to help you execute confidently. For many woodworkers, the value lies in the time saved from having ready-to-build plans and a consistent method to replicate results. If you decide to explore this option, you can learn more about the broader project library by visiting the affiliate page linked here: Ted’s Woodworking.
Remember, the goal isn’t to replace the joy of learning from free plans but to augment it with a structured collection of projects, especially as you plan larger or more intricate boxes. If you’re still deciding, balance exploration with practice. Build a few boxes from wood box plans free download to solidify your skills, then selectively explore paid plans for more ambitious designs and advanced techniques.
Practical tips for ongoing success with wood box plans free download
To keep progressing, approach each new plan as a learning exercise. Start by identifying one new technique you want to practice—whether it’s a particular joint, a wrap-and-finish approach, or a hardware choice. Schedule a realistic build timeline that segments preparation, cutting, assembly, and finishing. Keep your shop organized and clutter-free, and document your results with photos or notes so you can track what works well and what could be improved next time.
As you grow, you’ll naturally want to broaden your library of plans. This is where the internal resources become even more valuable. The wood shop tools guide can help you upgrade your equipment to better support box-building projects, while the small project ideas page can provide recurring practice opportunities that reinforce your growing skill set.
Frequently asked questions
Q: How do I choose between a free plan and a paid plan? A: Start with a free plan to learn the basics, then consider a paid library if you plan to tackle more varied projects, need more detailed instructions, or want consistently reliable dimensions and layouts.
Q: Are wooden boxes suitable for beginners? A: Yes. Start with simple designs that emphasize accuracy over complexity, and gradually introduce more advanced joints and finishes as your confidence grows.
Q: What tools will I need for most wood box plans free download projects? A: At minimum, you’ll want a good square, a reliable measuring setup, a saw, a chisel set, clamps, and a sander. A router or dovetail bit can be helpful for more decorative or robust joints.
Conclusion
The journey from wood box plans free download to a finished, admired keepsake is both satisfying and educational. By prioritizing clarity in plans, practicing precise cuts, and applying thoughtful finishing, you’ll build not only a quality box but also a solid foundation for broader woodworking skills. Free resources are a terrific starting point, and when you’re ready to expand, a well-curated paid library like Ted’s Woodworking can offer breadth, depth, and efficiency that accelerate progress while keeping the joy of building intact.
If you’re ready to take the next step, remember to combine your free-box-building practice with steady skill growth and smart tool choices from your workshop toolkit. And if you want quick access to a broad range of projects that align with your new and growing capabilities, explore the affiliate option linked above and compare it against your current plan library needs. A thoughtful blend of free downloads and a trusted paid resource can yield a robust, enjoyable, ongoing woodworking journey.
Image prompt
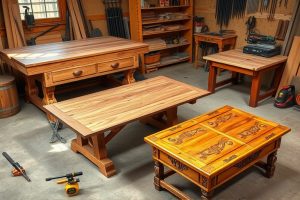
Prompt: A high-resolution, cinematic-style photograph of a tidy woodworking bench with a partially assembled wooden box in the foreground. Warm amber lighting highlights the rich grain of the wood. Tools like a handsaw, chisel, square, and small clamps are arranged neatly nearby. In the background, shelves with finished boxes and a few plan sheets visible. The color palette features natural wood tones—maple, walnut, and cherry—complemented by subtle shadows. The scene suggests focus, craftsmanship, and a sense of ongoing learning, with an unobtrusive banner or watermark reading wood box plans free download.