Introduction to wood projects
Wood projects are more than a pastime — they’re a way to transform space, hone your skills, and create something tangible with your own hands. Whether you’re building a simple shelf, a benches for the garden, or a full set of outdoor furniture, wood projects provide a tangible sense of progress as you learn to measure, cut, join, and finish. This guide explores practical strategies for getting started, staying organized, and leveling up your craft with confidence. And if you’re curious about expanding your plan library, you’ll find two excellent internal resources that discuss outdoor seating projects in depth, including step-by-step guidance from trusted woodworkers.
Why wood projects are worth your time
Investing time in wood projects pays dividends in several ways. First, they build real problem‑solving skills. Every cut, joint, and finish requires you to plan ahead, adjust on the fly, and evaluate results. Second, wood projects can improve your outdoor spaces, increasing comfort and enjoyment while adding value to your home. Finally, taking on wood projects regularly strengthens your toolbox of techniques, from basic rip cuts to more advanced joinery. If you’re looking for a structured path, a curated plan library can help you avoid common mistakes and accelerate progress. For outdoor seating and other furniture, the right plans can save time and reduce material waste while ensuring sturdy, durable results.
Planning your wood projects: a simple workflow
Great wood projects start with a clear plan. Here’s a straightforward workflow you can apply to almost any project, big or small:
- Define the goal: What will this piece do, where will it live, and how will it be used?
- Choose the project: Pick something that matches your space, skill level, and available time.
- Sketch or review a guide: Visualize dimensions and select joints that match your tools and experience.
- Material and finish plan: Decide on wood species, thickness, fasteners, and a protective finish.
- Estimate a budget: Include lumber, hardware, finishes, and a contingency for mistakes.
- Schedule steps: Break the build into manageable sessions to stay motivated and organized.
When you’re exploring woodworking for outdoor spaces, you’ll often discover that specific plans save time and reduce waste. For example, beginners can benefit from modular designs that can be adapted for different spaces without starting from scratch each time. If you’re considering seating projects, you’ll encounter popular options like a DIY 2×4 chair or Adirondack chair designs, which have become staples in many backyard makeovers. The pages below showcase projects that align with those goals, providing step-by-step guidance and practical advice.
For curated plans and guided instruction, many woodworkers rely on structured libraries. If you’re curious about a comprehensive plan collection, you can explore a trusted resource via this affiliate link to Ted’s Woodworking, a popular option for builders looking to expand their catalog of projects. Ted’s Woodworking can help you access a broad library of plans and ideas that fit a wide range of skill levels and interests.
Essential tools and safety for wood projects
Starting with the right tools is essential for accuracy and safety. You don’t need a full workshop to begin, but you should focus on a handful of versatile essentials:
- Measuring and marking: a tape measure, combination square, and marking gauge.
- Cutting: a good crosscut saw or a power circular saw with a sharp blade.
- Shaping: a sanding block or random orbit sander to produce smooth surfaces.
- Joinery basics: clamps, a wood mallet, and basic fasteners (screws, nails, wood glue).
- Finishing: brushes or rags for stain, and a compatible topcoat (polyurethane, varnish, or oil finish).
Safety is non-negotiable in any wood project. Wear eye and hearing protection, secure your workpiece, and use sharp blades to reduce the risk of kickback. Focus on proper blade height and feed direction, especially when using a table or circular saw. If you’re new to woodworking, consider starting with smaller, low-risk projects that help you master measurement, layout, and finish before tackling more complex joinery and outdoor furniture builds.
Beginner-friendly wood projects to kick things off
Starting with simple, rewarding projects is a great way to build confidence. Here are two easy builds that teach fundamentals without overwhelming you with complexity.
Simple planter box
A planter box is an ideal first project because it reinforces measuring, cutting, and assembling with basic joints. Use a straightforward box frame, ensure square corners with a square, and finish with a weather-friendly sealant. A planter box accommodates standard garden soil, protects roots from the elements, and provides a satisfying sense of accomplishment when you drop in the first plant. As you grow more comfortable, you can experiment with decorative moldings or easy rope handles for a touch of character. If you’re short on time, start with a compact model using pre-sanded boards and a simple butt joint. The key is to get clean cuts and consistent gaps.
Classic birdhouse
A birdhouse is another trusty beginner project that teaches weatherproofing and basic assembly. Start with a simple rectangular box, a sloped roof, and a hanging hole. Use waterproof glue and exterior-grade screws, and finish with an outdoor-grade sealant. Beyond the practical skill of joinery, you’ll learn how to account for natural wood movement as seasons change. A basic birdhouse can be completed in a weekend and serves as a reminder that even modest projects can bring delight to your outdoor space.
When you’re ready to explore more specialized outdoor seating projects, you’ll find two excellent internal resources offering guided plans for comfortable, durable outdoor seating. The first focuses on a sturdy outdoor seating option built from 2x4s, while the second presents Adirondack chair design plans that pair classic comfort with modern outdoor aesthetics. You can review details on these projects through the following pages: DIY 2×4 chair plans and Adirondack chair design plans.
Leveling up: intermediate wood projects that impress
Once you’re comfortable with basic cuts and joints, it’s time to tackle projects that require a bit more planning and precision. Two popular options for expanding your skills are the DIY 2×4 chair and the Adirondack chair. These projects emphasize comfort, durability, and outdoor resilience, and they translate well from a weekend build to a longer, more satisfying weekend. If you’re curious about the details, the linked resources above offer step-by-step guidance tailored to each design. Investing time in these plans helps you practice alignment, consistent spacing, and finishing techniques that yield professional-looking results.
DIY 2×4 chair plans
Building a chair from 2x4s is a fantastic way to practice cutting to length, drilling pilot holes, and creating sturdy frames with simple joinery. The 2×4 approach lets you use readily available stock and minimizes material waste while still delivering a comfortable, durable seat. The plan guides you through selecting the right hardware, choosing an outdoor-safe finish, and assembling without racking the frame. If you’d like a detailed, guided set of instructions, explore the page that covers this particular design in depth via the internal link above. It’s a practical entry point for anyone looking to grow from hobbyist to confident builder.
Adirondack chair design plans
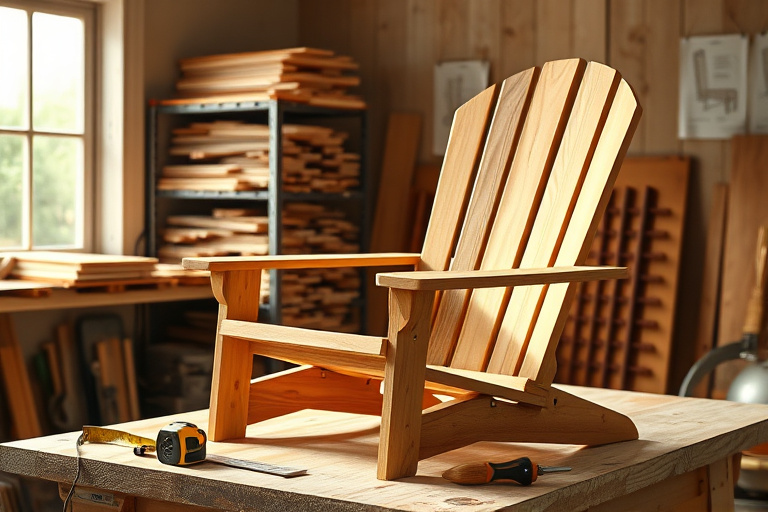
The Adirondack chair is iconic for outdoor comfort and relaxed style. The design emphasizes wide arms, a broad back, and a gentle recline that works well on porches, decks, and lawns. A well-executed Adirondack chair requires attention to the seating angle, seat height, and the curvature of the back slats for both comfort and support. The Adirondack chair design plans help you achieve the right proportions, select weather-resistant woods, and apply a finish that stands up to sun and rain. If your goal is a longer project that yields a signature piece for years to come, this is a classic choice that mixes practicality with timeless appeal. To explore a set of guided plans, follow the internal link provided above.
Advanced techniques for durable finishes and outdoor longevity
Outdoor wood projects demand finishes that resist moisture, UV damage, and temperature swings. Here are a few proven strategies to help you achieve lasting results:
- Material selection: For outdoor seating and planters, choose hardwoods like cedar or redwood, or use pressure-treated lumber designed for exterior use. If you work with softwoods, plan for extra sealing and maintenance.
- Surface preparation: Begin with thorough sanding (start with 120 grit, finish with 220) to ensure the finish adheres evenly and highlights wood grain.
- Sealing and protection: Apply a penetrating exterior oil or a durable polyurethane designed for exterior use. For decks and furniture that see heavy sun exposure, consider high-build finishes that offer UV protection.
- Maintenance plan: Outdoor projects benefit from periodic inspection and reapplication of protective finishes every 1–3 years, depending on climate and exposure.
With the right approach, your wood projects can withstand wind, rain, and sun while retaining color and integrity. A thoughtful finish plan also minimizes maintenance over time, keeping your furniture playing a central role in your outdoor living space.
How Ted’s Woodworking can accelerate your wood projects
If you’re looking to accelerate learning and expand your project options, exploring a curated library of woodworking plans can be enormously helpful. Ted’s Woodworking is a well-known source that offers a broad range of blueprints and plans across skill levels, from simple carry‑along projects to more complex furniture builds. While the plans themselves are designed to guide you through real-world builds, the more important benefit is the disciplined process they encourage: clear goals, accurate measurements, and consistent finishing practice. For those who want a consolidated resource without hunting for materials and dimensions, a membership can be a practical shortcut. If you’re curious, you can explore this option via the affiliate link provided earlier.
In addition to the broader plan library, Ted’s Woodworking aligns well with the idea of wood projects as a continuous learning journey. As you gain confidence with joints, edges, and finishes, you’ll find new projects that challenge you just enough to keep you growing. The combination of guided plans and hands-on practice helps you build a portfolio of outdoor furniture and accessories that reflects your evolving skillset. And if you prefer to see a curated set of plans tailored to outdoor seating and garden features, you can explore the two internal pages mentioned earlier for specific seating designs while considering additional resources that pair well with the Ted’s Woodworking approach.
Planning, budgeting, and project management for consistent results
One of the most underappreciated aspects of successful wood projects is the planning and budgeting phase. Even a well-executed build can disappoint if the material costs balloon or if the project drifts from the plan. Here are practical tips to keep your wood projects on track:
- Set a realistic scope: Start with a modest project you can complete in a weekend, then gradually increase complexity.
- Itemize materials and hardware: Create a basic bill of materials (BOM) with quantities, board feet, and fasteners. This helps prevent last-minute trips to the store and reduces waste.
- Schedule and milestones: Break the build into stages with clear milestones. Even short, focused sessions keep momentum going.
- Quality control: Check measurements at each stage, verify square and level, and test the fit of joints before final assembly.
When you maintain a steady pace, your wood projects become less about quick results and more about durable outcomes you’ll enjoy for years. A supplemental plan library, like Ted’s Woodworking, can reinforce this approach by providing tested sequences and dimensions that you can apply to multiple projects, reinforcing good habits and clean execution. If you’re ready to explore more options, the ClickBank affiliate link above provides access to a broad catalog of plans and ideas that can complement your ongoing projects.
Conclusion: turning hands-on time into lasting creations
Wood projects offer a rewarding blend of practical skill-building and tangible results. By approaching tasks with a clear plan, choosing appropriate tools, and applying durable finishes, you can create outdoor seating, planters, and storage solutions that enhance your space and your confidence. As you grow, don’t be afraid to mix in more ambitious designs or to revisit simpler builds with improved techniques. Remember that the journey matters just as much as the finished piece: every cut, joint, and coat of finish teaches you something new about materials, physics, and your own craftsmanship. For those who want a structured path to expand their ideas, exploring curated plans such as the two internal resources for outdoor seating can be a smart next step. And if you’re ready to broaden your plan library, consider Ted’s Woodworking as a resource to support your ongoing wood projects. Ted’s Woodworking may offer a comprehensive selection of plans that align with your evolving goals and schedule.