Whether you’re a weekend hobbyist, a dedicated maker, or a professional craftsman, the quality of your results starts with the right setup. Wood shop tools and equipment determine not only what you can build, but also how efficiently you can work, how safe your process is, and how much you enjoy the craft. In this guide, you’ll learn how to assemble a practical toolset, plan a workspace that fits your space and budget, and leverage trusted resources like Ted’s Woodworking to access dependable project plans. Think of this as your bridge from a blank workshop to a thriving creative engine that can deliver consistent, repeatable results.
Essential wood shop tools and equipment
Building a capable collection of wood shop tools and equipment doesn’t have to be overwhelming. Start with the fundamentals, then add specialized items as your projects demand. The goal is to create a workflow that minimizes wasted motion and maximizes accuracy.
Measuring and marking tools
Precise measurements are the backbone of quality woodworking. Start with a reliable tape measure, a sturdy combination square, a marking gauge, and a sharp marking knife or pencil. A caliper or digital caliper can be invaluable for freehand joinery or snug-fitting components. Keep these tools within easy reach on a pegboard or a designated tray on your workbench to reduce guesswork and error.
Power tools every shop should have
Power tools dramatically expand what you can accomplish. A typical starter lineup includes a table saw for breaking down panels, a miter saw for accurate crosscuts, a cordless drill/driver for holes and assembly, and a router for shaping edges and dados. A benchtop planner is a natural add-on for smoother stock, while a router table can turn a router into a precision profiling machine. As your projects grow in complexity, consider adding a plunge-cut router, a thickness planing option, or even a compact dust extractor to keep air quality high and cleanup simple.
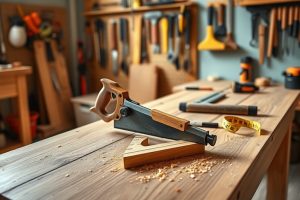
Hand tools and workholding
Hand tools balance power with control. A sharp backsaw or panel saw, a set of chisels, a smoothing plane, and a mallet are essential for fine-tuning joints and edge work. Workholding devices—vise clamps, bench dogs, and a sturdy workbench—help you secure work without rubbing elbows with the tools, which improves safety and accuracy. Don’t underestimate the value of a well-tuned smoothing plane; it can save hours when finishing surfaces and fitting joints.
Dust collection, safety gear, and shop safety
Clean air and safe operation aren’t optional extras—they’re essential parts of wood shop tools and equipment. A dust collection setup reduces airborne particles that irritate eyes and lungs, while respirators or dust masks offer protection when sanding or routing. Hearing protection, safety glasses, and bright, even lighting prevent accidents and improve precision. A small, well-ventilated space with clearly marked power-off switches and unplugged tools when idle helps maintain a safe, productive environment.
Choosing quality wood shop tools and equipment
Quality matters in the shop—not just for longevity, but for safety and precision. The most important choices typically fall into a few categories:
- Construction and materials: Cast iron tables, solid fences, and well-machined leads or slides ensure accurate alignment and repeatable cuts.
- Accuracy and adjustability: Tools with fine adjustment mechanisms, precise graduations, and reusable gauges save time and reduce errors.
- Ergonomics and weight: Lighter, balanced tools reduce fatigue, while heavier models offer stability for demanding tasks.
- Used vs. new: A well-maintained used tool can offer excellent value, but check for wear, alignment, and replaceable parts before purchasing.
When budgeting, consider prioritizing core tools first and expanding gradually. A solid core set will support most common projects, while specialty tools can be added as your interests evolve. For inspiration and project ideas, many woodworkers turn to reputable plan libraries and communities to tailor their tool purchases to real-world projects.
For project-specific planning and a wide range of vetted plans, many beginners and intermediates find value in Ted’s Woodworking. This resource provides a library of structured plans that align with varying skill levels, helping you choose projects that push your capabilities without overwhelming you. If you’re curious about a practical example set, you can explore related resources on backyard workspace and outdoor comfort plans, including backyard shed plans and Adirondack DIY plans to see how plans influence tool use and project flow.
Setting up a versatile wood shop on a budget
A great shop doesn’t have to be expensive. The trick is smart planning, prioritizing multi-use tools, and organizing your space to keep workflow efficient. Here are practical steps to build a versatile workshop on a reasonable budget.
Space planning and layout
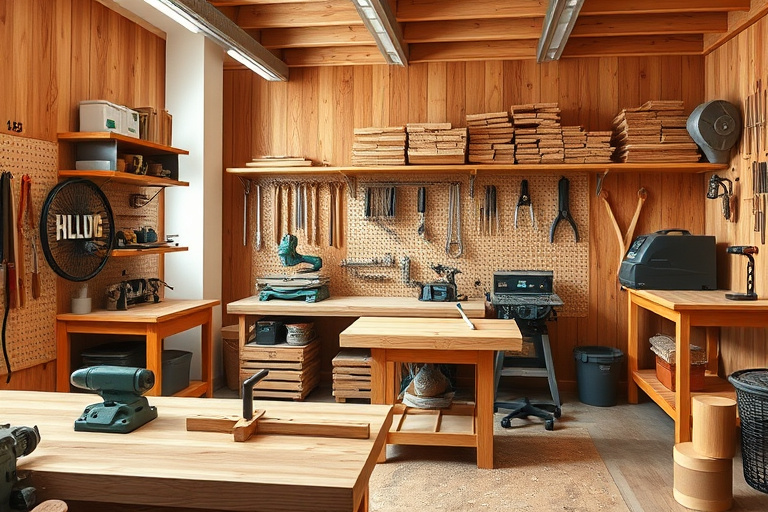
Start with the “U” or “I” layout concept to minimize motion between stock prep, cutting, assembly, and finishing. If you’re working in a smaller space, prioritize the table saw and workbench area as anchors, with the dust-collection unit positioned to capture debris from adjacent stations. Rolling stands and modular carts offer flexibility when you need to reconfigure for a different project.
Storage and organization
Efficient storage is the backbone of a productive shop. Pegboards keep frequently used hand tools in sight, while labeled bins and a woodworking tool cabinet keep fasteners, abrasives, and measuring devices organized. Consider a dedicated stock rack for lumber to minimize warping and to keep your shop productive. The right storage layout makes wood shop tools and equipment feel approachable rather than overwhelming.
Safety considerations
Safety isn’t optional; it’s foundational. Maintain clear walkways, use push blocks for table-saw work, and keep a first-aid kit within easy reach. Schedule regular tool maintenance—blade tension, fence alignment, brush cleaning, and wiring checks are simple habits that prevent breakdowns and accidents. Finally, invest in a good dust mask or respirator and a dependable hearing protection solution to keep you healthy during long sessions.
The role of plans and projects in building skills
Hands-on practice is the fastest path to improved technique. But trying to reinvent every project can lead to frustration. This is where well-structured plans shine. Access to dependable project plans helps you anticipate required tools, stock sizes, joinery methods, and finishing steps—reducing waste and building confidence as you progress. Ted’s Woodworking is a practical example of a plan library that many woodworkers rely on to expand their repertoire without guessing at each step. For additional inspiration beyond the standard plans, explore shed and outdoor-furniture concepts linked earlier, which demonstrate how a strong plan library informs tool choice and workflow.
How to pick the right tools for beginners to intermediate
Selecting tools for wood shop tools and equipment is about balancing capability, price, and upgrade path. Here’s a practical approach to building a smart starter set and growing it as skills advance.
Must-have starter tools for wood shop tools and equipment
For beginners, focus on tools that deliver immediate results and minimize common mistakes. A dependable cordless drill, a compact circular saw, a good combination square, a basic set of chisels, a block plane, a handsaw, and a sturdy workbench form a solid baseline. Add clamps (both bar clamps and pipe clamps), a square, and a quality tape measure. A layout line tool or marking knife helps with accuracy on initial cuts, and a simple dust collection solution can keep air clean for longer sessions.
As you accumulate projects, you’ll find that the right jigs and holds start to multiply your capabilities. A router or palm router opens up edge treatments and joinery options, while a thickness planer becomes a game-changer for working with stock of inconsistent thickness. Remember: it’s better to buy fewer high-quality items than to crowd your shop with low-quality gear that wears out quickly.
Upgrading over time
As your projects grow in complexity, plan to upgrade in stages. A higher-quality table saw with accurate alignment and a stable fence improves every cut, while a dedicated dust extractor keeps your shop cleaner and healthier. When upgrading, consider whether a tool complements your most frequent jobs—whether that’s cabinetry, furniture, or outdoor projects—and whether you already have compatible accessories and jigs to extend its usefulness. Ted’s Woodworking can help align your tool choices with project plans, ensuring your investments translate into tangible results.
Beginner to advanced project ideas
One of the best ways to grow your woodworking confidence is to pair the right project with the right plan. Simple projects reinforce technique, while intermediate builds push you to refine joinery, finish quality, and stock preparation. For inspiration and structured guidance, consider projects from Ted’s Woodworking, which are designed to scale with your growing skill set.
Simple projects
Start with a compact project that requires stock preparation, accurate crosscuts, and simple joinery. A small step stool, a basic bookshelf, or a garden planter box can be excellent first projects. They teach measurement discipline, edge finishing, and assembly workflow without overwhelming you with complex joints.
Intermediate projects
Progress to projects like a coffee table with exposed joinery, a media console with a routed edge, or a bench with a pegged through-dovetail. These tasks introduce you to more varied joinery, edge profiling, and finishing challenges, while still being manageable with a solid toolset and good plans. If you’re looking for outdoor-focused projects, you might explore seats and tables that stand up to the weather and still look refined, as guided by plan collections linked in this guide.
To see how curated plans align with outdoor-geometry projects, you can explore Adirondack designs and other outdoor comfort plans to understand how plan selections influence tool use and workflow. For example, the Adirondack DIY plans page provides a practical look at how outdoor furniture projects can justify specific jig setups and cutting sequences. Adirondack DIY plans.
The value of community resources and ongoing learning
Woodworking thrives in community. Online forums, local makerspaces, and workshop groups offer feedback, troubleshooting tips, and project ideas that help you push beyond plateaus. Regularly reviewing project plans, watching technique videos, and sharing your progress can accelerate learning and keep you motivated. A central part of building your skills is choosing projects that align with your current toolset while providing a clear path to more advanced tasks. Ted’s Woodworking is one such resource that many woodworkers rely on to grow their library of reliable plans and project pathways. If you’re curious to explore a structured plan library, consider the affiliate opportunity to access Ted’s Woodworking through the link provided below.
Ready to explore Ted’s Woodworking plans and join a broad library of projects? Click here to access Ted’s Woodworking plans.
Frequently Asked Questions
Q: What is the most important tool in a wood shop?
A:
The best tool is the one you reach for most often. More important than any single tool is a well-organized workflow that minimizes wasted motion and maximizes accuracy. A solid workbench, a reliable measuring setup, and safe storage are foundational to any successful project.
Q: How should I choose between new and used tools?
A:
Used tools can offer substantial value if they’re in good condition and maintainable. Inspect wear points, alignment, and replaceable parts before purchasing. For beginners, a blend of new essentials (safety-rated and rechargeable where appropriate) and carefully chosen used items can jump-start your shop without breaking the budget.
Q: Can I start with a small budget and still build great projects?
A:
Absolutely. Start with a core, versatile toolset and gradually add specialized instruments as your projects demand. Pairing your purchases with well-chosen plans—like those in Ted’s Woodworking—helps ensure every dollar spent translates into a meaningful project outcome.
In summary, the strategy for wood shop tools and equipment is about balancing quality, practicality, and future growth. With careful planning, affordable storage, and a steady stream of well-structured project plans, you’ll be building with confidence in no time. If you’re ready to expand your plan library and access step-by-step guides that align with your skill level, a reputable resource like Ted’s Woodworking can be a natural fit for your workshop journey. And remember to check out the linked guides for backyard sheds and outdoor furniture plans to broaden your understanding of how plans intersect with tool selection and shop layout.
Image prompt for featured image
Generate a high-resolution, photorealistic image of a well-organized wood workshop interior. Style: modern rustic with warm wood tones and natural light. Composition: wide-angle shot from a corner; foreground features a sturdy workbench with a vise, clamps, measuring tools, and a small bench-top router or sander. In the mid-ground, a pegboard wall loaded with hand tools and a power tool shelf (table saw, miter saw, drill/driver) arranged neatly. Background shows shelves with neatly stacked lumber, a dust collection unit, and ample bright lighting. Color palette: rich browns, steel gray, with blue accents on tool handles or safety gear. Mood: productive, inviting, and safe, with clear signage like “Woodworking Workshop” on the wall. Include sub-reflections of small shavings and pristine organization to convey a professional, ready-to-work atmosphere.