Why wood work for beginners matters
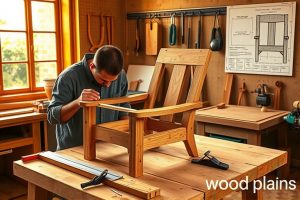
If you’re exploring wood work for beginners, you’re not alone. This hobby blends creativity with practical problem-solving, and it rewards steady practice. Starting with simple tasks builds confidence while teaching you to read a plan, measure twice, and smooth a surface until it feels like a real finish. The goal is not just to complete a project, but to develop a repeatable process you can apply to more complex builds over time.
For many people, the key is approach, not bravado. When you frame wood work for beginners as a series of tiny, achievable wins, you stay motivated and avoid common discouragements. In this guide you’ll find practical steps, recommended tools, and a pathway from your very first cut to more ambitious projects.
Throughout, you’ll see how to leverage curated resources—including structured guides such as Ted’s Woodworking PDF guide and a concise overview of instructional videos at woodworking instructional videos—to accelerate learning. Using these resources wisely helps you avoid wasted effort and keeps your momentum strong.
Gear up: tools, workspace, and safety basics
Essential tools for starting projects
Starting with the right tools makes a big difference in your early results. For wood work for beginners, a modest, well-chosen set goes further than a long shopping list of fancy gear. Key items include a sharp handsaw or basic circular saw, a square or combination square for accurate marks, a tape measure, clamps, a sanding block or power sander, chisels, and a basic drill/driver. As you complete your first projects, you’ll discover what you prefer for particular tasks—whether that’s better dust collection, more precise saw blades, or a dedicated router for edge work.
Quality matters, but so does restraint. Start with affordable, reliable tools that stay sharp and aligned. You’ll avoid frustration when the tool doesn’t fight you on simple tasks like crosscuts, miters, or fine sanding. Over time, you’ll learn which upgrades yield real gains in accuracy and finish quality.
Setting up a beginner-friendly workspace
Your workspace should feel safe and organized. A sturdy workbench with a stable vise is ideal, but even a kitchen counter called into service with a cutting mat and clamps can work for small, low-risk projects. Keep a well-lit area, a dedicated waste bin or bag, and a tool rack that places frequently used items within easy reach. The goal is to minimize rummaging; the less you waste time reaching for a tool, the more you can focus on technique and the joy of shaping wood.
Safety practices that keep you building, not bleeding
Learning wood work for beginners safely means building good habits early. Wear eye and ear protection, use push sticks or blocks for table saw tasks, secure your material before cutting, and never rush a cut. Work in a well-ventilated space, especially when finishing with stains or finishes. Take regular breaks to prevent fatigue-induced mistakes, and keep a simple checklist at hand for each project: plan, measure, cut, assemble, check alignment, sand, finish, and inspect for missed steps.
First projects that build momentum
Simple shelf or planter: get a cut, a finish, and a sense of pride
A straightforward shelf or planter box teaches essential skills: measuring accurately, making straight cuts, and assembling without stress. Start with stock of pine or poplar; these softwoods are forgiving and easy to work with. Practice laying out your marks with a square, making clean crosscuts, and clamping pieces during glue-up. A light, even finish—like a wipe-on poly or a water-based stain—helps you see your joints and edges clearly, and it protects the wood while you learn how it responds to moisture and wear.
Small box or birdhouse: learn measured accuracy and joints
Another friendly starter project is a small box or a simple birdhouse. It introduces you to mortise-and-tenon or butt joints, demonstrates the importance of 90-degree corners, and reinforces how to surface-edge pieces so the final product sits flat. Even if the box isn’t perfect, you’ll understand where alignment matters most and how to correct it on the next build.
Core skills every beginner should master
Measuring accurately and marking with care
Accurate measuring is the backbone of all woodworking. From laying out cut lines to ensuring joints meet correctly, precise measurements save material and time. Spend extra minutes on layout, use a crisp marking knife or fine pencil, and verify each dimension from multiple references. This discipline translates beyond your first projects into more complex builds where variances compound quickly.
Basic cuts: ripping, crosscutting, and bevels
Good cuts are the visible proof of growing competence. Practice safe, controlled ripping with a guide for long boards, then master accurate crosscuts using a miter gauge. For bevels, set the saw’s angle exactly and test with a scrap piece before committing to your main stock. The smoother your cuts, the less you’ll spend sanding and the more confident you’ll be when fitting pieces together.
Joinery basics: butt joints, dados, and dado-and-edge work
Joinery is where the furniture-like quality of your projects begins. Start with simple butt joints reinforced with wood glue and clamps. If a hint of complexity appeals, try adding a small dado to create a shelf support or a standing panel. Focus on square, tight-fitting joints and avoid forcing pieces together. Each successful joint builds your sense of control and reduces future frustration.
Sanding, finishing, and protection
Sanding is where your project becomes smooth and ready to reveal its character. Start with a grits progression (rough to fine), and spend time on edges and corners to remove stray fibers. Finishing adds durability and adds depth to the wood grain. Test finishes on scrap before applying to the final piece, and apply thin, even coats with light sanding between coats. Whether you choose a natural oil, shellac, stain, or polyurethane, the goal is a durable, even surface that enhances rather than hides your craftsmanship.
How to learn efficiently: resources and strategies
Structured courses vs. free tutorials
Learning wood work for beginners benefits from a structured approach. A well-designed course can guide you through a logical progression, ensuring you’re not skipping essential fundamentals. Free tutorials are excellent for supplementing your learning, but the curations behind organized programs often save you time by focusing on practical steps and common pitfalls. Combining both can be powerful: start with a clear plan from a respected program, then fill gaps with targeted free content, and always practice with purpose rather than simply watching.
Evaluating quality and pacing learning
When evaluating learning resources, look for clear demonstrations, safety emphasis, and projects that match your skill level. A good beginner path should provide measurable milestones, such as completing a specific project within a week or two, rather than an endless stream of quick hits. Pacing matters—if a resource makes you feel overwhelmed, pause and revisit the fundamentals, perhaps with a simpler project to rebuild confidence.
Ted’s Woodworking and other trusted resources
Why beginners consider Ted’s Woodworking as a resource
For many newcomers to wood work for beginners, a comprehensive resource can make the difference between months of trial-and-error and a focused, efficient path to results. Ted’s Woodworking is frequently cited as a practical collection of plans and guidance that can help you build a solid skill foundation. While it’s just one option among many, its well-structured plans often appeal to beginners who want clear measurements, cut lists, and step-by-step assembly guidance.
If you’re evaluating a resource like Ted’s Woodworking, consider how its plans align with your first projects and whether you prefer printed PDFs, diagrams, or video walkthroughs. You can explore further details and related material here: Ted’s Woodworking PDF guide.
How to use plans and PDFs effectively
Plans are most effective when you tailor them to your space and your tools. Start by reproducing the plan in a simple, accurate way: check the cut lists, map out the sequence, and mark your stock carefully. Keep a calendar or project log so you can track what worked, what didn’t, and what you’d do differently next time. If you’re seeking a curated compilation of projects and guided instructions, you might also find value in guided video content that complements paper plans—see the companion resource on instructional videos linked above.
A practical 4-week plan for steady progress
Week 1: safety, setup, and your first small project
In week one, establish your workspace, gather basic tools, and complete a simple project like a small shelf or planter. Practice measuring twice and cutting once. Focus on clamping securely and following a straightforward plan. Take photos of your setup and the initial pieces so you can compare against your final product later. If you want a deeper dive into a structured plan, check out the recommended PDFs and videos above to guide week-by-week progress.
Week 2: refine cuts, assemble, and finish
Week two shifts emphasis to accurate assembly and a basic finish. Embrace a methodical approach: dry-fit first, then glue and clamp, then surface-sand. Apply your chosen finish in thin coats, allowing proper drying time between applications. As you complete this phase, you’ll notice that your joints align cleaner, and your edges are smoother—hallmarks of growing competency in wood work for beginners.
Week 3: tackle improved joinery and a medium project
With confidence rising, try a slightly more complex project that introduces a different joint or a small dado. This step is about expanding your toolkit without abandoning the comfort of a guided plan. Use the same disciplined workflow: measure, mark, cut, assemble, sand, finish. If you feel tempted to jump ahead, revisit a simpler piece to reinforce technique before attempting heavier work.
Week 4: finalize with professional finishing touches
By week four, your goal is to deliver a polished piece with thoughtful finishing. Sand progressively to a silky smooth profile, seal edges, and apply a finish that protects the wood and highlights its natural character. This is where your project begins to look like a finished piece rather than a practice item, and that sense of accomplishment fuels your next project.
Common mistakes to avoid and how to recover
Even experienced wood workers make missteps; the key is to recognize patterns and recover quickly. Common beginner errors include underestimating stock thickness, rushing through joints, and skipping safety steps. If you notice a wobble in a shelf or a misaligned corner, don’t pretend it isn’t there—adjust your approach, re-cut if necessary, and use scrap stock to rehearse the joint before applying glue to the final piece. Learning to pause, assess, and retry is a core skill in any ambitious wood work for beginners journey.
FAQs
- What is the best wood for beginners? Softwoods like pine or poplar are typically easiest to start with due to their forgiving nature and cost.
- How many tools do I need to begin? A focused starter kit with a saw, square, clamps, drill, and sander will cover most beginner projects.
- Are plans essential? Plans help prevent guesswork; they’re especially useful when you’re learning a new joint or technique.
- Where can I find reliable projects? Start with guided PDFs and instructional videos to maintain a consistent learning curve, as highlighted in the resources above.
Conclusion
Wood work for beginners is a journey of small, repeatable wins that compound into real capability. By starting with essential tools, a dedicated workspace, and safety-first habits, you set yourself up for success from day one. Pairing hands-on practice with structured resources—the kind of curated guidance found in Ted’s Woodworking and related instructional material—can dramatically accelerate your learning curve. Remember, the goal isn’t to rush to complex builds; it’s to build a foundation you can trust and expand upon, project after project. If you’re curious about a comprehensive plan that organizes your learning journey, consider exploring the linked resources, including the Ted’s Woodworking PDFs and the instructional video guide, and check out the affiliated program for additional ideas and templates that can help you stay on track.
Ready to dive in? You can explore further with this trusted resource: Ted’s Woodworking, which provides structured plans and ideas to complement your growing skill set. As you progress, revisit the two internal resources for enhanced understanding and a steady, confident path forward: Ted’s Woodworking PDF guide and Woodworking instructional videos guide.