Introduction to wood working tricks
Wood working tricks are simple, repeatable methods that elevate the quality, speed, and safety of every project. These tricks aren’t about shortcuts; they are practical techniques that help you achieve precise measurements, cleaner joints, and a better finish with less fatigue. When you start thinking about wood working tricks as part of a daily routine, your projects will look more professional and feel more rewarding. In this guide, you’ll discover approachable strategies to sharpen your craft, along with trusted resources that can broaden your toolbox—without overwhelming you with jargon or complexity.
If you’re ready to blend solid techniques with reliable plans, you’ll find value in a curated collection of patterns and projects that align with real-world shop practice. For readers who want to see these ideas in action, a practical outdoor seating project can be a perfect starting point for applying new wood working tricks to a tangible result.
Why mastering wood working tricks matters
Mastering wood working tricks translates to higher precision, stronger joints, and a safer work environment. When you practice layout tricks, you reduce the risk of ruined boards and wasted materials. Clean, accurate cuts minimize the need for heavy sanding and rework, which saves time and money in the long run. Furthermore, refined finishing techniques protect your work from moisture, wear, and visible wear over time. The outcome is not just a beautiful piece, but something that endures and performs as intended. This is the essence of true wood working tricks: consistent results through careful preparation and execution.
Essential setup and safety
Workspace and lighting
Your workspace shapes your ability to apply wood working tricks consistently. A well-lit, uncluttered bench makes layout lines obvious and helps you align workpieces with confidence. Position your main workbench near a window or use daylight-balanced bulbs to avoid color distortion when you’re finishing wood. Good lighting also reduces eye strain, which is essential when you’re focusing on small details like dovetail pins or precise edge routes.
Safety gear and practices
Safety is a cornerstone of good wood working tricks. Always wear eye protection, hearing protection when using loud tools, and a dust mask for fine particles. Keep a clean shop—clutter invites slips, misalignments, and miscuts. A simple rule of thumb is to remove waste wood promptly and secure loose clothing or jewelry that could engage a blade or spinning parts. By building safety into your routine, you protect yourself and your ongoing ability to perform precise work that your future projects will depend on.
Core techniques and tricks
Measuring precision and layout tricks
Precision starts with layout. Invest in a reliable combination square, a marking knife, and a sharp pencil, then develop a habit of double-checking before you cut. A common wood working trick is to scribe a layout line first, then bring in the final cut after confirming the reference surfaces. If you’re working with sheet goods, score the cut line with a utility knife before guiding a plywood blade—this reduces tear-out and gives you a cleaner final edge. Keep your tools sharp and you’ll notice that the need for forcing a cut diminishes, which is a direct win for accuracy and safety.
Sawing tricks for clean cuts
Clean cuts are the backbone of professional-feeling results. When using a table saw, keep the blade sharp, aligned, and adjusted to the proper height. A common wood working trick is to support long stock with outfeed tables or roller stands, ensuring the piece stays flat as it travels through the blade. For hand saws, harness the correct stance, let the saw do the work, and maintain a steady cadence so you don’t chip or drift off your line. Practicing controlled passes rather than aggressive, single-pass cuts helps you achieve square, consistent results that you can trust every time.
Joinery tricks that strengthen projects
Joinery quality makes or breaks a project’s durability and feel. A few practical tricks include dry-fitting joints before gluing, marking test pieces to confirm fit, and using clamps to maintain even pressure along the joint line. For beginners, simple butt joints reinforced with glue and fasteners can be a stepping stone to more advanced joinery; for seasoned hobbyists, refined techniques like box joints or through-dasas joints can dramatically improve aesthetics and strength. The key is to plan the joint type in advance and verify fit at multiple stages of the build.
Sanding and finishing tricks for longevity
Polished finish is a result of careful sanding progression and careful surface preparation. Start with a coarse grit to remove marks, then move through progressively finer grits to achieve a smooth surface. A common trick is to wipe the dust between grits and finish with a final pass using a sanding block for flat, even results. When applying finishes, test on scrap pieces first to ensure the color, sheen, and penetration align with your intent. Small, deliberate strokes in the direction of the grain reduce swirl marks and reveal the wood’s natural beauty rather than masking it with inconsistent coats.
Tools that unlock pro results
Balancing hand tools and power tools
Effective wood working tricks often hinge on tool choice. Power tools accelerate tasks and can improve consistency, but a disciplined hand-tool approach remains essential for fine work. Start with a solid plane, a sharp chisel, and a dependable saw (back saw or tenon saw for precision cuts). Introduce power tools—drills, routers, and a compact circular saw—when you’re ready to tackle larger pieces or repetitive cuts. The best routines blend both worlds: use hand tools to achieve precise tolerances where it counts and rely on power tools for speed on the bulk tasks.
Sharpening tricks and maintenance
Sharp tools are the quickest path to clean edges and accurate cuts. A consistent sharpening routine keeps blades within a hair of razor sharp and reduces tear-out. A simple trick is to set aside a dedicated sharpening station with a stable stone or honing guide, and to establish a routine: every project starts with a quick check and touch-up of edges. Regular maintenance also extends tool life and helps you keep your focus on the work rather than on tool issues.
Project ideas to practice wood working tricks
Outdoor seating project inspired by patio chair plans
Applying wood working tricks to outdoor furniture is a practical way to see results quickly. A patio chair plan, such as the one linked in this article, offers a clear set of components, joinery needs, and finishing considerations that are perfect for refining layout, cutting, and assembly skills. When you work on a simple outdoor seating project, you practice accuracy on long rails, secure joints, and a finish that withstands the elements. This is a real-world test bed for your tricks in measuring, cutting, joining, and finishing. If you want a concrete example of how to apply these ideas, check out the ‘Patio chair plan’ for a guided project you can build over a weekend.
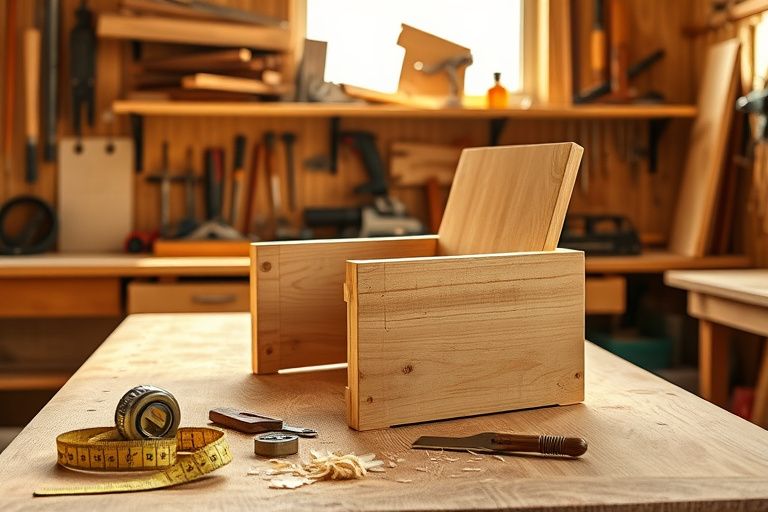
Small box or jewelry case to test joints
After you’ve built confidence with larger pieces, a small project—like a jewelry box—lets you focus on precise joints, accurate miters, and clean finishing. The compact size is forgiving, yet the stakes for accuracy are high because any misalignment is easy to spot on a small surface. Use this project to experiment with dovetails or finger joints, test-edge treatments, and your finish technique. It’s a perfect way to translate wood working tricks into a tangible, satisfying result without committing a large amount of material at once.
Learn more with Ted’s Woodworking
To deepen your library of patterns, layouts, and project ideas, many woodworkers turn to a curated resource like Ted’s Woodworking. This collection offers a broad range of plans that can complement the tricks you’ve learned here, helping you choose projects that fit your space, budget, and skill level. If you’re ready to broaden your horizons with structured plans and a vast catalog of designs, you can explore Ted’s Woodworking through this offering: Ted’s Woodworking.
In addition, learning how Ted’s Woodworking fits into a well-rounded toolkit is helped by exploring related guidance on precision tools in a complementary resource: Fine carpentry tools: the ultimate guide. This guide illustrates how a well-chosen set of tools and patterns can boost your wood working tricks while keeping projects practical and enjoyable.
Real-world tips and resources
Beyond the core techniques, real-world tips include keeping a well-organized shop, labeling scrap bins for different stock thicknesses, and building a small reference library of joint types, finishes, and grain orientations. The purpose is to create a repeatable workflow that makes wood working tricks feel like second nature. Consistency matters, and over time your muscle memory for layout lines, blade alignment, and finish application will improve dramatically. Use the internal resources above to explore ideas that are relevant to your space and style, and remember that every new technique you adopt increases your confidence and craftsmanship.
Conclusion
Wood working tricks are not a secret code but a practical mindset: plan carefully, measure twice, cut once, and finish with thought. By combining solid fundamental skills with a library of proven plans and patterns, you’ll see your projects improve in quality, speed, and enjoyment. Whether you’re starting with a simple outdoor seating project or advancing toward complex joinery, the discipline to practice these tricks will pay dividends for years to come. Remember to balance hands-on practice with thoughtful learning resources, and don’t hesitate to explore curated plans like Ted’s Woodworking to accelerate your progress while staying aligned with your goals. As you build confidence, you’ll find that wood working tricks are a blend of technique, patience, and a little creative insight that makes each piece uniquely yours.