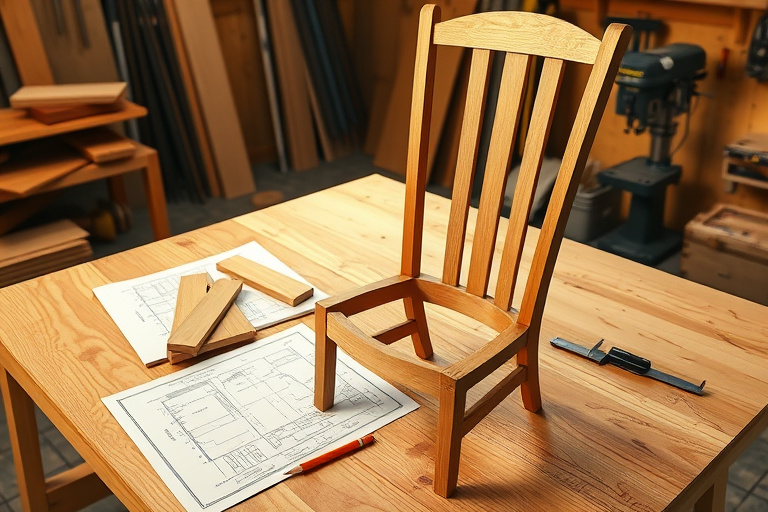
Building a wooden chair from scratch is a rewarding blend of art and engineering. Whether you’re hoping to furnish a dining room, modernize a living space, or craft a comfortable seating option for a cozy kitchen nook, starting with wooden chair plans blueprints sets you up for success. Detailed plans keep your measurements clean, your joints tight, and your finish looking professional. In this guide, we’ll explore how to choose, interpret, and adapt chair blueprints while keeping the process approachable for hobbyists and budding woodworkers alike.
Before we dive in, consider that investing in high-quality blueprints often translates into less waste, faster build times, and better ergonomics. If you’re looking for a curated collection of reliable plans, you’ll find that credible woodworking programs offer a broad range of chair designs, along with step-by-step guidance. For many builders, a reputable resource like Ted’s Woodworking provides a library of blueprints and variations that can expand your project ideas without overwhelming you. Exploring a trusted catalog can save time and help you compare different back styles, joinery options, and seating radii as you plan your project.
Why wooden chair plans blueprints matter
Blueprints act as your roadmap. They translate an idea into precise measurements, cut lists, and assembly steps so you can reproduce your chair consistently. Here are two core reasons this approach matters when building with wooden chair plans blueprints in mind:
- Precision and waste reduction. When you have a clearly defined cut list, you minimize scrap and maximize yield from your stock. This is especially valuable for hobbyists who stock up on a particular wood type and want to optimize every board foot.
- Ergonomics and comfort. Good blueprints include seat height, knee clearance, back angle, and armrest placement. These details ensure your chair isn’t just attractive, but comfortable during long sits or dinner conversations.
In practice, you’ll often see chair designs that vary in back styles, leg geometries, and joinery. For beginners, a well-drawn blueprint is a safety net that guides you through rough-cutting, shaping, and finishing without guessing or improvising joinery. A robust plan also helps you communicate your vision to others who may be helping with the build, whether you’re following a pattern for a dining chair or a classic Windsor style.
How to pick the right chair plans
Choosing the right plan starts with a few honest questions about your space, toolset, and level of patience for a multi-day project. Here are practical steps to select the best wooden chair plans blueprints for your workshop:
- Consider wood species and stock. Some chair designs look stunning with oak or cherry, while others lean toward softer pine or poplar for ease of cutting and shaping. Your plan should specify stock dimensions and recommended species so you can attach a realistic cut list to your shopping list.
- Assess skill level and complexity. If you’re new to woodworking, start with a simple, well-documented plan that uses standard joints and straightforward assembly. As you gain confidence, you can tackle more complex designs and experiment with decorative details.
- Review the cut list and hardware needs. A comprehensive blueprint will include each part’s length, width, thickness, and the number of pieces. It should also note hardware like screws, dowels, or corner braces and any special tools you’ll need.
To broaden your perspective on chair design patterns and construction methods, consider exploring the chair template and pattern resources that many woodworkers rely on. For a detailed discussion of choosing, using, and building with patterns, visit this guide: wood chair templates.
A beginner-friendly workflow
Adopting a repeatable workflow keeps the process enjoyable and predictable. Below is a practical sequence that aligns well with wooden chair plans blueprints and helps you stay organized from start to finish:
- Define the design and take measurements. Start by noting your table or dining room dimensions, chair spacing, and preferred seat height. A standard dining chair seat is often around 17 to 19 inches high, but you’ll want to tailor this to your table and guests.
- Gather materials and create a cut-list. Translate the blueprint into a stock order, confirming board width, thickness, and length for each component. Double-check grain direction for strength and aesthetics.
- Rough cut and joinery basics. Rough-cut components slightly oversized, then refine with joinery such as mortise-and-tenon, dowels, or doweled-edge joints depending on the plan. Maintain square edges and consistent thickness to ensure clean assembly.
- Assembly, sanding, and finishing. Dry-fit parts before glue-up to verify alignment. Use clamps to hold pieces in place, then apply a smooth, even finish. Sand progressively from coarse to fine grits, and consider a protective finish that enhances durability for dining-room use.
If you’re curious about how to adapt patterns and templates while you work, the chair template guide linked above can be a helpful companion as you refine your build. It’s also worth noting how a broader library of patterns can inform your own customizations without compromising the structural integrity defined by the blueprint.
Essential tools and safety
A solid toolset and a safe workspace make all the difference when translating wooden chair plans blueprints into a finished chair. For beginners, focus on a core set of hand tools and gradually expand as you gain confidence.
- Hand tools for beginners. A sharp backsaw, block plane, chisels, square, measuring tape, and a marking knife are the essentials for precise shaping and joinery. A few high-quality squares and a marking gauge can dramatically improve alignment and accuracy.
- Shop safety and setup. Establish a clean, well-lit workspace with proper clamping, dust collection, and PPE. Secure your stock to a stable workbench, and practice safe-handling techniques when cutting, sanding, or routing. If you’re starting out, you may want to consult a practical guide such as mastering small wood tools for practical tool use and beginner-friendly approaches.
As your tool collection grows, you’ll appreciate the value of thoughtfully chosen tools that align with your chosen chair plan. For a broader discussion on tool basics for beginners and beyond, this resource offers a thorough overview that complements your project work: mastering small wood tools.
How Ted’s Woodworking fits in
If you’re exploring a reliable way to access a wide range of chair plans and blueprints, Ted’s Woodworking offers a curated library of woodworking plans, including various wooden chair designs. The platform often features detailed measurements, material lists, and step-by-step assembly instructions, which can help you stay aligned with your wooden chair plans blueprints without reinventing the wheel. While exploring these resources, keep in mind that the exact plan you choose should match your skill level and shop capabilities. If you’re ready to explore a broad collection of chair designs and variations, you can use the official affiliate link here: Ted’s Woodworking.
Beyond raw blueprints, Ted’s Woodworking often provides guidance on project sequencing, material substitution, and finishing options that can help you tailor a plan to your available stock and climate. For many hobbyists, this broader catalog serves as a source of inspiration and learning as you master woodworking patterns and joinery techniques while keeping the core blueprint intact.
Variations and customization ideas
One of the strengths of chair blueprints is their ability to be adapted to different aesthetics, materials, and living spaces. Here are a few ideas to customize a plan while preserving the structural integrity defined by the blueprint:
- Back styles. A ladder-back, an arched-back, or a curved slat back each convey a distinct look. Align your back design with the rest of your room’s decor and the seat height that best suits your dining table and typical guests.
- Leg and rail profiles. Turned legs, square-box legs, or tapered variants can change the chair’s personality. Ensure joinery remains robust, regardless of profile, to handle daily use.
- Seat options and materials. You can choose solid wood slats for a rustic feel, or a well-padded seat for added comfort. If you opt for padding, incorporate an easily replaceable cushion system to extend the life of your chair.
- Finishes and aging techniques. Consider oil finishes for warm color depth and easier maintenance, or a polyurethane coat for higher durability in busy dining spaces. Always sand between coats and test finish on scrap before applying to the final piece.
Remember to verify that any customization remains compatible with the blueprint’s joinery and load-bearing requirements. Small changes can have large effects on stability, so take time to re-check measurements and fit as you adjust the design.
Maintenance, care, and longevity
Once your chair is built, proper care ensures it remains a cherished piece for years. A few routine practices can extend its life dramatically:
- Regular cleaning and dust removal. Wipe with a soft cloth to prevent surface scratches. Avoid abrasive cleaners that can wear away finishes.
- Protect the finish from moisture and heat. Use protective pads under legs on hard flooring and avoid placing hot items directly on the armrests or seat surface.
- Periodic re-coating or touch-ups. Depending on use, reapply a compatible finish every few years to maintain color and luster. Light sanding and a fresh coat can refresh an old chair without changing its character.
In practice, the longevity of your chair also depends on the quality of joinery and the rigidity of the frame. A solid, well-fitted assembly will resist common issues like loosening joints and creaking over time. If you ever want more ideas on how to care for and preserve wooden projects, the linked resources provide guidance that complements your plan-focused approach.
Maintenance, care, and longevity
Consistency in care is the final piece of the puzzle for any chair project. Treat your build as a long-term investment—especially if you’re sharing meals, hosting guests, or using the chair in daily life. A well-planned process, combined with careful finishing, will keep your chair feeling sturdy and looking beautiful through many meals and memories.
FAQs
- Do I need special tools to build wooden chair plans? Most beginner-friendly plans rely on standard tools you’ll already own or can rent, such as a saw, drill, clamps, and a palm sander. As you progress, you may add more specialized tools, but you can complete many chair projects with a solid baseline toolkit.
- How do I customize a chair plan without compromising strength? Make incremental changes and re-check joinery and weight distribution. If you’re unsure, test a small, similar pattern in scrap wood first before committing to the full build.
- Where can I find additional patterns and variations? Consider reputable plan libraries and pattern guides that focus on chair design. The internal chair template guide mentioned earlier is a useful starting point for understanding pattern options without straying from sound engineering principles.
Conclusion
Building a chair from wooden chair plans blueprints is a precise, satisfying craft that rewards careful planning, accurate execution, and thoughtful finishing. By selecting the right plan, following a beginner-friendly workflow, and leveraging a curated resource like Ted’s Woodworking for additional blueprints and variations, you can create seating that’s not only attractive but built to last. Keep your goals aligned with your tools and stock, refer to reliable pattern guides as needed, and approach each step with a mindset of accuracy and pride in your work. With persistence and patience, you’ll discover that the journey from rough-cut wood to a finished chair is as enjoyable as the final piece itself.