Whether you are a weekend hobbyist or a full-time woodworker, woodworking blueprints are the backbone of your best builds. They translate ideas into precise, repeatable steps, helping you avoid miscuts, wasted material, and delays. In this guide, you will learn how to read, interpret, and apply blueprints to real projects, plus where to find reliable sources that expand your design library without overwhelming your shop time.
Blueprints come in several forms—from straightforward plans with measurements to more detailed construction drawings that include exploded views, hardware lists, and finish notes. The goal is not to memorize every number but to understand the logic of a project: its intended size, how pieces fit together, what tools and materials are needed, and how to verify fit before you cut. As you become comfortable with the language of blueprints, your projects will become more predictable, your setups safer, and your outcomes more consistent.
For many woodworkers, a curated collection of blueprints acts like a curriculum. That is where trusted resources such as Ted’s Woodworking can help you expand your library with comprehensive plans, step-by-step instructions, and optimization tips. If you are exploring the practical side of blueprint-based building, you may also enjoy additional guidance in our recommended DIY resources. For a more project-focused approach, see DIY woodworking kits — a practical guide to start crafting at home with Ted’s Woodworking and DIY wood projects for home — the ultimate practical guide to beautiful functional builds.
Understanding woodworking blueprints
What they are
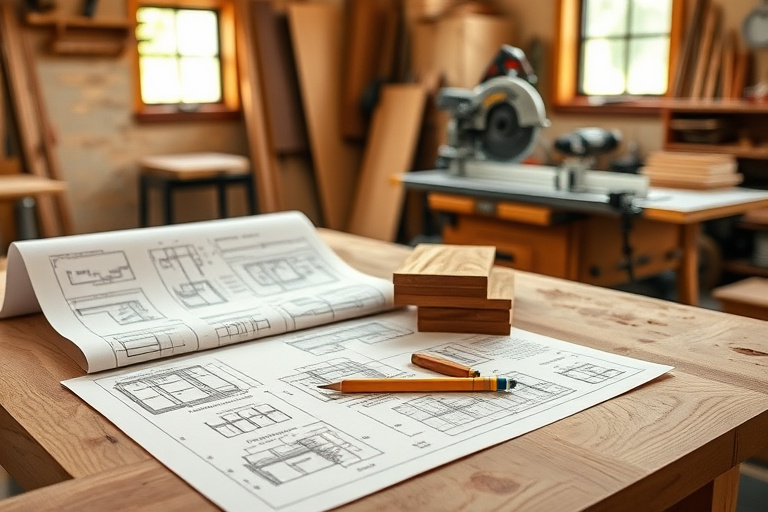
A woodworking blueprint is more than a pretty drawing. It is a compact package of information that communicates size, shape, material, and assembly sequence. You will typically encounter several components:
- Plans or patterns that show the overall shape and dimensions of each component
- Cut lists that specify board feet, thicknesses, and quantities
- Hardware and finish notes that guide you through hardware choices, joinery, and surface treatment
- Exploded views or assembly diagrams that reveal how parts fit together
When you look at woodworking blueprints, you are not just seeing numbers; you are following a project’s logic from raw material to final piece. Even if you modify dimensions to fit a space or adjust a style, the blueprint remains a reliable starting point for accuracy and proportion.
Types and formats
Blueprints come in several flavors, all useful in different contexts. Some are simple and perfect for beginners who want a quick build with minimal setup. Others are more complex and provide a full assembly sequence, hardware schedules, and tolerances that matter when you are building to a specific standard or replicating a design. Knowing the difference helps you select the right blueprint for your goals, your available tools, and your space.
As you accumulate expertise, your blueprint library should cover a mix of project types — small functional pieces like a benchtop tray up to larger items such as a dining chair or bookcase. A diversified collection keeps your skills sharp and your shop active, while also giving you a reliable path to repeatable results in less time.
Reading and interpreting blueprints
Symbols, scales, and dimensions
Reading a blueprint begins with understanding the language behind the lines. You will encounter scales that convert a drawing into real-world sizes, such as 1/4 inch equals 1 foot or 1:2 to indicate a drawing is half the size of the actual piece. Dimensions tell you exact lengths, widths, and depths for each component. It helps to know common woodworking symbols for common joints, such as mortises, tenons, dadoes, and rabbets, as well as material notations like softwood versus hardwood.
When you see a dimension on a blueprint, double-check how it applies to the actual assembly. Some drawings show finished dimensions, others show nominal sizes before planing. If you see a note such as “finished width inches after sanding,” you will want to set your blades and planers to account for stock that will lose material in finishing. The goal is to maintain a consistent target size after the piece emerges from your shop, not just in the moment of cutting.
Materials and cut lists
Cut lists translate the blueprint into actionable steps. They enumerate how many boards you need, their thickness, width, and length. A well-prepared cut list minimizes waste and makes stock preparation more efficient. As you gain experience, you will start cross-referencing the cut list with your available stock and the grain direction to maximize strength and aesthetics. If you are working from a new blueprint, it is wise to sort your stock by thickness and width before you begin cutting. This small prep work often saves hours in the shop and reduces the risk of mistakes.
A practical workflow from blueprint to build
Planning and layout
Turn a blueprint into a real build with a simple, repeatable workflow. Start by confirming the project size, space constraints, and the tools at your disposal. Then, translate the blueprint into a layout plan for your workshop. A good layout considers stock sizes, cut parts, and assembly order. You may draft a quick floor plan on paper or use a simple shop software tool, but the key is to visualize the sequence from rough cut to final assembly.
Next, verify the cut list against your stock. If you find you are short on a specific dimension, you can adjust planed thickness or length modestly while preserving overall proportions. This is where woodworking blueprints become a practical guide rather than a rigid prescription. Flexibility, when used carefully, helps you complete projects without needing a special trip to the store.
Prototyping and fitting
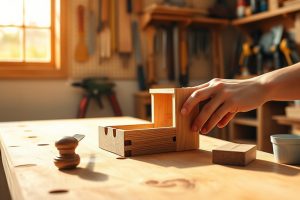
Prototyping a small portion of a project is a smart move. For example, you can first assemble a dry-fit of a tabletop assembly or a mortise-and-tenon joint using scrap stock. This trial helps you confirm tolerances, verify alignment, and identify potential interference before you commit to all the components. The goal is to catch discrepancies early, so your final piece has a precise fit and finish. Prototyping is a practical extension of blueprint literacy — it transforms abstract measurements into tangible confidence in your workmanship.
Keep your workspace organized. Label cut pieces and use a dedicated assembly area for test fits. Clean, accurate space reduces the risk of misreading a measurement or misplacing a component. When your blueprint-based plan is supported by disciplined shop practices, your output quality rises noticeably over time.
Project ideas to practice
Simple bedside table
A compact bedside table is an ideal starting point for building confidence with woodworking blueprints. It typically involves straight-lined components, standard joinery, and a modest finish that lets the wood grain shine. Work from a blueprint that includes a clear cut list, a straightforward joinery method (such as box joints or dowel joints), and a finishing schedule. As you complete this project, you will quickly learn how to interpret dimension calls, how to layout mortises, and how to align legs for a square, rigid result.
Compact bookshelf
Next, try a small bookshelf with evenly spaced shelves. This project introduces you to longer boards, shelf supports, and the importance of keeping verticals square. The blueprint will show you spacing, shelf thickness, and hardware locations. If space is a premium, choose a slender design from your blueprint library and adapt it to your wall dimensions. A bookshelf is also an excellent canvas for modifications, such as hidden drawer spaces or decorative trim, which deepen your understanding of how woodworking blueprints translate into distinctive furniture pieces.
Remember, the blueprint is a guide for form and function, not a prison. You can adjust finishes, hardware, or proportions to suit your taste while preserving the core geometry and strength of the design.
Resources, tools, and sources
Building with confidence comes from combining reliable blueprints with the right tools and a curated library of plans. While you gradually expand your catalog, you can rely on trusted sources to supply well-structured blueprints, time-tested joinery techniques, and practical workflow advice. If you are exploring broad options for plans and patterns, consider a comprehensive library such as Ted’s Woodworking as a core part of your toolkit. This resource is designed to supplement your own blueprint reading with additional project templates, material lists, and step-by-step instructions, all aligned with common workshop practices.
In addition, practical reading and application strategies can be reinforced by targeted guides. For instance, you may want to explore DIY woodworking kits — a practical guide to start crafting at home with Ted’s Woodworking to see how blueprint-driven kits can accelerate your learning curve, and DIY wood projects for home — the ultimate practical guide to beautiful functional builds for project ideas that pair with blueprint plans. These resources complement your own practice, offering new angles on how woodworking blueprints can shape the way you work.
As you broaden your toolkit, keep in mind that good blueprints also guide you toward efficient shop setup. Prioritize plans that provide clear cut lists, straightforward joinery, and a sensible assembly sequence. A well-chosen blueprint library reduces decision fatigue and keeps you focused on craftsmanship rather than hunting for numbers.
Getting started today
Quick-start checklist
- Define a small project you want to complete this week, such as a compact bookshelf or a simple stool.
- Choose a blueprint with a clear cut list and assembly sequence. Verify that the dimensions fit your space and stock availability.
- Gather materials and tools, organizing stock by thickness and width to speed up the cutting process.
- Layout the project on a large bench, make a dry-fit assembly, and adjust as necessary before final assembly.
- Finish with your preferred method, ensuring protection and beauty of the wood grain.
By starting with a well-structured blueprint, you create a reliable path from idea to finished piece. Over time, your ability to interpret and adjust blueprints will speed up your builds and improve quality, even when you tackle more complex projects. If you are seeking a broader library of plans to expand your horizons, remember that a dedicated resource such as Ted’s Woodworking can be a valuable companion to your practice. It blends detailed project plans with practical tips that align with common woodworking workflows and joinery conventions, helping you translate blueprint reading into tangible results in your shop.
For ongoing inspiration and ideas, you can also explore the two internal references that accompany this guide. They offer practical, hands-on guidance on starting with projects that use blueprint thinking and building your confidence through well-documented plans. The combination of solid blueprints, a focused practice routine, and the right tools can turn a sporadic hobby into a steady, fulfilling woodworking journey.