Woodworking box plans are the backbone of any project that aims to combine form, function, and sturdy construction. Whether you’re making a small jewelry box, a keepsake chest, or a modular organizer, solid plans guide your cuts, joints, and finishes. In this guide, we’ll explore how to find, read, and apply woodworking box plans so you can build with confidence. A well-thought-out set of plans helps you avoid costly mistakes, optimize material usage, and end up with pieces that fit together neatly and look polished on display.
When you search for woodworking box plans, you’re essentially seeking a reliable blueprint that controls dimensions, proportions, and the sequence of operations. It’s not just about the cut list; it’s about understanding how each piece relates to the next, ensuring each joint carries the load where it’s needed, and delivering a finish that will stand up to years of daily use. The best plans become a repeatable framework you can reuse for a variety of box projects, from simple keepsake boxes to more intricate storage chests.
To gain a broader perspective on planning and tool selection, check Ted McGrath’s approach to woodworking projects and how he emphasizes a repeatable process to maximize results. This mindset aligns well with developing a library of woodworking box plans that you can customize as your skills grow.
As you sharpen your workshop routine, you may want to read Master Your Woodworking Workshop: Essential Tips for workflow strategies that dovetail with a robust box plan catalog. The tips there can help you organize your shop so you can execute box projects with fewer interruptions and more consistent results.
What are woodworking box plans?
Woodworking box plans are a curated set of drawings, dimensions, and assembly notes that tell you how to cut pieces, join them, and finish the product. They may include exploded views, cut lists, templates, and finishing instructions. Plans can be detailed for specific joints like dovetails or box joints, or they can be more general for families of boxes. The more comprehensive the plan, the easier it is to reproduce the project with different wood species or dimensions.
Along with measurements, effective woodworking box plans typically provide guidance on grain orientation, hardware options (hinges, magnets, latches), and recommended finishes. A strong plan adapts to your shop’s capabilities, whether you’re using traditional hand tools or modern powered equipment. If you’re collecting plans for future builds, look for clear diagrams and a material list that includes approximate board feet and sheet goods requirements so you can price out a project before you start.
Key features to look for in woodworking box plans
Choosing the right box plans means prioritizing clarity, accuracy, and practical guidance. Here are some essential features to evaluate:
Scale, dimensions, and tolerance
Good plans provide exact dimensions for each component and note where tolerances matter most. Boxes rely on precise sides, bottoms, and lids to sit flush and function smoothly. If a plan shows a box joint or dovetail joint, it should indicate the number of pins and tails, the thickness of stock, and any allowance for finish thickness.
Joinery, materials, and finish compatibility
Different projects call for different joints and materials. Some plans highlight traditional joinery like box joints or finger joints, while others focus on simpler butt joints reinforced with dados or rabbets. The choice of wood species (hardwood vs softwood), panel thickness, and the type of finish (oil, varnish, wax) influence the final appearance and durability. Look for notes that connect the joinery to chosen materials and finish options.
Documentation: cut lists, templates, and exploded views
Clear cut lists save time and material costs. Templates or pattern drawings help if you’re making multiple boxes with the same profile. An exploded view can be invaluable when you’re trying to comprehend how a lid, base, and sides come together, especially if you’re new to box construction.
Choosing the right plans for your experience level
Not every project is appropriate for a novice, so match plans to your skill level. If you’re just starting, you’ll benefit from box plans that emphasize straightforward jointing, simple hardware, and minimal risk of miscut stock.
Starter projects and beginner-friendly joints
Beginner plans often feature simple box joints or rabbet joints with straightforward assembly. They may also include a basic bottom panel and a lid with a basic hinge. These projects teach essential measuring, layout, and finishing skills without overwhelming you with exotic joinery or complex templates.
Intermediate projects with decorative inlays or special hardware
As you gain confidence, you can tackle plans that incorporate decorative elements such as inlays, contrasting woods, or decorative hardware. These projects provide opportunities to practice precise marking, alignment, and finishing techniques, expanding your toolbox of skills while still staying within a manageable scope.
Advanced designs: complex joinery and precision tolerances
Advanced box plans may include dovetail joints, finger joints, or stopped dadoes with exacting tolerances. They often require more precise tooling, careful clamping strategies, and a higher level of patience. If you pursue these, pair the plans with practice pieces so you can refine your technique before committing to a cherished project.
Tools, materials, and workspace setup
Your toolkit will influence how you approach woodworking box plans. Essential tools for most beginner and intermediate projects include a good measuring setup, a sharp set of chisels, a backsaw or miter box, a power drill, a router with a straight bit for dados, a scroll or jig saw if you plan to cut curves, clamps in multiple sizes, and a sanding station or block plane for finishing touches. Stock choices often begin with softwoods like pine or spruce for practice, moving to hardwoods such as maple, cherry, or walnut for a more refined look and longer-lasting joints. Always factor in finish product requirements and the environmental conditions of your workspace, especially humidity, which can affect wood movement and joint stability.
To make the most of box plans, organize your shop with an efficient workflow. Create a dedicated area for layout and marking, a separate space for cutting, and a finishing station where you can apply finishes evenly. A tidy workspace helps you follow plans more accurately and reduces the risk of misreading measurements or mixing up components.
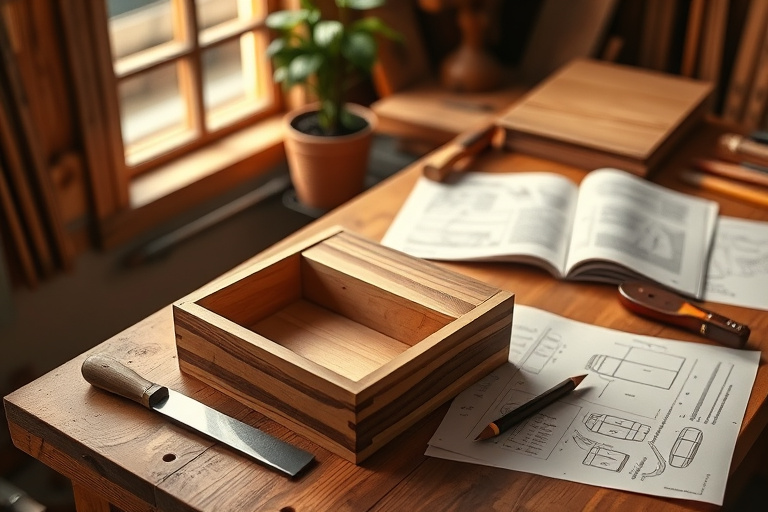
A practical, step-by-step project: building a simple keepsake box
Let’s walk through a practical project that illustrates how woodworking box plans operate in the real world. This keepsake box uses a straightforward box joint, a hinged lid, and a smooth finish. You’ll see how the plan translates into a sequence of actions that you can replicate with different materials or dimensions.
Planning and layout
Start by selecting a stock thickness appropriate for your box size, typically 1/2 inch to 3/4 inch. Refer to the plan’s cut list for panel sizes and joint positions. Mark the layout lines on each piece, double-checking against measurements from the plan. Prioritize accuracy here because a small deviation early on can magnify in later steps.
Cutting, joinery, and assembly
Cut each piece with clean, square edges. If you’re using box joints, staple a jig or template to ensure uniform finger spacing. Dry-fit the sides to verify alignment before applying any glue. Use clamps to hold joints square while the glue cures. Attach the bottom panel with a rabbet or a dado, as indicated by your plan, and then hinge the lid using your selected hardware, ensuring smooth operation without binding.
Finishing and hardware installation
Sand progressively from rough to fine grits for a smooth surface. Apply a finish that enhances the wood grain and provides protection—oil finishes highlight grain, while varnishes or polyurethane add durability. Install any hardware, like hinges, magnets, or a small catch, following the plan’s spacing guidelines. A final polish or wax can bring out a warm glow that makes the box feel tactile and special.
How Ted’s Woodworking fits into your box plan journey
For woodworkers who want a broad library of plans and project ideas, Ted’s Woodworking offers a large catalog that can complement your existing box plans. A curated set of plans helps you maintain consistency across projects and provides inspiration when you’re ready to scale up. If you’re curious, you can explore the resource at Ted’s Woodworking.
In addition, having access to a diverse collection can expand your options for box styles, such as jewelry boxes with curved lids, keepsake chests with hidden compartments, or compact organizer boxes designed for a desk drawer. The combination of well-executed woodworking box plans and a trusted plan library can accelerate your learning curve and help you achieve professional-looking results faster.
Tips for using woodworking box plans effectively
Effective use of box plans comes down to method and flexibility. Here are practical tips to get the most from every plan you use:
Measuring twice, planning once
Always verify critical dimensions before cutting. Cross-check the plan against your stock thickness and the finish you intend to apply. A quick calculator check for overall height, lid clearance, and base depth can prevent fit issues later in assembly.
Adapting plans to your material stock
Stock varies in density, moisture content, and thickness. If your wood is slightly off from the plan, you can adjust length and width of pieces proportionally while preserving the relative joints. When in doubt, run a quick dry-fit first and adjust as needed before applying glue.
Safety, maintenance, and ongoing learning
Woodworking box plans are a tool for safer, more repeatable builds. Always wear eye and hearing protection as you cut, use clamps and push sticks to maintain control, and keep your work area well ventilated when finishing. Regularly sharpen blades and bits to ensure clean cuts, and maintain your tools with routine maintenance to extend their life. Finally, adopt a mindset of ongoing learning—each new project increases your ability to read plans, select appropriate joinery, and finish with consistency.
Inspiration: other box plan ideas to explore
From compact gift boxes with decorative inlays to larger jewelry chests with multiple compartments, the possibilities are broad. Box plans can also be adapted for wall-mounted storage, desk organizers, or travel cases. As you experiment with different wood species and finishes, you’ll notice how small changes in plan details produce noticeably different results. Start with a simple keepsake box, then branch into a few variations, applying what you learn to future projects.
Next steps and where to find the best plans
If you’re ready to expand your library of woodworking box plans and want access to a wide range of projects, consider exploring Ted’s Woodworking via the affiliate link above. Pairing high-quality box plans with your own growing skills creates a powerful path to consistent, satisfying builds. Remember to revisit the two internal resources for broader strategies and workshop optimization as your portfolio of projects grows: Ted McGrath’s approach and Master Your Woodworking Workshop.
With the right woodworking box plans in hand, you can approach each project with confidence, clarity, and a clear path to a polished, reliable result that you’ll be proud to share or gift.